igloo ice maker instruction manual
Welcome to the Igloo Ice Maker Instruction Manual! This guide provides comprehensive instructions for understanding features, setup, maintenance, and troubleshooting your portable ice maker, ensuring optimal performance and longevity.
Key Features of the Igloo Ice Maker
The Igloo Ice Maker is designed for convenience and efficiency, offering a portable and compact design perfect for countertops. It produces up to 26 pounds of ice daily, with bullet-shaped ice cubes in as little as 7 minutes. The machine features a self-cleaning function, digital control panel, and an easy-to-use interface. Its large water reservoir minimizes refills, while the ice basket and transparent lid provide easy monitoring. Energy-efficient and eco-friendly modes ensure minimal power consumption. With advanced microcomputer control, this ice maker is ideal for home, office, or outdoor use, delivering consistent performance and durability.
First Impressions and Unboxing
Unboxing the Igloo Ice Maker reveals a sleek, compact appliance designed for portability and convenience. The unit arrives with a user manual, ice basket, and drain cap, ensuring everything needed for setup is included. Its lightweight design and modern aesthetics make it a stylish addition to any kitchen or outdoor setting. First impressions highlight its durability and user-friendly interface, with clear controls and an intuitive design. The ice maker is easy to handle and place, making it ready for immediate use after a quick setup. Initial setup involves washing the basket, filling the reservoir, and powering it on, providing a seamless experience for first-time users.
Safety Precautions
Always read and follow the manual carefully. Avoid direct sunlight and heat sources. Keep the appliance away from water and ensure proper ventilation. Supervise children during use and only use authorized parts to maintain safety and functionality.
General Safety Guidelines
Always follow these essential safety guidelines to ensure safe operation of your Igloo Ice Maker. Read the manual thoroughly before first use. Keep the appliance away from direct sunlight, heat sources, and water. Ensure proper ventilation and avoid tilting the machine beyond 45 degrees during transportation or use. Never submerge the unit in water or expose it to excessive moisture. Avoid using damaged cords or plugs, and unplug the machine before cleaning or maintenance. Keep children supervised while operating the ice maker. Follow all electrical safety instructions to prevent hazards. Regularly check for wear and tear, and only use authorized replacement parts. Remember, this appliance is not a freezer, so transfer ice to another freezer if not used immediately.
Electrical Safety Instructions
Always adhere to these electrical safety guidelines for safe operation of your Igloo Ice Maker. Use the appliance only with a grounded electrical outlet rated for 120V AC, 60Hz. Avoid using extension cords or adapters, as they may cause electrical hazards. Never operate the ice maker with a damaged cord or plug. Keep the power cord away from water, heat sources, and sharp objects to prevent damage. Unplug the unit before cleaning, maintenance, or when not in use. Ensure the outlet is easily accessible to quickly disconnect if needed. Do not overload the circuit with other high-power appliances. Follow all local electrical regulations and manufacturer recommendations to prevent electrical accidents and ensure reliable performance. Regularly inspect the cord and plug for wear and tear, replacing them if necessary.
Parts and Accessories
Your Igloo Ice Maker comes with essential components like a water reservoir, ice basket, and control panel. Accessories may include a measuring cup and user manual for easy operation and maintenance.
Main Components of the Igloo Ice Maker
The Igloo Ice Maker consists of key components designed for efficient ice production. The water reservoir holds the water supply, while the ice basket collects and stores the freshly made ice. The control panel features buttons and indicators for controlling settings and monitoring the ice-making process. Additionally, the drain allows easy water disposal after use. These components work together to ensure smooth operation and maintenance of the unit.
- Water Reservoir: Holds up to 2.3 quarts of water for continuous ice production.
- Ice Basket: Keeps ice organized and within reach.
- Control Panel: Simplifies operation with intuitive buttons and status lights.
- Drain: Facilitates easy draining of unused water after each use.
Accessories Included in the Package
Your Igloo Ice Maker comes with essential accessories to ensure smooth operation and convenience. The package includes a user manual detailing setup, usage, and maintenance instructions. Additionally, you’ll find an ice basket for collecting and storing ice, a drain cap for easy water disposal, and a power cord for connecting the unit to a power source. These accessories are designed to enhance your experience and ensure the ice maker functions optimally. Always refer to the manual for specific details on each accessory and its proper use.
- User Manual: Provides detailed instructions for setup and maintenance.
- Ice Basket: Collects and stores freshly made ice cubes.
- Drain Cap: Facilitates easy draining of excess water;
- Power Cord: Connects the unit to a power source for operation.
Installation and Setup
Unpack and place the Igloo Ice Maker on a flat, stable surface. Ensure the unit is upright and allow it to stand for 24 hours before first use. Plug in the power cord and prepare for operation as outlined in the manual.
Choosing the Right Location for Your Ice Maker
Position your Igloo Ice Maker on a flat, stable surface to ensure even ice production. Avoid direct sunlight and heat sources like radiators or ovens to maintain efficiency. Keep it at least 6 inches away from walls for proper air circulation. Ensure the location is level to prevent uneven water distribution and ice formation issues. Place it near a power outlet to avoid using extension cords. If installing in a humid environment, ensure good ventilation to prevent moisture buildup. Always follow the manual’s guidelines for optimal performance and longevity of your ice maker.
Initial Setup and Preparation
Before first use, carefully unpack your Igloo Ice Maker and remove all packaging materials. Clean the unit thoroughly, including the water reservoir and ice basket, using warm water and a mild detergent. Rinse and dry with a soft cloth. Ensure the drain cap is securely tightened after draining any residual water. Place the ice basket back inside and fill the water reservoir with fresh, drinkable water (up to the max line). Plug in the unit and allow it to cool for 5 minutes before starting. Always refer to the manual for specific instructions to ensure proper setup and function. Proper preparation ensures optimal ice production and longevity of your machine.
Operating Instructions
Fill the water reservoir, turn on the machine, and select your preferred ice size. Allow 10-15 minutes for the first batch of ice. Ensure the machine is placed away from direct sunlight and heat sources for optimal performance.
Daily Operation and Ice Production
For daily operation, ensure the water reservoir is filled with clean, drinkable water. Turn on the machine and select your desired ice size using the control panel. The Igloo Ice Maker typically produces its first batch of ice within 10-15 minutes. It can generate up to 26 pounds of ice in 24 hours, depending on usage and settings. Regularly check the water level and ice basket to maintain continuous production. Always place the ice maker on a flat, stable surface away from direct sunlight and heat sources. After each use, remove ice cubes and drain excess water to prevent freezing. Follow these steps to ensure efficient and consistent ice production.
Advanced Features and Settings
Explore the advanced features of your Igloo Ice Maker to customize your experience. The self-cleaning function ensures hassle-free maintenance by automatically cleaning the interior. Choose from multiple ice size settings to suit your needs, whether you prefer small, medium, or large cubes. Some models include smart technology, allowing you to control the ice maker via a mobile app for convenient scheduling. The automatic shut-off feature prevents overfilling and saves energy. Additionally, eco-friendly modes optimize ice production while reducing power consumption. For further customization, adjust the timer to produce ice at specific intervals. These advanced settings enhance efficiency and provide a tailored experience for users seeking more control over their ice-making process.
Cleaning and Maintenance
Regularly clean and sanitize your Igloo Ice Maker to ensure optimal performance. Deep clean by descaling to remove mineral buildup and maintain ice quality. Use the self-cleaning feature for convenience.
Regular Cleaning and Sanitizing
Regular cleaning is essential for maintaining your Igloo Ice Maker’s efficiency and hygiene. Start by removing the ice basket and washing it with warm water and mild detergent. Drain the water reservoir and wipe down the interior with a soft cloth. For tougher stains or mineral buildup, mix equal parts water and white vinegar in the reservoir and run a cleaning cycle. After cleaning, rinse thoroughly with fresh water to eliminate any vinegar taste. Sanitize all parts with a food-safe sanitizer before reassembly to ensure your ice remains fresh and clean. Regular maintenance prevents mold growth and keeps your ice maker functioning smoothly.
Deep Cleaning and Descaling
Deep cleaning and descaling are crucial for maintaining your Igloo Ice Maker’s performance, especially in areas with hard water. Mix a solution of water and white vinegar or a descaling agent, then pour it into the water reservoir. Run a cleaning cycle to allow the solution to circulate through the system. Repeat if necessary to remove stubborn mineral deposits. After descaling, rinse the reservoir and interior thoroughly with fresh water to eliminate any residual taste. For tough stains, soak removable parts in warm soapy water before scrubbing gently. Regular descaling every 1-2 months prevents mineral buildup and ensures your ice maker operates efficiently and produces clean, fresh ice.
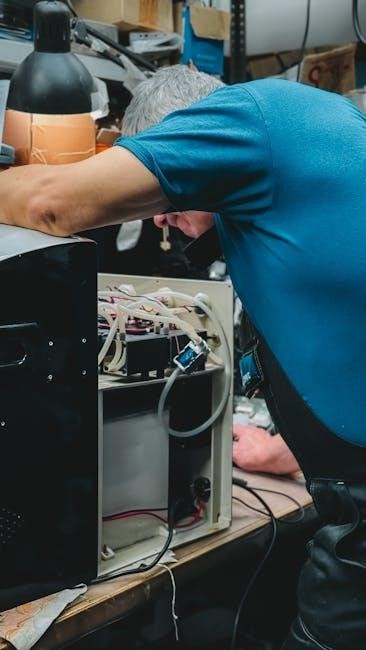
Troubleshooting Common Issues
Identify common problems like ice maker not producing ice, unusual noise, or water leaks. Check water levels, ensure proper power connection, and clean or descale as needed.
Identifying and Solving Common Problems
If your Igloo Ice Maker isn’t producing ice, check the water reservoir to ensure it’s filled. Verify that the power switch is on and the unit is properly plugged in. If the machine is making noise but not producing ice, inspect for blockages in the ice chute or mold. Low water flow or incorrect water temperature can also affect performance. For issues like leaks, ensure all connections are secure. Regularly cleaning and descaling the unit can prevent mineral buildup, which may cause malfunctions. Always refer to the troubleshooting section in your manual for specific error codes and solutions to restore functionality quickly.
Understanding Error Codes and Alarms
Your Igloo Ice Maker is equipped with error codes and alarms to help you identify and address issues quickly. Common error codes include E1, E2, and E3, which indicate problems such as sensor malfunctions, low water levels, or overheating. When an error occurs, the machine will display the code and may sound an alarm. Refer to your manual for a detailed list of codes and their meanings. To resolve issues, check the water reservoir, ensure proper airflow, or allow the unit to cool down if overheated. After addressing the problem, press the reset button to resume operation. If issues persist, consult the troubleshooting guide or contact customer support for assistance. Regular maintenance can help prevent errors and keep your ice maker functioning smoothly. Always follow the manufacturer’s instructions for optimal performance.
Additional Features
Your Igloo Ice Maker offers special functions like automatic shut-off, self-cleaning modes, and customizable ice size settings. Energy-efficient designs and eco-friendly operation enhance convenience and performance, ensuring reliable ice production while minimizing energy usage.
Special Functions and Customization Options
The Igloo Ice Maker boasts an array of special functions designed to enhance user experience. One standout feature is the self-cleaning mode, which simplifies maintenance by automatically cleaning the interior with minimal effort. Additionally, users can customize ice size, choosing between small, medium, or large cubes to suit their preferences. The ice maker also includes an automatic shut-off feature, which stops production once the ice basket is full, preventing overflow. Furthermore, the control panel offers intuitive buttons for selecting settings, ensuring easy operation. These customization options and special functions make the Igloo Ice Maker both versatile and user-friendly, catering to various needs and ensuring efficient ice production.
Energy Efficiency and Eco-Friendly Modes
The Igloo Ice Maker is designed with energy efficiency in mind, featuring an eco-friendly mode that reduces power consumption while maintaining performance. This mode optimizes ice production cycles to minimize energy use without sacrificing output. Additionally, the ice maker includes a smart sensor that detects when the ice basket is full, automatically shutting off production to conserve energy. The unit also uses environmentally friendly materials and adheres to Energy Star standards, ensuring it meets energy efficiency requirements. These eco-conscious features make the Igloo Ice Maker a sustainable choice for homeowners seeking to reduce their environmental impact while enjoying convenient ice production.
Warranty and Support
Your Igloo Ice Maker is backed by a one-year limited warranty covering defects in materials and workmanship. Register your product for extended support and access to dedicated customer service for troubleshooting, repairs, and general inquiries.
Understanding Your Warranty Coverage
Your Igloo Ice Maker is protected by a one-year limited warranty, covering manufacturing defects in materials and workmanship. This warranty ensures that any faulty parts will be repaired or replaced free of charge during the coverage period. To maintain warranty validity, ensure proper installation and usage as outlined in this manual. Damage caused by misuse, improper cleaning, or unauthorized modifications is not covered. Keep your purchase receipt as proof of ownership, as it is required for warranty claims. For detailed terms and conditions, refer to the warranty section in this manual or visit the Igloo support website.
Contacting Customer Support
For any questions, concerns, or assistance with your Igloo Ice Maker, our dedicated customer support team is here to help. You can reach us toll-free at 1-800-968-9853 or submit a support request through our official website. Visit the Igloo support page to access the contact form, where you can provide details about your issue or inquiry. Additionally, you can download manuals, find troubleshooting guides, and explore FAQs online. For faster service, have your product model number and purchase details ready. Our team is committed to providing prompt and effective solutions to ensure your satisfaction with your Igloo Ice Maker.