Guide

turntable cartridge guide

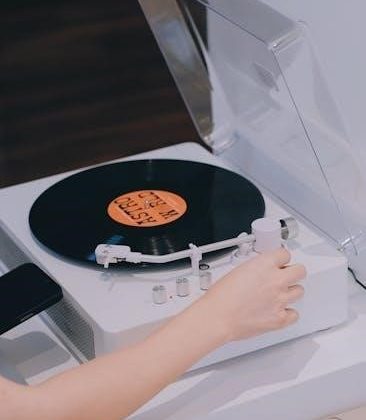
A turntable cartridge is the heart of your vinyl setup‚ converting vibrations into sound. Available in Moving Magnet or Moving Coil types‚ it ensures optimal audio reproduction; Proper alignment and a phono preamp are essential for enhanced sound quality and performance.

Types of Turntable Cartridges

Turntable cartridges come in two main types: Moving Magnet (MM) and Moving Coil (MC). MM cartridges are user-friendly and widely compatible‚ while MC cartridges offer superior audio fidelity but require phono preamps for proper function.

Moving Magnet Cartridges

Moving Magnet (MM) cartridges are the most common type‚ known for their simplicity and reliability. They feature a magnetic stylus that moves within a fixed coil‚ generating an electrical signal. MM cartridges are widely compatible with standard phono inputs and require no additional equipment‚ making them a great choice for entry-level setups. They are relatively easy to install and maintain‚ with replaceable styli available for many models. MM cartridges are praised for their clear and balanced sound reproduction‚ though they may lack the high-fidelity detail of Moving Coil cartridges. Their robust design and user-friendly nature make them a popular option for both casual listeners and audiophiles alike; With proper care‚ MM cartridges can provide years of excellent performance‚ ensuring your vinyl collection sounds its best.

Moving Coil Cartridges

Moving Coil (MC) cartridges are prized for their exceptional sound quality and precision. They feature a lightweight coil and magnet assembly suspended within a magnetic field‚ ensuring accurate tracking of the record groove. MC cartridges are known for their detailed and nuanced sound reproduction‚ making them a favorite among audiophiles. However‚ they typically require a step-up transformer or a specialized phono preamp due to their lower output voltage compared to Moving Magnet cartridges. This adds complexity but enhances the listening experience. MC cartridges are more delicate and require careful handling‚ but their durability is generally good with proper maintenance. While they are often more expensive‚ the superior sound quality they deliver makes them a worthwhile investment for serious vinyl enthusiasts seeking the highest fidelity from their records.

Choosing the Right Cartridge

Selecting the ideal cartridge involves balancing sound quality‚ compatibility‚ and budget. Consider your turntable’s specifications‚ the type of records you play‚ and the desired audio performance to make an informed decision. Ensure the cartridge aligns with your system’s capabilities and enhances your overall listening experience. Proper alignment and setup are crucial for optimal sound reproduction. Research and compare different models to find the best fit for your vinyl journey and ensure longevity with proper maintenance. This careful selection will elevate your vinyl playback‚ providing years of enjoyment and faithful music reproduction. Take the time to evaluate your needs and preferences to choose the cartridge that best suits your system and listening habits. This will ensure a seamless integration and exceptional sound quality for all your records.

Compatibility with Your Turntable

Ensuring your cartridge is compatible with your turntable is crucial for optimal performance. Check the cartridge’s mount type‚ whether it’s standard or P-mount‚ to match your turntable’s headshell. The cartridge’s weight and electrical requirements must also align with your system’s capabilities. Proper alignment and balance ensure accurate tracking and prevent wear on both the cartridge and records. Additionally‚ consider the phono preamp compatibility‚ as some cartridges require specific equalization settings. Always refer to your turntable’s manual for specifications and recommendations. A compatible cartridge ensures seamless integration‚ enhances sound quality‚ and prolongs the life of your equipment. Making the right match guarantees a smooth setup process and reliable performance‚ allowing you to enjoy your vinyl collection to the fullest. This step is fundamental in achieving the best possible audio reproduction and overall satisfaction with your turntable setup. Proper compatibility ensures that every component works harmoniously‚ delivering the desired sound quality and durability. By carefully matching your cartridge to your turntable‚ you can avoid potential issues and enjoy a superior listening experience. This compatibility is key to unlocking the full potential of your vinyl playback system‚ ensuring clarity and precision in every note. Always prioritize compatibility to maintain the integrity and performance of your turntable and cartridge combination.

Sound Quality Considerations

Sound quality is a critical factor when selecting a turntable cartridge. The cartridge’s ability to accurately reproduce audio depends on its design and compatibility with your system. Moving Magnet (MM) cartridges are known for their consistent performance and ease of use‚ while Moving Coil (MC) cartridges often deliver higher fidelity but require a compatible phono preamp. The stylus shape and material also play a significant role‚ with elliptical and line-contact styli offering better tracking and detail retrieval. Additionally‚ the cartridge’s compliance and tracking force must be properly adjusted to ensure optimal sound reproduction without distortion or wear on the records; Higher-quality cartridges often feature advanced materials and precision engineering‚ resulting in clearer‚ more nuanced sound. Balancing these factors ensures a rich and immersive listening experience‚ making sound quality considerations essential for vinyl enthusiasts seeking the best possible audio performance from their turntable setup.

Budget and Cost Implications

When selecting a turntable cartridge‚ budget plays a significant role. Entry-level cartridges are affordable‚ offering decent performance for casual listeners‚ while high-end models provide superior sound quality but at a higher cost. It’s essential to balance your budget with your listening habits and system requirements. Consider whether the cartridge includes a stylus or if it’s sold separately‚ as this affects the total cost. Additionally‚ some cartridges may require a specific phono preamp‚ adding to the overall expense. While cheaper options may seem appealing‚ they might lack durability or sound clarity. Investing in a mid-range cartridge often strikes a balance between quality and affordability. Set a budget and prioritize features that matter most to you‚ ensuring your purchase aligns with your audio goals without overspending. Properly allocating resources ensures you get the best value for your money and enjoy a satisfying listening experience.

Installation of the Cartridge

Installing a turntable cartridge requires careful handling and alignment. Secure the cartridge to the headshell using screws‚ ensuring proper alignment with the gauge. Gently tighten and test playback for optimal performance.

Tools and Equipment Needed

To install a turntable cartridge‚ you’ll need a few essential tools and equipment. Start with a small Phillips head screwdriver to secure the cartridge to the headshell. An alignment gauge or tool is crucial for proper cartridge alignment‚ ensuring optimal sound quality. A phono preamp may be necessary if your turntable or receiver doesn’t have one built-in‚ to amplify the low-level audio signal. Additionally‚ a soft-bristled brush can help clean the stylus and cartridge‚ removing dust and debris. Optionally‚ an Allen wrench might be needed for adjusting or tightening certain parts of the headshell or tonearm. Always refer to your turntable’s manual for specific requirements‚ as some models may need specialized tools. Gathering these items beforehand will make the installation process smoother and more efficient.

Step-by-Step Installation Guide

Installing a turntable cartridge involves careful steps to ensure proper function and sound quality. Start by removing the old cartridge from the headshell‚ taking care not to touch the stylus. Next‚ handle the new cartridge by the body to avoid damage and gently insert it into the headshell‚ aligning the pins with the terminals. Secure it firmly using the screws provided‚ ensuring it’s snug but not over-tightened. Connect the wires to the appropriate terminals‚ matching the color coding if available. Once installed‚ use an alignment gauge to adjust the cartridge’s position for optimal tracking. Finally‚ set the tracking force according to the manufacturer’s specifications and test the setup by playing a record. Proper installation ensures clear sound and prevents wear on your records and stylus.

Setting Up Your Cartridge

Proper cartridge setup ensures optimal sound quality. Align the cartridge using a gauge‚ adjust tracking force‚ and set anti-skate to prevent wear and distortion. Regular checks maintain performance.

Cartridge Alignment Techniques

Proper cartridge alignment is crucial for optimal sound quality and record wear prevention. Use an alignment protractor or gauge to ensure the cartridge is square to the headshell. Aligning the stylus tip with the grid lines on the gauge ensures even tracking across the record groove. Misalignment can cause uneven wear‚ distortion‚ and skipping. Start by loosening the cartridge screws‚ then gently adjust the cartridge body until it aligns with the reference lines. Tighten the screws securely after alignment. Regular checks and adjustments maintain performance and extend the life of both the cartridge and your records. This simple step ensures your turntable delivers the best possible sound quality consistently.

Adjusting Tracking Force

Adjusting the tracking force ensures the stylus tracks the groove accurately‚ preventing distortion and wear. Use a tracking force gauge to measure and set the recommended force‚ typically between 1-3 grams. Start by balancing the tonearm by adjusting the counterweight. Gently rotate the dial until the arm floats evenly. Then‚ fine-tune the force by turning the weight until the gauge matches the cartridge’s specified range. Proper force ensures clear highs‚ tight bass‚ and minimal record wear. Over or under force can cause mis-tracking or stylus damage. Regular checks maintain optimal performance and extend cartridge life. Always refer to your cartridge’s manual for specific recommendations. Correct tracking force is essential for enjoying your vinyl collection with fidelity and longevity.

Setting Anti-Skate Adjustment

Anti-skate adjustment ensures the tonearm moves smoothly across the record‚ preventing the stylus from skating inward or outward. Proper adjustment reduces distortion and wear on both the stylus and record. Start by setting the tracking force‚ then adjust the anti-skate dial while playing a record with a blank or silent groove. The goal is to achieve even tonearm balance‚ with no pull to either side. Use a tracking force gauge to ensure accuracy. If the arm drifts inward‚ increase the anti-skate; if it drifts outward‚ decrease it. Fine-tune until the arm floats evenly. This adjustment ensures optimal playback and minimizes potential damage. Regular checks are recommended to maintain performance. Always refer to your turntable’s manual for specific instructions‚ as mechanisms vary. Correct anti-skate adjustment enhances sound quality and prolongs the life of your cartridge and records.

Maintenance Tips


Regular cleaning and proper alignment ensure optimal performance. Check the stylus for dust and debris‚ and adjust the cartridge as needed for consistent sound quality and longevity.

Cleaning the Stylus

Cleaning the stylus is crucial for maintaining sound quality and extending cartridge life. Use a soft‚ dry brush to gently remove dust and debris. For tougher residue‚ apply a specialized cleaning solution to a cotton swab and lightly wipe the stylus tip. Avoid harsh chemicals or excessive moisture‚ as they can damage the cartridge. Regular cleaning ensures optimal trackability and reduces wear on your records. Always handle the stylus carefully to prevent accidental damage. By incorporating this simple maintenance routine‚ you can enjoy clearer sound and prolong the lifespan of your turntable cartridge. Consistency is key to preserving your vinyl listening experience.

Checking for Wear and Tear

Regularly inspecting your turntable cartridge for wear and tear is essential to ensure optimal performance. Visually examine the stylus tip for signs of damage‚ such as uneven wear or visible chips. Check the cantilever for proper alignment and flexibility. If the cartridge body appears loose‚ tighten the screws gently but firmly. Over time‚ the stylus may wear down‚ leading to distorted sound or skipping. Replace the cartridge if you notice significant degradation or if it no longer tracks records accurately. Most cartridges have a lifespan of 500 to 1‚000 hours of playtime. Use a magnifying glass or jeweler’s loupe for a closer look. Addressing wear promptly prevents further damage to both the cartridge and your records. Always refer to your cartridge’s manual for specific maintenance recommendations. By staying proactive‚ you can ensure consistent sound quality and extend the life of your equipment. Regular checks are vital for vinyl enthusiasts.

Troubleshooting Common Issues

Identify and resolve issues like distortion‚ skipping‚ or low volume by checking connections‚ stylus cleanliness‚ and alignment. Adjust tracking force and anti-skate for optimal performance and sound quality.

Common Problems and Solutions

Common issues with turntable cartridges include distortion‚ skipping‚ and low volume. Distortion can often be resolved by ensuring proper alignment and cleaning the stylus. Skipping may result from incorrect tracking force or a worn-out needle. Low volume might indicate a connectivity issue or a faulty phono preamp. Regular maintenance‚ such as cleaning the stylus and checking connections‚ can prevent many of these problems. Adjusting the anti-skate and tracking force can also improve performance. If issues persist‚ consider replacing the cartridge or stylus. Always refer to your turntable’s manual for specific troubleshooting steps tailored to your model. Addressing these problems promptly ensures optimal sound quality and extends the life of your cartridge.

Addressing Distortion and Skipping

Digital distortion and skipping are common issues that can disrupt your vinyl listening experience. Distortion often arises from improper cartridge alignment or a worn stylus‚ while skipping may be caused by insufficient tracking force or debris on the record. To address distortion‚ ensure the cartridge is properly aligned and clean the stylus regularly. For skipping‚ adjust the tracking force to the recommended level and inspect the record for dust or scratches. If the issue persists‚ check the phono preamp settings and ensure the turntable is placed on a stable‚ level surface. Cleaning the record with a high-quality brush and using an anti-static cleaner can also help. Replacing a worn stylus or upgrading to a better cartridge may be necessary in severe cases. Regular maintenance and proper setup are key to minimizing these problems and enjoying smooth playback.

Selecting and maintaining the right turntable cartridge enhances your vinyl experience. Proper alignment‚ phono preamp setup‚ and regular cleaning ensure optimal sound quality. Invest wisely for lasting enjoyment.

Final Thoughts and Recommendations

Investing in a high-quality turntable cartridge is crucial for an exceptional vinyl listening experience. Whether you choose a Moving Magnet or Moving Coil model‚ ensure it aligns with your turntable’s specifications. Regular maintenance‚ such as cleaning the stylus and checking for wear‚ will extend the cartridge’s lifespan. Additionally‚ consider the importance of proper alignment and tracking force to prevent record damage and distortion. For optimal sound quality‚ pair your cartridge with a suitable phono preamp. Lastly‚ research and consult with experts to make an informed decision tailored to your setup and budget. By following these guidelines‚ you’ll enjoy precise sound reproduction and lasting satisfaction from your vinyl collection.

PDF

tennis court dimensions pdf

A tennis court’s dimensions are standardized for fair play‚ measuring 78ft long and 36ft wide for doubles‚ and 78ft by 27ft for singles. The service line is 21ft from the net‚ while baselines are 18ft from the service line. Proper dimensions ensure consistency across all matches‚ with detailed PDF guides available for reference.

Singles Tennis Court Dimensions

A singles tennis court measures 78 feet (23.77 meters) in length and 27 feet (8.23 meters) in width. The service line is 21 feet from the net‚ while the baseline is 18 feet from the service line. The sidelines are 27 feet apart‚ providing a compact playing area for two players. The court’s dimensions ensure balanced play‚ with clear markings for service boxes‚ baselines‚ and the center mark. Proper sizing is crucial for maintaining game rules and player performance. PDF guides and diagrams are available for precise measurements‚ helping constructors and players understand the layout. These standards are consistent across all levels of play‚ ensuring fairness and uniformity in singles matches worldwide.

  • Length: 78 feet (23.77 meters)
  • Width: 27 feet (8.23 meters)
  • Service line: 21 feet from the net
  • Baseline: 18 feet from the service line

Doubles Tennis Court Dimensions

A doubles tennis court measures 78 feet (23.77 meters) in length and 36 feet (10.97 meters) in width‚ providing additional space for the extra players. The sidelines are 4.5 feet wider than in singles matches‚ accommodating the broader playing area. The service line remains 21 feet from the net‚ while the baseline is 18 feet from the service line. The court’s larger width ensures dynamic gameplay‚ with more emphasis on strategic positioning and teamwork. These dimensions are standardized to maintain consistency in doubles matches worldwide. PDF guides offer detailed layouts‚ including line markings and measurements‚ to help constructors and players visualize the court accurately. The doubles court’s size ensures fair and competitive play for all participants.

  • Length: 78 feet (23.77 meters)
  • Width: 36 feet (10.97 meters)
  • Service line: 21 feet from the net
  • Baseline: 18 feet from the service line

Additional Components of a Tennis Court

A tennis court includes a service line‚ baseline‚ and center mark‚ with specific dimensions ensuring precise gameplay. These elements are crucial for accurate court layout and functionality.


4.1 Service Line Dimensions

The service line on a tennis court is positioned 21 feet (6.4 meters) from the net‚ spanning the width of the court. For singles‚ it extends 27 feet wide‚ while for doubles‚ it spans 36 feet. The line itself is 2 inches wide‚ ensuring visibility. It serves as the boundary for serves‚ with any ball landing beyond it considered out. Proper measurement is crucial for fair play‚ as outlined in official PDF guides. These dimensions are consistent across all courts to maintain uniformity in professional and recreational matches alike‚ ensuring accurate gameplay and adherence to regulations.

4.2 Baseline Dimensions

The baseline is a critical component of a tennis court‚ measuring 39 feet (11.89 meters) from the net and 18 feet (5.49 meters) from the service line. It spans the entire width of the court‚ marking the farthest boundary for players during rallies. For singles matches‚ the baseline is 27 feet wide‚ while for doubles‚ it extends to 36 feet. The baseline is typically 4 inches wide‚ though it can be up to 10 centimeters wide for visibility. Its precise measurement ensures fair play‚ as balls landing beyond it are considered out of bounds. Consistent across all court sizes‚ the baseline’s dimensions are clearly outlined in official PDF guides for accurate construction and gameplay.

4.3 Center Mark and Service Line

The center mark is a 2-inch-wide line located at the midpoint of the baseline‚ dividing the court into two equal halves. The service line‚ 21 feet from the net and 18 feet from the baseline‚ is also 2 inches wide. Together‚ these markings define the service area‚ ensuring accurate serves. The center mark aids in aligning serves correctly‚ while the service line dictates the landing zone for valid serves. Both are essential for maintaining fair play and are standardized across all courts. These dimensions are meticulously detailed in official PDF guides‚ providing clear references for court construction and gameplay consistency. Their precise measurements ensure that players can rely on consistent conditions in every match.

Line Width Specifications

Tennis court lines are standardized for consistency. The center mark and service lines are 2 inches wide‚ while other lines range from 1 to 2 inches wide.

5.1 General Line Specifications

The lines on a tennis court are standardized to ensure consistency. The center mark and service lines are 2 inches (5 cm) wide‚ while other lines‚ such as the sidelines‚ baselines‚ and doubles alleys‚ range between 1 inch (2.5 cm) and 2 inches (5 cm) in width. This uniformity is crucial for fair play and accurate calls during matches. The baseline‚ however‚ may be up to 10 cm wide‚ providing a clear visual reference for players. These dimensions are meticulously outlined in official tennis court diagrams and PDF guides‚ ensuring compliance with international standards like those set by the ITF. Proper line width specifications contribute to the integrity and functionality of the court design.

5.2 Baseline Width Exception

The baseline is the only line on a tennis court with a width exception‚ measuring up to 10 cm wide. This wider line provides a clear visual reference for players‚ ensuring accurate foot placement during serves and baseline shots. The increased width does not affect gameplay fairness but enhances visibility‚ especially under various lighting conditions. This specification is detailed in official tennis court PDF guides‚ aligning with ITF standards. The baseline’s exceptional width is a practical design element that balances functionality with gameplay integrity‚ making it a unique feature among court lines. This adjustment ensures that the baseline remains a critical and easily identifiable marker for all players.

Area Calculations for Tennis Courts

A singles tennis court is 78ft by 27ft‚ totaling 2‚106ft²‚ while a doubles court is 78ft by 36ft‚ covering 2‚808ft²‚ meeting ITF standards for consistency.

6.1 Singles Court Area

A singles tennis court measures 78ft in length and 27ft in width‚ resulting in a total area of 2‚106ft²; This dimension ensures optimal playability for singles matches‚ with clear boundaries for players. The area calculation is straightforward: length multiplied by width‚ providing a consistent playing surface. This standardized size is adopted globally‚ including in professional tournaments‚ to maintain fairness and uniformity. Properly understanding the area helps players and court constructors ensure compliance with ITF regulations. Detailed PDF guides are available for precise measurements and layouts‚ making it easier to visualize and construct courts accurately.

6.2 Doubles Court Area

A doubles tennis court measures 78ft in length and 36ft in width‚ resulting in a total area of 2‚808ft². This is 702ft² larger than a singles court‚ accommodating the additional space needed for doubles play. The extra 9ft in width on each side allows for more dynamic gameplay with four players. The area calculation is length multiplied by width‚ ensuring a consistent and fair playing surface. This standardized size is used in professional and recreational settings‚ maintaining uniformity worldwide. PDF guides provide detailed diagrams and measurements for constructing doubles courts accurately. Understanding the doubles court area is essential for players‚ coaches‚ and constructors to ensure compliance with ITF standards and optimal court performance.

Tennis Court Orientation

Tennis courts should be oriented to minimize sunlight interference‚ with the net facing north-south to avoid glare. Proper orientation ensures fair play and optimal visibility for players and spectators.

7.1 Recommended Court Direction

The recommended direction for a tennis court is north-south to reduce sunlight glare during play. This orientation minimizes the impact of the sun’s position‚ particularly during early morning and late afternoon matches. Proper alignment ensures that players do not face direct sunlight‚ which can affect visibility and performance. Additionally‚ this direction helps maintain consistent lighting conditions for both players and spectators. Courts built in this orientation comply with international standards and promote fair play. It is essential to consider the surrounding environment and the sun’s path when constructing a tennis court to achieve optimal playing conditions year-round.

7.2 Importance of Proper Orientation

Proper orientation of a tennis court is crucial for ensuring fair play and optimal conditions. A north-south alignment minimizes sunlight interference‚ reducing glare during early morning and late afternoon matches. This orientation also helps maintain consistent lighting for players and spectators. Additionally‚ proper orientation aids in effective water drainage‚ preventing water accumulation on the court surface. It ensures compliance with international standards and enhances player safety by providing even visibility. Properly oriented courts also contribute to a better spectator experience‚ as seating can be arranged to avoid sun glare. Overall‚ correct orientation is essential for maintaining a consistent‚ safe‚ and enjoyable playing environment for all participants.

Construction and Maintenance of Tennis Courts

Constructing tennis courts involves using durable materials like asphalt or grass‚ ensuring proper drainage systems. Regular maintenance‚ including surface cleaning and line repainting‚ ensures optimal playability and longevity.

8.1 Suitable Surface Materials

Tennis courts can be constructed using various surfaces‚ each offering different play characteristics. The most common materials include asphalt‚ concrete‚ grass‚ and clay. Asphalt and concrete are popular for their durability and low maintenance‚ making them ideal for outdoor courts. Grass courts‚ while traditional and aesthetically pleasing‚ require frequent watering and are typically used in high-end facilities. Clay courts are known for their slow bounce and are common in European tournaments. Additionally‚ synthetic surfaces such as acrylic and artificial grass are gaining popularity due to their longevity and ability to mimic natural playing conditions. Proper material selection ensures the court’s performance and player safety‚ adhering to international standards outlined in PDF guides.

8.2 Drainage Requirements

Proper drainage is crucial for maintaining a tennis court’s surface integrity and preventing water damage. Courts should be designed with a slight slope to ensure water runoff‚ typically between 0.5% and 1% gradient. Underground drainage systems‚ including lateral drains and catch basins‚ are essential for redirecting water away from the playing area. For outdoor courts‚ the subgrade drainage system must be installed beneath the surface to prevent water accumulation. Drains should be placed at regular intervals‚ usually every 20-25 feet‚ to ensure efficient water removal. Additionally‚ the court’s surface material should be permeable or designed to allow water to drain quickly. Proper drainage not only extends the court’s lifespan but also ensures safe playing conditions for athletes‚ as outlined in detailed PDF guides for tennis court construction.

PDF Resources for Tennis Court Dimensions

Downloadable PDF guides provide detailed tennis court dimensions‚ including diagrams and labels. These essential resources comply with ITF standards and are ideal for construction planning and coaching purposes.

9.1 Availability of PDF Guides

PDF guides detailing tennis court dimensions are widely available online‚ offering precise measurements and layouts. These resources are accessible for download from various sports and construction websites. They include diagrams for singles and doubles courts‚ service lines‚ and baselines‚ ensuring compliance with ITF standards. Coaches‚ architects‚ and players can use these guides to plan constructions or visualize strategies. Some documents also cover additional features like run-off areas and surface specifications. The PDFs are often free or require minimal subscription‚ making them a convenient tool for understanding and implementing correct court dimensions effectively.

9.2 Uses for PDF Diagrams

PDF diagrams of tennis court dimensions are invaluable for architects‚ contractors‚ and coaches. They provide precise measurements for constructing or renovating courts‚ ensuring compliance with ITF standards. Coaches can use these diagrams to plan strategies‚ visualize drills‚ and explain tactics to players. Players benefit by understanding court layouts‚ which aids in positioning and shot placement. The diagrams are also useful for maintaining existing courts‚ as they detail exact specifications for lines‚ service areas‚ and baselines. Additionally‚ PDFs are scalable‚ making them suitable for printing or digital use. Their clarity and detail make them essential tools for anyone involved in tennis-court design‚ construction‚ or gameplay strategy.

International Standards and Variations

International tennis court standards are governed by the ITF‚ ensuring uniformity worldwide. Variations exist in local adaptations‚ but core dimensions remain consistent for fair play.

10.1 ITF Standards Compliance

Compliance with ITF standards ensures that tennis courts meet global regulations‚ promoting consistency across tournaments. The ITF specifies precise dimensions‚ including court length and width‚ service line placement‚ and baseline measurements. These guidelines are crucial for maintaining fairness and uniformity in all levels of play‚ from amateur to professional. Courts must adhere to these measurements‚ with lines appropriately marked and surfaces meeting specified materials and drainage requirements. Proper ITF compliance guarantees that players experience a standardized environment‚ irrespective of location‚ fostering competitive integrity. Adherence to these rules is verified through regular inspections and certifications‚ ensuring the highest standards are upheld worldwide.

10.2 Variations in Court Dimensions

While ITF standards provide a framework‚ variations in court dimensions can occur based on specific needs or levels of play. Local or amateur courts may slightly adjust measurements‚ while professional tournaments adhere strictly to ITF guidelines. Surface materials‚ such as grass‚ clay‚ or hard courts‚ can influence dimensions due to differing bounce and play characteristics. Additionally‚ some courts may incorporate extra space for player movement or spectator areas. Minor adjustments are often made for junior or wheelchair tennis to accommodate player requirements. These variations ensure flexibility while maintaining the integrity of the game. Detailed PDF guides outline acceptable deviations‚ ensuring consistency and adaptability across different playing environments and levels of competition.

Guide

ap world history unit 5 study guide

Unit 5 explores the transformative periods of political revolutions, Enlightenment ideas, and industrialization, shaping global modernity. Mastering these themes is crucial for understanding the AP World History curriculum and excelling on the exam.

1.1 Historical Context of Unit 5

Unit 5 of AP World History focuses on the transformative periods of the 18th and 19th centuries, a time of profound political, economic, and social change. This era witnessed the rise of Enlightenment ideas, which emphasized reason, individual rights, and scientific progress, laying the groundwork for political revolutions such as the American, French, and Latin American wars of independence. Simultaneously, the Industrial Revolution reshaped global economies, creating new social classes and labor systems. These developments were deeply interconnected, as the spread of Enlightenment principles challenged traditional authority, while industrialization brought about unprecedented economic and cultural shifts. Understanding this historical context is essential for analyzing how these events influenced modern nation-states, global interactions, and the emergence of new ideologies. By studying Unit 5, students gain insights into the origins of contemporary political systems, economic structures, and cultural movements that continue to shape the world today.

1.2 Key Themes and Concepts

The key themes of Unit 5 in AP World History include the spread and impact of Enlightenment ideas, the causes and consequences of political revolutions, and the transformative effects of industrialization. Central concepts involve the development of democratic ideals, the rise of nationalism, and the shift from agrarian to industrial economies. Themes also explore the interplay between global interactions and local responses, such as resistance to imperialism and the adaptation of Enlightenment principles in different regions. Understanding these themes requires analyzing primary sources, comparing revolutions, and evaluating the social and economic changes brought by industrialization. Mastery of these concepts is vital for success in essays, multiple-choice questions, and other exam components. By focusing on these themes, students can better comprehend the complexities of modern global development and the legacy of 18th and 19th-century transformations.

1.3 Importance of Unit 5 in AP World History

Unit 5 is a cornerstone of the AP World History curriculum, as it bridges the gap between early modern and modern periods. It emphasizes the global impact of the Enlightenment, political revolutions, and industrialization, which shaped modern political systems, economies, and societies. Understanding these developments is crucial for analyzing contemporary global issues and continuities. The unit also prepares students for key exam questions, as themes like revolution, nationalism, and economic change are frequently assessed. Additionally, Unit 5 highlights the interconnectedness of global regions, reinforcing the course’s focus on cross-cultural interactions. By mastering Unit 5, students gain insights into the roots of modernity and develop critical thinking skills for historical analysis. This unit is essential for building a comprehensive understanding of world history and excelling on the AP exam.

The Enlightenment and Its Impact

The Enlightenment, emerging in the 17th and 18th centuries, emphasized reason, science, and individual rights, inspiring political and intellectual transformations that shaped modern Western society and global thought.

2.1 Origins of the Enlightenment

The Enlightenment emerged in 17th- and 18th-century Europe, rooted in scientific advancements, rationalism, and challenges to traditional authority. Thinkers like Descartes and Newton laid the groundwork, while philosophers such as Voltaire and Rousseau popularized its ideals. The movement flourished in urban centers like Paris and London, fostered by salons, printing presses, and intellectual exchanges. These developments created a cultural shift, emphasizing reason, individualism, and progress, which influenced political, social, and religious thought. The focus on human potential and critical inquiry set the stage for revolutionary ideas that would reshape governance and society, making the Enlightenment a cornerstone of modern intellectual history.

2.2 Key Ideas of the Enlightenment

The Enlightenment emphasized reason, individualism, and progress, challenging traditional authority and promoting critical thinking. Central ideas included the belief in natural rights, inherent human dignity, and the power of science and rationality to improve society. Thinkers like John Locke, Jean-Jacques Rousseau, and Voltaire advocated for liberty, equality, and the separation of church and state. The concept of the social contract emerged, suggesting that governments derive legitimacy from the consent of the governed. These ideas undermined absolute monarchies and religious dogma, fostering democratic ideals and intellectual freedom. The Enlightenment also celebrated human potential, arguing that education and reason could overcome superstition and inequality. Its principles laid the groundwork for modern political and philosophical thought, influencing revolutions and shaping the foundations of contemporary society. Understanding these ideas is essential for grasping their transformative impact on global history and their continued relevance today.

2.3 Influence on Political Revolutions

The Enlightenment’s emphasis on reason, liberty, and natural rights profoundly influenced political revolutions in the 18th and 19th centuries. Ideas like John Locke’s social contract theory and the concept of inherent human rights challenged absolute monarchies and inspired movements for independence and democracy. The American Revolution, for instance, drew heavily on Enlightenment principles, embedding them in its Declaration of Independence. Similarly, the French Revolution’s emphasis on liberty, equality, and fraternity reflected Enlightenment ideals, even as it took radical forms. Beyond Europe, Enlightenment ideas fueled Latin American and Haitian revolutions, as leaders sought to overthrow colonial rule and establish sovereign states. These revolutions demonstrated the transformative power of Enlightenment thought, reshaping political systems and inspiring future movements for independence and self-governance. The legacy of these ideas continues to shape modern political ideologies and struggles for human rights worldwide.

Political Revolutions in the 18th and 19th Centuries

This section examines key revolutions, including the American, French, Latin American, and Haitian revolutions, exploring their causes, outcomes, and lasting impacts on sovereignty, rights, and modern political systems.

3.1 The American Revolution

The American Revolution (1775–1783) was a pivotal event in world history, marking the colonies’ struggle for independence from Britain. Rooted in Enlightenment ideas of liberty and democracy, the Revolution was sparked by taxes like the Stamp Act and Tea Act, which fueled colonial resentment. The Declaration of Independence (1776), drafted by Thomas Jefferson, asserted the colonies’ right to self-governance and established foundational democratic principles. Key battles, such as Lexington and Concord, and the leadership of figures like George Washington, shaped the war’s outcome. The Treaty of Paris (1783) formally ended the conflict, recognizing the United States as an independent nation. The Revolution’s legacy includes the creation of a constitutional government and the inspiration it provided for other global movements seeking political freedom and self-determination.

3.2 The French Revolution

The French Revolution (1789–1799) was a transformative event that reshaped European and world history. It began amid a financial crisis, social inequality, and the influence of Enlightenment ideas, which challenged absolute monarchy and feudal structures. The revolution’s early stages saw the formation of the National Assembly and the adoption of the Declaration of the Rights of Man and of the Citizen, emphasizing liberty, equality, and fraternity. The fall of the Bastille in 1789 became a symbol of the revolution’s radical shift. The Reign of Terror (1793–1794), led by Maximilien Robespierre, marked a violent period of political purges and executions, including those of King Louis XVI and Queen Marie Antoinette. The revolution culminated in Napoleon Bonaparte’s rise to power, whose military conquests and legal reforms, such as the Napoleonic Code, spread revolutionary ideals across Europe. The French Revolution’s legacy includes the establishment of modern political ideologies and the end of feudalism, profoundly influencing global movements for democracy and self-determination.

3.3 Latin American Revolutions

The Latin American revolutions of the early 19th century were a series of independence movements that swept across Central and South America, inspired by Enlightenment ideas and the successes of the American and French revolutions. These uprisings were driven by the desire for self-governance, economic grievances, and the exclusion of the Creole class from political power. Key figures like Simón Bolívar and José de San Martín played pivotal roles in leading these revolutions. The wars of independence were marked by prolonged conflicts, with regional armies clashing with Spanish and Portuguese colonial forces. By the 1820s, most Latin American nations had gained independence, marking the end of Spanish and Portuguese colonial rule. However, the post-independence period was fraught with political instability, economic challenges, and social inequality. These revolutions laid the groundwork for modern nation-states in Latin America, emphasizing the principles of sovereignty, liberty, and national identity. They also highlighted the complexities of transitioning from colonial rule to independent governance.

3.4 The Haitian Revolution

The Haitian Revolution (1791–1804) was the largest successful slave revolt in modern history, leading to Haiti’s independence from France. Inspired by the Enlightenment ideals of liberty and equality, enslaved Africans rose against brutal colonial rule and racial discrimination. Key figures like Toussaint Louverture and Jean-Jacques Dessalines spearheaded the movement. The revolution unfolded amid the broader context of the French Revolution, which initially promised freedom but excluded enslaved people. Napoleon’s efforts to re-establish control failed, and Haiti became the first independent Black nation in the world, abolishing slavery and defying colonial powers. The Haitian Revolution had far-reaching impacts, inspiring abolitionist movements globally and challenging European colonial dominance. Its legacy remains significant, symbolizing resistance to oppression and the fight for freedom and equality, despite the socio-political challenges Haiti faced in its aftermath.

Economic and Social Changes: Industrialization

Industrialization transformed economies and societies, driven by technological innovations and capital investment. It spurred urbanization, mass production, and new labor systems, reshaping global trade and social structures while creating both opportunities and challenges.

4.1 Causes of the Industrial Revolution

The Industrial Revolution was spurred by agricultural improvements, such as crop rotation and enclosure movements, which increased food production and population growth. The availability of capital from colonial wealth and trade enabled investment in factories and machinery. Technological innovations, like the steam engine and spinning jenny, revolutionized production processes. Britain’s abundant natural resources, including coal and iron, provided the raw materials necessary for industrialization. Additionally, the development of financial institutions and banking systems facilitated investment. The growth of a consumer culture and expanding global markets created demand for mass-produced goods. Government policies, such as the repeal of restrictive guild regulations, further encouraged industrial growth. These interconnected factors created a perfect storm that launched the Industrial Revolution, transforming economies and societies forever.

4.2 Effects of Industrialization on Society

Industrialization profoundly reshaped societies, bringing both opportunities and challenges. Urbanization accelerated as people moved to cities for factory jobs, leading to overcrowded and unsanitary living conditions. The development of a factory system created a new working class, often subjected to long hours, low wages, and unsafe conditions. This led to the rise of labor movements and eventual reforms. Social stratification intensified, with industrialists and capitalists accumulating wealth while workers faced poverty. The growth of a consumer culture emerged, as mass production made goods more accessible. Family structures evolved, with women and children entering the workforce in unprecedented numbers. Environmental degradation became a concern due to pollution from factories. Overall, industrialization transformed societal structures, fostering both progress and inequality, and laying the foundation for modern economic and social systems.

4.3 Comparison of Industrialization Across Regions

Industrialization varied significantly across regions, shaped by local resources, political systems, and cultural contexts. In Europe, Britain led the way with its abundant coal and iron, while other nations like Germany and France followed, leveraging state support and technological innovation. North America benefited from vast natural resources and a growing workforce, with the United States emerging as a global industrial powerhouse. In contrast, industrialization in Asia, such as in Japan, was often driven by state-directed modernization efforts, blending traditional practices with Western technologies. Latin America lagged due to colonial legacies, reliance on agriculture, and limited infrastructure. The timing and pace of industrialization also differed, with some regions adopting industrial practices earlier and others experiencing delayed or partial industrialization. These variations highlight the global unevenness of industrialization and its diverse social, economic, and political impacts across regions.

Imperialism and Global Interactions

Imperialism dominated global interactions from the late 19th to early 20th centuries, marked by European dominance, competition for resources, and cultural clashes. It reshaped societies, sparked resistance, and intensified global inequalities.

5.1 The Rise of European Imperialism

European imperialism surged in the 19th and early 20th centuries, driven by economic needs, political rivalries, and cultural beliefs in racial and civilizational superiority. Nations like Britain, France, Germany, and Belgium sought raw materials, markets, and strategic territories to fuel industrial growth and enhance global influence. The “Scramble for Africa” exemplified this competition, as European powers partitioned the continent, often disregarding local cultures and political systems.

Technological advancements, such as steamships and railways, facilitated imperial expansion, enabling European armies to dominate distant regions. The idea of a “civilizing mission” justified colonization, claiming to bring modernity and Christianity to “backward” societies. However, this rhetoric masked exploitation, as colonies became sources of cheap labor and resources. Imperialism reshaped global power dynamics, creating unequal relationships that persisted well into the 20th century.

The rise of European imperialism also sparked resistance, as colonized peoples fought to retain their sovereignty and cultural identities. These interactions laid the groundwork for future nationalist movements and the eventual decline of empires. Understanding imperialism is key to grasping its enduring impact on global politics, economies, and cultures.

5.2 Impact of Imperialism on Colonized Regions

Imperialism profoundly altered the political, economic, and social landscapes of colonized regions. Local industries were often destroyed to prioritize raw material extraction for the colonizer’s benefit, leading to economic dependency. Traditional governance systems were dismantled, replaced by colonial administrations that frequently disregarded indigenous customs and rights. Cultural identities were eroded as European norms were imposed, often through education and religion. The exploitation of labor and resources enriched European powers while fostering poverty and inequality in colonies.

Despite these oppressive dynamics, some regions experienced limited modernization, such as the introduction of railways and infrastructure, though these primarily served colonial interests. Resistance to imperialism emerged, inspiring nationalist movements that later sought independence. The long-term consequences of imperialism remain evident in global economic disparities, cultural hybridity, and ongoing struggles for self-determination in formerly colonized nations.

5.3 Responses and Resistance to Imperialism

Colonized regions responded to imperialism through various forms of resistance, ranging from armed rebellions to diplomatic and cultural movements. In India, figures like Mahatma Gandhi led non-violent protests, while in China, the Boxer Rebellion emerged as a violent anti-foreigner and anti-Christian movement. African societies, such as Ethiopia, successfully repelled European colonizers through military resistance. Many indigenous leaders adopted hybrid strategies, blending traditional practices with Western-educated elites to challenge colonial rule. Intellectuals and writers played a crucial role, spreading anti-colonial ideas through literature and media. These responses not only highlighted the resilience of colonized peoples but also exposed the moral contradictions of imperialism. Over time, such resistance contributed to the decline of imperial systems, particularly after World War II, as global opinion shifted in favor of self-determination and independence movements.

Cultural and Intellectual Developments

This period saw the rise of Romanticism, emphasizing emotion and nature, alongside the spread of nationalism. Intellectual movements and social reforms emerged, shaping modern identity and cultural expression globally during the 18th and 19th centuries.

6.1 Romanticism and Its Influence

Romanticism emerged as a reaction to the Enlightenment and Industrial Revolution, emphasizing emotion, nature, and individualism. It influenced art, literature, and music, with key figures like William Wordsworth and Caspar David Friedrich. The movement celebrated the sublime and the irrational, contrasting with the rationalism of the Enlightenment. Romanticism also fostered nationalism, as people embraced cultural identities and folklore. This intellectual shift impacted political movements, inspiring revolutions and calls for independence. Its legacy endures in modern aesthetics and the valorization of personal expression. Understanding Romanticism is essential for grasping the cultural and intellectual transformations of the 18th and 19th centuries, as it shaped both artistic expression and political ideologies. The movement’s focus on emotion and nature continues to influence contemporary thought, making it a pivotal element in AP World History Unit 5.

6.2 Rise of Nationalism

Nationalism emerged as a powerful force in the 18th and 19th centuries, emphasizing national identity, sovereignty, and self-governance. Rooted in Enlightenment ideas of liberty and Romanticist celebrations of cultural uniqueness, nationalism inspired movements across the globe. In Europe, it fueled unification efforts in Italy and Germany, while in the Americas, it drove independence movements against colonial powers. Nationalist sentiments also motivated anti-imperial resistance in regions like the Balkans and Asia. The rise of nationalism reshaped political landscapes, fostering both unity and conflict. It often led to the creation of nation-states and the redrawing of borders, reflecting a growing emphasis on ethnic and cultural identity. Understanding nationalism is crucial for analyzing its role in shaping modern political ideologies and its lasting impact on global history, as it continues to influence contemporary debates on sovereignty and identity.


6.3 Social Movements and Reforms

The 18th and 19th centuries witnessed significant social movements driven by Enlightenment ideals and the aftermath of political revolutions. Abolitionism emerged as a global movement, advocating for the end of slavery, with key figures like Olaudah Equiano and William Wilberforce leading the charge. Women’s rights movements also gained momentum, challenging gender inequality and advocating for suffrage and property rights. Labor reforms addressed the harsh conditions brought by industrialization, with efforts to improve wages, working hours, and workplace safety. These movements often overlapped, as marginalized groups sought justice and equality. The spread of literacy and print media amplified these causes, enabling grassroots organizing and petitions. While progress was uneven, these reforms laid the foundation for modern human rights movements. Understanding these social movements is essential for grasping the broader struggle for equity and justice in the modern world.

Unit 5 requires mastering key themes like revolutions, industrialization, and cultural shifts. Use active study techniques, practice essays, and review past exams to excel. Plan your study schedule wisely for optimal preparation.

7.1 Summary of Key Points

Unit 5 of AP World History focuses on transformative periods, including the Enlightenment, political revolutions, and industrialization. Key themes include sovereignty, rationality, and cultural shifts. The Enlightenment emphasized reason and individual rights, influencing political revolutions like the American, French, and Latin American revolutions. Industrialization brought economic and social changes, such as urbanization and labor reforms. Imperialism reshaped global interactions, with European powers dominating colonized regions, sparking resistance. Cultural movements like Romanticism and nationalism emerged, alongside social reforms. Mastery of these themes requires understanding their interconnectedness and impact on modernity. Effective study strategies involve active engagement with materials, practice essays, and targeted review of challenging concepts. By synthesizing these elements, students can achieve a deep understanding of Unit 5 and excel on the AP exam.

7.2 Effective Study Tips for Unit 5

To excel in Unit 5, focus on active engagement with course materials. Start by creating a detailed study timeline, ensuring consistent review of key themes like Enlightenment ideas, political revolutions, and industrialization. Practice with past exam questions to familiarize yourself with the format and deepen your understanding of historical patterns. Use flashcards to memorize significant events, theories, and terminology. Engage in study groups to discuss complex concepts, such as the impact of imperialism or the rise of nationalism. Regularly review primary sources and historical documents to build analytical skills. Prioritize understanding over memorization, as Unit 5 emphasizes thematic connections and causal relationships. Additionally, leverage online resources, such as practice essays and video lectures, to reinforce your learning. By integrating these strategies, you can develop a comprehensive grasp of Unit 5 and improve your performance on the AP exam.

7.3 Final Exam Preparation Strategies

To excel on the AP World History Unit 5 exam, adopt a structured approach to final preparation. Begin with timed practice exams to simulate test conditions, focusing on essay questions and document-based analyses. Review the official rubric to understand how essays are scored, ensuring your responses align with expectations. Dedicate time to practicing past free-response questions, emphasizing clear thesis statements and evidence-based arguments. Use primary sources to refine your analytical skills, as they frequently appear in exam prompts. Maintain a study schedule, prioritizing weak areas identified through practice. Stay calm and well-rested before the exam to ensure optimal performance. By combining rigorous practice with strategic review, you can confidently tackle the challenges of Unit 5 and achieve your desired score.

Canada

singer sewing machine user guide

Welcome to the Singer Sewing Machine User Guide, your comprehensive resource for mastering your machine. Discover tips, troubleshooting, and maintenance advice to enhance your sewing experience.

1.1 Importance of the User Guide

The Singer Sewing Machine User Guide is an essential tool for optimizing your sewing experience. It provides step-by-step instructions for setting up, operating, and maintaining your machine. Whether you’re a beginner or an experienced sewer, the guide helps you understand the machine’s features, troubleshoot common issues, and ensure proper maintenance. It also highlights safety precautions and offers tips for achieving professional results. By following the guide, you can maximize your machine’s performance, extend its lifespan, and enhance your sewing skills. Singer has shifted to digital manuals as part of their Green Initiative, making it easier to access the latest updates and instructions online. This guide is your key to unlocking the full potential of your Singer sewing machine.

1.2 Key Features of Singer Sewing Machines

Singer sewing machines are renowned for their innovative features designed to enhance sewing efficiency and creativity. Key features include automatic threading systems, variable stitch length and width adjustments, and a free arm for sewing cuffs and sleeves. Many models offer multiple stitch options, including decorative and stretch stitches, catering to diverse fabrics; Some machines feature heavy-duty metal frames and powerful motors, ideal for thick materials like leather and denim; Additionally, Singer machines often come with customizable settings, allowing users to tailor their sewing experience. These features, combined with user-friendly interfaces, make Singer machines versatile tools for both beginners and experienced sewers, ensuring high-quality results across various projects.

Parts Identification

Identify essential components like the spool pin, tension discs, and bobbin case. Understand the free arm, feed dogs, and stitch selectors to optimize your sewing experience effectively.

2.1 External Components of the Machine

The Singer sewing machine features a durable design with key external components. The spool pin holds the thread, while the tension discs regulate thread tightness. The stitch selector allows choosing stitch types, and the power switch controls operation. The free arm enables sewing cylindrical items like sleeves. Additional components include the bobbin winder, thread take-up lever, and reverse stitch lever. Understanding these parts is essential for effective machine operation and maintenance. Regularly inspecting and cleaning these components ensures optimal performance. Familiarize yourself with their locations and functions to maximize your sewing experience. Proper care of these external parts enhances durability and sewing accuracy, making your Singer machine a reliable companion for all projects.

2.2 Internal Components and Their Functions

The internal components of your Singer sewing machine are crucial for its operation. The bobbin case holds the bobbin, ensuring proper thread delivery. The feed dogs move fabric smoothly under the needle, maintaining even stitch formation. The shuttle hook loops the thread around the bobbin thread, creating stitches. The gear system transmits power from the motor to the needle and other moving parts. These components work together to ensure consistent stitching and fabric movement. Understanding their roles helps in identifying potential issues. Regular maintenance, like cleaning and oiling (if applicable), keeps these parts functioning optimally. Proper care extends the machine’s lifespan and ensures reliable performance for all your sewing projects. Always refer to the manual for specific maintenance instructions tailored to your Singer model.


Setting Up Your Singer Sewing Machine

Setting up your Singer sewing machine involves unpacking, inspecting, and threading. Follow the included Quick Start Guide for initial steps to ensure smooth operation and prevent issues.

3.1 Unpacking and Initial Inspection

Unpacking your Singer sewing machine is an exciting first step. Ensure you have a clean, stable workspace. Carefully remove the machine from its box and packaging materials. Inspect the machine for any visible damage or scratches. Check the included accessories, such as the power cord, foot pedal, and sewing feet, to ensure nothing is missing. Plug in the machine to test basic functions, like turning it on and checking the stitch selector. If any damage is found, contact customer support immediately. Refer to the Quick Start Guide for initial setup instructions. Proper inspection ensures your machine is ready for use and prevents future issues. Proceed to threading and bobbin installation once satisfied with your machine’s condition.

3.2 Threading the Machine

Threading your Singer sewing machine is essential for smooth operation. Begin by placing the spool of thread on the spool pin. Guide the thread through the tension discs, ensuring it clicks into place. Follow the machine’s thread path, looping the thread around the take-up lever and through the needle’s eye. Use the automatic needle threader if available. Gently pull the thread to remove any slack and create a small tail. Always use high-quality thread and genuine Singer needles for optimal performance. Proper threading ensures consistent stitch quality and prevents issues like thread breakage. If unsure, refer to the Quick Start Guide or online tutorials for visual guidance. Correct threading is the foundation of successful sewing.

3.3 Winding and Installing the Bobbin

Winding and installing the bobbin correctly is crucial for smooth stitching. Begin by placing an empty bobbin on the winder and secure it. Thread the machine as described earlier, ensuring the thread passes through the tension disc. Wind the thread onto the bobbin by pressing the foot pedal gently. Stop when the bobbin is about 80% full. Trim the excess thread, leaving a small tail. Remove the bobbin and insert it into the bobbin case, ensuring it sits properly. Pull the thread gently to seat the bobbin. Close the bobbin case and test the tension by gently tugging the thread. Properly wound and installed bobbins prevent jams and ensure even stitching. Always use the correct thread type for your fabric to avoid issues. Regularly check the bobbin for damage or wear. Replace it if necessary to maintain optimal performance. This step ensures your machine runs smoothly and consistently, reducing the risk of thread breakage or uneven stitches. By following these steps, you can achieve professional-quality results with your Singer sewing machine. Always refer to your user guide for specific model instructions. Correct bobbin installation is key to successful sewing projects. Ensure the bobbin is seated correctly to avoid machine jamming or skipped stitches. If you experience issues, consult the troubleshooting section or Singer support resources. Proper maintenance of the bobbin and its case will extend the life of your machine and enhance your sewing experience. Never overlook the importance of this step, as it directly impacts the quality of your work. Happy sewing! For further assistance, visit Singer’s official website or download the complete user manual for detailed guidance. Remember to use genuine Singer accessories for the best results.

3.4 Adjusting Thread Tension

Proper thread tension is essential for consistent stitching. Begin by threading the machine as described earlier. Locate the tension dials, typically on the front or top of the machine. Turn the dials to increase or decrease tension. For most fabrics, a balanced tension is ideal. Test the tension by pulling the thread gently; it should feel firm but not overly tight; If the thread is too loose, stitches may be uneven. If too tight, the thread may break. Adjust in small increments, then sew a test line to check the results. Ensure the bobbin tension is also balanced for smooth operation. Avoid using damaged or low-quality thread, as it can disrupt tension. Regularly clean the tension discs to prevent thread buildup. For specific guidance, refer to your machine’s manual or Singer’s online resources. Proper tension adjustment ensures professional-quality stitches and extends the machine’s lifespan. Always test on scrap fabric before sewing your final project. If issues persist, consult the troubleshooting section or contact Singer support.

Basic Sewing Operations

Master essential sewing tasks with ease. Learn to sew straight lines, backstitch, and create buttonholes. Understand stitch selection and basic techniques for consistent, professional results.

4.1 Selecting the Right Stitch Type

Selecting the right stitch type is crucial for achieving professional results. Singer sewing machines offer various stitches, including straight, zigzag, and decorative options. For everyday sewing, the straight stitch is ideal for seaming fabrics. The zigzag stitch is perfect for preventing fraying on raw edges. Decorative stitches add a creative touch to your projects. Always refer to your machine’s stitch guide to explore the full range of options. Proper stitch selection ensures durability and enhances the visual appeal of your work. Experiment with different stitches to find the best match for your fabric type and sewing goal.

4.2 Sewing Straight Lines and Basic Stitches

Sewing straight lines and basic stitches is fundamental for any sewing project. Start by aligning the fabric edge with the machine’s edge guide or markings. Use the straight stitch for seaming and the backstitch for secure starts and ends. For accuracy, engage the walking foot or Teflon foot for smooth fabric movement. Keep the fabric taut but not stretched, and maintain a steady pace. Avoid pulling the fabric, as this can cause uneven stitching. Practice on scrap fabric to master straight-line sewing before working on your final project. This ensures clean, professional results and builds confidence in your sewing skills.

4.3 Backstitching for Secure Seams

Backstitching is essential for securing seams, especially at the beginning and end of your stitching. To backstitch, start sewing forward, then press the reverse stitch button or lever to sew a few stitches backward. This reinforces the seam and prevents unraveling. On Singer machines, the backstitch function is typically easy to access, ensuring strong starts and finishes. For heavier fabrics, consider using a shorter stitch length for added security. Avoid pulling the fabric while backstitching, as this can misalign the stitches. Proper backstitching ensures durability and professional-looking results, making it a crucial technique for all sewing projects. Regular practice will help you master this fundamental skill.

4.4 Creating Buttonholes

Creating buttonholes is a breeze with Singer sewing machines, which often feature a one-step buttonhole setting. To begin, measure and mark the desired buttonhole location on your fabric. Select the buttonhole stitch on your machine and adjust the size if necessary. Place the fabric under the presser foot, aligning the mark with the needle. Gently start sewing, letting the machine automate the process. For manual machines, you may need to guide the fabric back and forth to create the hole. Once complete, trim the excess thread and reinforce the edges with a zigzag stitch. Singer machines simplify buttonhole creation, ensuring uniform and professional-looking results every time. This feature is especially useful for garments and home decor projects. Regular practice enhances precision and speed.

Maintenance and Care

Regularly clean your Singer sewing machine to prevent dust buildup. Oil internal parts if applicable, and store it in a dry place to maintain optimal performance.

5.1 Cleaning the Machine

Cleaning your Singer sewing machine is essential to ensure optimal performance and longevity. Start by turning off and unplugging the machine. Use a soft, dry brush to remove dust, lint, and thread fragments from the exterior and internal components, such as the bobbin area and feed dogs. For stubborn debris, lightly dampen a cloth with water, but avoid harsh chemicals or excessive moisture that could damage electrical parts. Regularly cleaning prevents dust buildup, which can cause mechanical issues or fabric snags. After cleaning, ensure all surfaces are dry before storing the machine to prevent rust or corrosion. This simple maintenance routine keeps your Singer sewing machine in top working condition.

5.2 Oiling the Machine (if applicable)

Regular oiling is crucial for maintaining the smooth operation of certain Singer sewing machines, particularly mechanical or heavy-duty models. Check your user manual to confirm if your machine requires oiling, as many modern computerized models are sealed and do not need additional lubrication. For applicable machines, locate the oiling points, typically found near moving parts like the bobbin hook or handwheel. Use only Singer-recommended sewing machine oil to avoid damaging the mechanism. Apply a few drops sparingly, as over-oiling can attract dust and cause malfunctions. After oiling, run the machine without fabric to distribute the oil evenly. Always refer to the manual for specific guidance, and if unsure, contact Singer support for assistance.

5.3 Storing the Machine Properly

Proper storage is essential to maintain the performance and longevity of your Singer sewing machine. Before storing, ensure the machine is clean and free from dust or debris. Cover the machine with a protective cover or dust bag to prevent damage. Store it in a dry, cool place away from direct sunlight and moisture. Avoid extreme temperatures, as they can affect the machine’s internal components. If storing for an extended period, disconnect the power cord and secure it neatly. For portable machines, consider using the original carrying case. Always keep the machine out of children’s reach. Follow these steps to preserve your Singer sewing machine in excellent condition for future use.

Troubleshooting Common Issues

Identify and resolve common problems like thread breakage, machine jamming, or uneven stitching. Check thread tension, clear debris, and ensure proper needle alignment for smooth operation.

6.1 Thread Breakage and Tension Problems

Thread breakage and tension issues are common challenges. Check for incorrect thread routing, improper tension settings, or using the wrong needle type. Adjust the tension dials to balance the thread flow. Ensure the bobbin is correctly wound and seated. If the thread frequently breaks, inspect for sharp edges or debris in the machine. Regularly cleaning the machine and using genuine Singer needles can prevent such issues. Refer to the manual for specific tension adjustments and maintenance tips to resolve these problems effectively.

6.2 Machine Jamming or Skipping Stitches

Machine jamming or skipping stitches can disrupt your sewing flow. These issues often arise from tangled bobbins, incorrect threading, or improper needle usage. To resolve, first, turn off the machine and gently remove any tangled thread. Check the bobbin for correct installation and ensure the needle is compatible with your fabric type. Re-thread the machine following the guide, and verify that the stitch settings are appropriate. If stitches are skipping, inspect the needle for damage or dullness and replace it if necessary. Regular cleaning and proper maintenance can also prevent such issues. Always refer to the manual for specific troubleshooting steps tailored to your Singer model.

6.3 Bobbin Winding Issues

Bobbin winding issues can hinder your sewing progress. Common problems include uneven winding, thread tangling, or the bobbin not fitting properly. To address these, ensure the bobbin is wound correctly by guiding the thread smoothly and avoiding overfilling. Check if the thread is compatible with your fabric and machine. If the bobbin winder is faulty or misaligned, consult the manual for adjustment steps. Regularly clean lint from the bobbin area to prevent jams. If issues persist, consider using pre-wound bobbins or referring to the Singer troubleshooting guide for specific solutions tailored to your machine model. Proper bobbin management is essential for smooth stitching and overall machine performance.

Accessories and Attachments

Essential accessories like bobbins, needles, and specialized attachments enhance your sewing experience. Explore Singer’s range of genuine parts and attachments for optimal performance and versatility in your projects.

7.1 Essential Accessories for Singer Machines

The right accessories can elevate your sewing experience. Genuine Singer needles, bobbins, and presser feet are must-haves for optimal performance. Use specialized attachments like zipper feet or blind hem feet for tailored results. Singer offers a variety of kits and bundles tailored to specific models, ensuring compatibility and ease of use. Accessories like seam rippers, lint brushes, and thread cutters are handy for everyday tasks. Always opt for genuine Singer parts to maintain your machine’s quality and prevent issues like thread breakage or skipped stitches. Explore Singer’s official resources or authorized dealers for authentic accessories designed to enhance your sewing journey.

7.2 Using Specialized Attachments

Specialized attachments expand your Singer machine’s capabilities, enabling precise stitching for specific tasks. The zipper foot simplifies zipper installations, while the blind hem foot is ideal for invisible hems. Use the edge joining attachment for effortless seam alignment. Singer offers a variety of attachments tailored to different models, ensuring compatibility and ease of use. For heavy-duty projects, consider the heavy-duty sewing attachment. Always refer to your machine’s compatibility list to choose the right tools. Properly attaching and adjusting these accessories ensures professional results. Regularly clean and maintain your machine when using attachments to prevent thread jams and wear. Explore Singer’s official resources for guidance on selecting and using attachments effectively. This enhances your sewing experience and expands your creative possibilities.

Advanced Features and Customization

Explore advanced features like stitch length and width adjustment, fabric-specific settings, and customizable sewing options for enhanced creativity and precision in your projects.

8.1 Adjusting Stitch Length and Width

Adjusting stitch length and width on your Singer sewing machine allows for precise control over your stitches. To modify the stitch length, locate the stitch length dial, typically found on the front or top of the machine. Rotate the dial to increase or decrease the length, ensuring it suits your fabric type. Similarly, the stitch width adjustment, often controlled by a separate dial, enables you to customize the width of decorative or utility stitches. Always refer to your Singer machine’s specific guide for exact dial locations and settings. Proper adjustments ensure professional-looking seams and prevent fabric damage. Experiment with different settings to achieve the desired results for various projects.

8.2 Customizing Sewing Settings

Customizing sewing settings on your Singer machine enhances your sewing experience by tailoring the machine to your project needs. Many Singer models allow you to adjust stitch patterns, tension, and speed. For advanced customization, explore memory settings to save your favorite stitches or create custom combinations. Some machines also offer programmable functions, enabling you to pre-set specific sewing parameters. Additionally, adjust presser foot pressure to accommodate different fabric thicknesses. Consult your machine’s guide to access these features. Customizing settings ensures optimal performance for various fabrics and techniques, from delicate embroidery to heavy-duty sewing. Experiment with these options to unlock your machine’s full potential and achieve professional results. Always refer to your Singer user guide for specific customization instructions.

Safety Precautions

Ensure safe operation by following Singer’s guidelines. Keep loose clothing tied back, avoid distractions, and unplug the machine during maintenance to prevent accidents and injuries.

9.1 General Safety Guidelines

Always prioritize safety when operating your Singer sewing machine. Keep children and pets away while sewing. Avoid wearing loose clothing or jewelry that could get caught. Ensure the machine is placed on a stable, flat surface. Never sew near flammable materials or in humid environments. Keep the work area well-lit to maintain clear visibility. Unplug the machine during maintenance or when not in use. Avoid sewing when tired or distracted. Use genuine Singer needles and follow proper threading techniques to prevent accidents. Regularly inspect the machine for damage or wear. By adhering to these guidelines, you ensure a safe and enjoyable sewing experience.

9.2 Handling the Machine Safely

Handling your Singer sewing machine with care ensures longevity and prevents accidents. Always lift the machine with both hands, supporting the base firmly. Avoid sudden movements or tilting, as this could damage internal components. Store the machine in a dry, cool place, away from direct sunlight or extreme temperatures. Clean the machine before storing it to prevent dust buildup. Use the original carrying case if available to protect the machine during transport. Never leave the machine unattended near children or pets. By handling the machine with care and attention, you maintain its performance and ensure safe operation for years to come.

Congratulations! You’ve completed the Singer Sewing Machine User Guide. Mastering these techniques enhances your sewing skills. Explore creative projects, maintain your machine, and enjoy sewing with confidence always. For further assistance, visit Singer’s official support page or download additional guides. Happy sewing!

10.1 Final Tips for Effective Sewing

To achieve professional results, always use genuine Singer needles and replace them frequently. Maintain proper thread tension and clean your machine regularly. Practice on scrap fabric before sewing actual projects. Keep your sewing area well-lit and organized. Experiment with different stitches and fabrics to expand your skills. Regularly oil your machine if applicable, and store it properly when not in use. For best results, follow the guidelines in your user manual. Explore Singer’s official resources for additional tips and tutorials. Happy sewing!

10.2 Resources for Further Assistance

For additional support, Singer offers a wealth of resources. Visit Singer’s official website for downloadable manuals, stitch guides, and machine updates. Explore the Singer App for free owners’ classes and tutorials. Check out YouTube tutorials for step-by-step guidance. Join sewing communities and forums for tips and troubleshooting. Singer’s customer support is also available for specific inquiries. Remember, Singer has partnered with Husqvarna Viking and Pfaff to provide comprehensive support across all models. Utilize these resources to maximize your sewing machine’s potential and enhance your sewing journey. Ensure to refer to genuine Singer materials for accurate information and optimal performance. Happy sewing!

PDF

free evinrude service manual pdf

Evinrude service manuals are essential resources for maintaining and repairing Evinrude outboard motors. These manuals provide detailed instructions, diagrams, and troubleshooting guides to ensure optimal performance and safety. Available for free as PDF downloads, they cover various models and years, making them accessible to boat owners and mechanics. By following the guidelines in these manuals, users can perform routine maintenance, diagnose issues, and execute repairs effectively. This ensures the longevity and reliability of Evinrude outboard motors, keeping them in peak condition for years.

Popular Evinrude Models and Their Manuals

Evinrude outboard motors have been a trusted choice for boat enthusiasts for decades, with numerous models standing out for their performance and reliability. Among the most popular Evinrude models are the E-Tec Series, known for their advanced technology and fuel efficiency. Service manuals for these models, such as the Evinrude E-Tec Series 115, 150, 175, and 200 HP, are widely available online in PDF format, offering detailed repair procedures, troubleshooting guides, and maintenance schedules.

Another widely sought-after model is the Johnson_Evinrude 1990-2001 service manual, which covers a range of models from those years. This manual is particularly valuable for owners of older Evinrude engines, as it provides comprehensive instructions for maintenance and repair. Additionally, the Evinrude 40_50_60_65 HP service manual is a popular download, catering to owners of mid-sized outboard motors who need to perform routine upkeep or address specific issues.

The Evinrude 9.9 1973 repair manual is another highly requested resource, especially for enthusiasts of classic outboard motors. This manual includes detailed diagrams and step-by-step instructions, making it indispensable for those looking to restore or maintain their vintage engines. Similarly, the 1993 E50JetB manual is a go-to resource for owners of this specific model, offering insights into its unique features and repair requirements.

These manuals are not only practical but also easily accessible. Websites like Scribd and Internet Archive host a wide range of Evinrude service manuals, including those for less common models. By searching for specific model numbers or years, users can quickly find the exact manual they need. For example, the Evinrude 40_50_60_65 HP service manual is a frequent download, as it covers multiple models and provides extensive guidance on maintenance and repair.

Troubleshooting Common Issues

Troubleshooting common issues with Evinrude outboard motors is a critical skill for boat owners and mechanics. Service manuals play a vital role in diagnosing and resolving problems efficiently. One of the most common issues is engine overheating, which can be caused by blockages in the cooling system or malfunctioning components. The service manual provides detailed instructions for inspecting and cleaning the cooling system, as well as replacing faulty parts. Similarly, poor engine performance, such as lack of power or rough idling, can often be traced to issues like faulty spark plugs, clogged fuel filters, or improper fuel-to-air ratios. The manual offers step-by-step guidance for identifying and addressing these problems.

Electrical issues are another frequent concern, particularly with modern Evinrude models like the E-Tec Series. Problems such as faulty starters, dead batteries, or malfunctioning ignition systems can be diagnosed using the troubleshooting guides in the service manual. These guides include wiring diagrams and test procedures to help pinpoint the root cause of electrical issues. Additionally, the manual provides instructions for routine maintenance tasks, such as lubricating the engine and gearcase, which can prevent many common problems from arising in the first place.

For older models, such as the Johnson_Evinrude 1990-2001 series, the service manual is an invaluable resource for troubleshooting issues specific to those engines. For example, the manual includes guidance on repairing carburetors, adjusting the timing, and servicing the lower unit. Online forums and communities also offer additional support, with many users sharing their experiences and solutions for common problems. By combining the information in the service manual with community insights, owners can effectively troubleshoot and resolve issues, ensuring their outboard motor runs smoothly and reliably.

Overall, troubleshooting Evinrude outboard motors is made easier with the help of service manuals and online resources. Whether it’s addressing overheating, poor performance, or electrical issues, the manual provides the necessary tools and knowledge to get back on the water quickly. Regular maintenance and prompt repairs, as outlined in the manual, are key to preventing costly breakdowns and extending the life of the engine.

Maintenance and Repair Guidelines

Regular maintenance is crucial for ensuring the optimal performance and longevity of Evinrude outboard motors. Service manuals provide comprehensive guidelines for routine checks and repairs, helping owners keep their engines in top condition. One of the most essential maintenance tasks is inspecting and replacing the propeller, as damage or wear can significantly affect performance. The manual outlines steps for removing the propeller, inspecting for dings or bends, and reinstalling it properly. Additionally, the fuel system requires regular attention, including cleaning or replacing fuel filters and checking for blockages or leaks.

Lubrication is another key aspect of maintenance. The service manual details the correct procedures for lubricating the engine and gearcase, ensuring all moving parts are well-oiled to prevent friction and wear. Electrical system maintenance is also covered, with instructions for checking the battery, starter, and ignition components. Routine checks of these systems can help prevent unexpected breakdowns and ensure reliable operation. For older models, such as the Johnson_Evinrude 1990-2001 series, the manual provides specific guidance on maintaining carburetors, adjusting timing, and servicing the lower unit.

When repairs are necessary, the service manual offers detailed instructions and diagrams to guide the process. Whether it’s replacing a faulty spark plug, repairing a cracked cowling, or overhauling the engine, the manual ensures that repairs are done correctly and efficiently. Online resources, including forums and repair guides, often complement the manual by offering additional tips and advice from experienced technicians and owners. By following these guidelines, boat owners can extend the life of their Evinrude outboard motor and enjoy years of trouble-free boating. Proper maintenance and timely repairs are essential for maintaining performance, safety, and reliability on the water.

Downloading Evinrude Service Manuals

Downloading Evinrude service manuals is a straightforward process, thanks to the availability of free PDF resources online. Many websites specialize in providing repair and maintenance manuals for outboard motors, including Evinrude models. These manuals are designed to help boat owners and mechanics perform routine maintenance, troubleshoot common issues, and execute repairs efficiently. By searching for terms like “free Evinrude service manual PDF,” users can access a wide range of manuals for various models and years.

Popular platforms like Scribd and Internet Archive offer a variety of Evinrude service manuals in PDF format. These manuals are often organized by model number or year, making it easy for users to find the specific guide they need. For example, the Johnson_Evinrude 1990-2001 service manual is a popular download, covering multiple models and providing detailed instructions for maintenance and repair. Additionally, websites dedicated to marine engine repair often host free Evinrude service manuals, ensuring that users have access to the information they need to keep their outboard motors running smoothly.

Downloading these manuals is typically a quick and hassle-free process. Most websites allow users to search for specific models, such as the Evinrude E-Tec Series or the 40_50_60_65 HP models, and download the corresponding manual in just a few clicks. The PDF format ensures that the manuals are easy to read and can be accessed on a variety of devices, including smartphones, tablets, and computers. This convenience makes it easier for users to reference the manual while working on their outboard motor, even in remote locations.

Free Evinrude service manual PDF downloads are a valuable resource for boat owners and technicians. They provide detailed instructions, diagrams, and troubleshooting guides, enabling users to perform repairs and maintenance with confidence. Whether you’re addressing a minor issue or undertaking a major overhaul, these manuals are an indispensable tool. By leveraging these free resources, users can save time and money while ensuring their Evinrude outboard motor remains in optimal condition. With the right manual, anyone can take control of their engine’s maintenance and repairs, extending its lifespan and performance.


Benefits of Using Service Manuals

Using Evinrude service manuals provides numerous benefits for boat owners and mechanics, especially when accessed as free PDF downloads. These manuals serve as comprehensive guides for maintaining, troubleshooting, and repairing Evinrude outboard motors, ensuring optimal performance and longevity. One of the primary advantages is cost savings. By following the instructions in the manual, users can perform routine maintenance and repairs themselves, reducing the need for expensive professional services. This empowers individuals to take control of their engine’s upkeep, saving both time and money.

Another significant benefit is the detailed information provided in the manuals. Evinrude service manuals include step-by-step instructions, diagrams, and troubleshooting guides, making it easier to identify and resolve common issues. This level of detail ensures that even those with limited mechanical experience can perform repairs confidently; Additionally, these manuals are often available for older models, which may no longer be supported by manufacturers or available in print. This makes them invaluable for owners of vintage or discontinued Evinrude outboard motors.

Access to accurate and up-to-date information is another key advantage. Service manuals provide specifications, torque values, and recommended procedures, ensuring that repairs are done correctly and safely. This not only prevents further damage to the motor but also enhances its performance and reliability. Furthermore, the availability of free PDF downloads means that users can easily access the information they need without additional costs or delays.

The availability of these manuals in digital format makes them easily accessible, allowing users to download and reference them whenever needed. This convenience is particularly beneficial for those working on older models, as many manuals for discontinued engines are still available online. Additionally, the cost-effectiveness of free downloads ensures that maintaining an Evinrude outboard motor is more affordable and manageable for individuals of all skill levels.

Overall, Evinrude service manuals are a testament to the importance of proper maintenance and repair in extending the life of outboard motors. By leveraging these resources, users can avoid costly repairs, enhance engine performance, and ensure a safer boating experience. Whether you’re a seasoned mechanic or a DIY enthusiast, Evinrude service manuals provide the tools and knowledge needed to keep your outboard motor in excellent condition for years to come.

Guide

riders of rohan upgrade guide

Welcome to the Riders of Rohan Upgrade Guide! This comprehensive guide helps you enhance the Jeskai human-themed preconstructed Commander deck, focusing on maximizing tribal synergy and monarch mechanics. Éowyn, Shieldmaiden leads the charge, blending aggressive play with strategic depth.

1.1 Brief Overview of Riders of Rohan

Riders of Rohan is a Jeskai (U-R-W) human-themed preconstructed Commander deck from The Lord of the Rings: Tales of Middle-earth set. It revolves around the human tribal synergy and incorporates a monarch subtheme, blending aggressive play with strategic depth. Éowyn, Shieldmaiden is the featured commander, but many players prefer Aragorn, King of Gondor, for his exceptional monarch abilities. The deck emphasizes early-game aggression and mid-game control, leveraging human creatures, monarch triggers, and targeted removal spells. While the preconstructed version is playable, it has significant potential for improvement through targeted upgrades to enhance consistency, power, and thematic focus. This guide will explore the key strategies, upgrades, and optimizations to transform Riders of Rohan into a competitive and enjoyable deck.

1.2 Importance of Upgrading the Preconstructed Deck

Upgrading the preconstructed Riders of Rohan deck is crucial to elevate its performance and competitiveness. While the precon offers a solid foundation, it lacks consistency and power for higher-level play. Key areas for improvement include enhancing human tribal synergy, refining the monarch subtheme, and adding more robust cards to address common weaknesses. Upgrading allows players to optimize the deck’s mana base, improve card draw and removal options, and integrate powerful commanders like Aragorn, King of Gondor, for better monarch control. Additionally, upgrading ensures the deck remains adaptable to meta shifts and personal playstyle preferences. By addressing these areas, players can transform Riders of Rohan into a formidable force capable of competing in competitive Commander formats while staying true to its thematic identity.


Understanding the Core Strategy

The core strategy revolves around human tribal synergy and monarch subtheme integration, creating a powerful and flexible deck that excels in both consistency and board control while appealing to competitive and casual players alike.

2.1 Human Tribal Synergy

Human tribal synergy is the backbone of the Riders of Rohan deck, focusing on amplifying the power of human creatures through cumulative bonuses. Cards like Rionya, Fire Dancer and Selfless Squire provide immediate value, while Théoden, King of Rohan and Village Bell-Ringer enhance the board state. The deck thrives when multiple humans are in play, as their abilities synergize to create a formidable force. Key creatures like Weathered Wayfarer and Zealous Conscripts further bolster the strategy by enabling early-game aggression and late-game utility. This tribal focus ensures consistency and scalability, making the deck competitive across various metas. By leveraging human-specific payoffs, players can build a cohesive and powerful strategy that rewards swarm tactics and board control.

2.2 Monarch Subtheme Integration

The Monarch subtheme in Riders of Rohan adds a layer of political intrigue and card advantage, complementing the human tribal strategy. Aragorn, King of Gondor, shines as a Monarch commander, enabling the deck to generate consistent card draw and exert pressure. Cards like The Wandering King and Crown of Gondor enhance the Monarch mechanic, ensuring you maintain control and generate value. This subtheme encourages a balance between aggression and control, leveraging the Monarch’s ability to disrupt opponents while fueling your own strategy. By integrating Monarch cards, the deck gains resilience and adaptability, making it a formidable force in competitive play.

Essential Upgrades for a Competitive Deck

Enhance your Riders of Rohan deck with powerful cards that amplify human tribal synergy and monarch mechanics. Aragorn and Éowyn shine as commanders, while additions like The Wandering King and Crown of Gondor bolster the Monarch theme, ensuring consistent card draw and strategic dominance;

3.1 Top Commanders to Consider

Choosing the right commander is crucial for maximizing the Riders of Rohan deck’s potential. Éowyn, Shieldmaiden is the face card, offering a low mana cost and the ability to grow into a formidable force. However, Aragorn, King of Gondor, stands out as a superior option due to his exceptional monarch synergy and ability to generate card advantage. His leadership and the enters-the-battlefield trigger make him a cornerstone for competitive builds. Other notable commanders include Rick, Steadfast Leader, who enhances human tribal synergies, and Mondrak, Glory Dominus, providing anthem effects and token generation. These commanders offer distinct playstyles, but Aragorn remains the top choice for his balance of power and thematic consistency, making him the ideal pick for players aiming to dominate with human tribal and monarch strategies.

3.2 Key Creatures to Add

Enhancing the Riders of Rohan deck requires adding creatures that amplify human tribal synergy and monarch mechanics. Selfless Squire is a standout addition, offering card draw and token generation, while Théoden, King of Rohan, provides leadership and anthem effects. Rionya, Fire Dancer excels in generating card advantage through monarch triggers. Village Bell-Ringer enables flash creature plays, adding versatility. For budget-friendly options, consider Weathered Wayfarer for mana ramp and Zealous Conscripts for utility. These creatures strengthen the deck’s core strategies, ensuring consistent aggression and synergy. Prioritize adding these key creatures to elevate your deck’s performance and dominate with human tribal might while maintaining monarch control.

3.3 Enchantments and Artifacts to Enhance Power

To further empower your Riders of Rohan deck, consider adding key enchantments and artifacts that enhance its tribal and monarch themes. Door of Destinies is a powerful addition, boosting your human creatures’ power and toughness. Crown of Gondor and Grasp of Fate are excellent for maintaining monarch control and generating card advantage. For artifacts, Arcane Signet and Commander’s Sphere provide crucial mana acceleration, enabling faster plays. These upgrades ensure your deck maintains consistent aggression while leveraging its strategic themes. Prioritize these additions to solidify your deck’s overall power and synergy, making it a formidable force on the battlefield.

Lands and Mana Base Optimization

Optimizing your land base is crucial for consistent performance. Incorporate utility lands like Arcane Signet and Commander’s Sphere to enhance mana consistency and support your deck’s aggressive strategy effectively.

4;1 Improving the Land Base for Consistency

Optimizing your land base is essential for ensuring consistent gameplay. Focus on adding utility lands like Arcane Signet and Commander’s Sphere to improve mana consistency. These cards provide reliable mana acceleration, enabling early-game plays and supporting your aggressive strategy. Additionally, consider including lands that offer additional benefits, such as Crown of Gondor or Door of Destinies, which enhance your deck’s overall performance. Budget-friendly alternatives like Foul Orchard or Path of Ancestry can also be effective. Prioritize lands that align with your deck’s Jeskai colors to maintain balance and avoid mana bottlenecks. By refining your land base, you ensure smoother gameplay and better odds of executing your strategy effectively.

4.2 Adding Utility Lands

Utility lands are crucial for enhancing your deck’s functionality. Consider adding Arcane Signet and Commander’s Sphere for mana acceleration and fixing. Foul Orchard and Path of Ancestry provide budget-friendly options for consistent mana generation. Crown of Gondor and Door of Destinies offer additional benefits, synergizing with your human tribal strategy. Mirror Entity and Grasp of Fate can serve as utility lands that double as impactful spells. Prioritize lands that align with your Jeskai colors to maintain balance. These additions ensure smoother gameplay and improve your deck’s overall performance, making it more competitive while staying true to the human tribal and monarch themes.

Budget-Friendly Upgrade Options

Enhance your Riders of Rohan deck with affordable upgrades. Consider adding Arcane Signet, Commander’s Sphere, and Foul Orchard for mana fixing. Path of Ancestry and Mirror Entity provide budget-friendly utility, boosting your deck’s performance without breaking the bank.

5.1 Affordable Cards for Beginners

For new players, upgrading the Riders of Rohan deck can be cost-effective with strategic additions. Arcane Signet and Commander’s Sphere provide affordable mana acceleration. Foul Orchard and Path of Ancestry enhance your land base, while Mirror Entity offers versatility. Selfless Squire protects your commander, and Vanquisher’s Banner supports card draw. Weathered Wayfarer ensures consistent land drops. These budget-friendly cards improve your deck’s performance without breaking the bank, making them perfect for beginners looking to start their Riders of Rohan journey.

5.2 Optimizing the Deck on a Limited Budget

Optimizing Riders of Rohan on a limited budget requires careful card selection and prioritization. Start by adding affordable staples like Arcane Signet and Commander’s Sphere for mana acceleration. Foul Orchard and Path of Ancestry are budget-friendly lands that improve consistency. Consider Mirror Entity for versatile creature enhancement and Vanquisher’s Banner for card draw. Replace weaker cards like Call for Aid and Increasing Devotion with more impactful options. Focus on enhancing human synergy and monarch mechanics without overspending. Prioritize cards that offer multiple benefits, ensuring each addition strengthens your overall strategy. This approach allows you to build a competitive deck gradually while staying within financial limits.

Advanced Upgrade Strategies

Maximize human synergy and monarch mechanics with strategic card choices. Integrate powerful monarch cards like Aragorn, King of Gondor and optimize creature interactions for enhanced deck performance.

6.1 Maximizing Human Synergy

Focusing on human tribal interactions, this section explores advanced strategies to amplify your deck’s power. By incorporating cards like Rick, Steadfast Leader and Mondrak, Glory Dominus, you can enhance human synergy and create a formidable board presence. These cards not only boost your creatures’ effectiveness but also provide additional advantages, such as anthem effects and token generation. Additionally, integrating monarch-themed cards like Aragorn, King of Gondor allows you to maintain control while leveraging human synergies. To further optimize, consider adding creatures with “enter the battlefield” effects, such as Selfless Squire, to generate consistent value. Pairing these with tutors and recursion effects ensures your human tribal strategy remains consistent and devastating. This approach transforms your deck into a cohesive, high-powered force on the battlefield.

6.2 Integrating Powerful Monarch Cards

Enhancing your deck with monarch-themed cards is crucial for maintaining control and generating card advantage. Aragorn, King of Gondor excels as a monarch commander, offering both human synergy and the ability to claim the monarch title. Cards like Crown of Gondor and The Ozolith amplify this strategy by enabling monarch retention and resource generation. Pairing these with creatures like Théoden, King of Rohan creates a powerful synergy, as his ability to grant vigilance supports an aggressive playstyle while maintaining monarch control. Additionally, including recursion effects for monarch cards ensures sustained pressure. Budget-friendly options like Grasp of Fate and Mirror Entity can also bolster your monarch gameplan. By integrating these cards, you create a balanced deck that seamlessly blends human tribal aggression with monarch-driven card advantage, making it a formidable force in any Commander matchup.

Cards to Remove from the Precon

Identify and remove underperforming cards like Call for Aid, Earthquake, and Increasing Devotion, which lack synergy with the human tribal or monarch themes, hindering deck consistency and overall performance.

7.1 Identifying Weak Links in the Deck

To optimize your Riders of Rohan deck, it’s crucial to identify and address cards that fail to contribute meaningfully to the human tribal or monarch strategies. Cards like Call for Aid, Earthquake, and Increasing Devotion often underperform, as they lack synergy with the deck’s core themes. These cards either provide inconsistent value or disrupt the overall game plan. For example, Earthquake can be detrimental to your own board state, while Increasing Devotion struggles to generate meaningful card advantage in a tribal-focused deck. Additionally, cards that don’t support the monarch mechanic or human synergy should be carefully evaluated. By trimming these weaker elements, you create space for more impactful cards that enhance the deck’s aggression and thematic consistency, ultimately elevating its competitive potential.

7.2 Cutting Non-Essential Cards

Cutting non-essential cards is vital to refining your Riders of Rohan deck. Cards like Call for Aid, Earthquake, and Increasing Devotion often fail to align with the deck’s human tribal or monarch themes. These cards either lack synergy or provide inconsistent value, making them prime candidates for removal. For instance, Earthquake can harm your own creatures, while Increasing Devotion struggles to generate meaningful card advantage. By trimming these, you make room for more impactful cards that enhance tribal synergy or support the monarch mechanic. This process ensures your deck remains focused and competitive, allowing you to leverage its aggressive playstyle and strategic depth more effectively. Cutting these cards is a crucial step toward building a more cohesive and powerful deck.

Deck Performance and Playstyle

The Riders of Rohan deck excels with its aggressive Jeskai human tribal playstyle, leveraging synergies and monarch mechanics for consistent pressure. Balancing raw aggression with strategic control elements ensures competitive performance and adaptability in matchups.

8.1 Aggressive Playstyle with Human Tribal

The Riders of Rohan deck thrives on an aggressive playstyle, leveraging human tribal synergies to swarm the board with efficient creatures. Éowyn, Shieldmaiden, and Aragorn, King of Gondor, exemplify this strategy, combining combat prowess with monarch mechanics. Early-game threats like Weathered Wayfarer and Selfless Squire accelerate mana and deploy forces quickly. The deck’s low-to-the-ground curve ensures consistent pressure, while human payoffs like Door of Destinies amplify your board presence. Tribal synergies allow for explosive starts, making it difficult for opponents to recover. This aggressive approach is balanced by strategic card advantage from monarch effects, enabling sustained dominance. By focusing on synergy and tempo, the deck delivers a dynamic and competitive experience, embodying the Rohirrim’s fearless cavalry charge.

8.2 Balancing Aggression with Control Elements

While the Riders of Rohan deck excels at aggressive strategies, incorporating control elements ensures longevity and adaptability. Cards like Grasp of Fate and Mirror Entity provide critical interaction and board protection, allowing you to maintain tempo. These elements complement the deck’s human tribal core by preventing opponents from establishing a foothold. Additionally, including recursion effects or cards like Akroma’s Will can safeguard your forces during board wipes. The monarch mechanic further enhances this balance by generating card advantage, enabling you to rebuild quickly. Balancing aggression with control ensures the deck remains competitive in longer games, while still leveraging its tribal synergies for explosive starts. This blend of strategies makes the deck versatile and resilient, capable of adapting to various metas while staying true to its aggressive roots.

The Riders of Rohan upgrade journey transforms a solid precon into a formidable deck. By maximizing human synergy, integrating monarch mechanics, and balancing aggression with control, you create a competitive force. Continuous refinement and adaptation ensure the deck evolves, staying relevant and powerful in any meta. Embrace the charge and lead your Eorlingas to victory!

9.1 Summary of Key Upgrades

The Riders of Rohan upgrade process focuses on enhancing human tribal synergy and monarch mechanics. Key upgrades include swapping weaker cards for powerful additions like Aragorn, King of Gondor, who excels as a monarch commander. Adding creatures such as Rick, Steadfast Leader and Purphoros, God of the Forge amplifies human synergy and provides board presence. Enchantments like Grasp of Fate and artifacts like Crown of Gondor bolster the monarch theme. Budget-friendly options like Village Bell-Ringer and Weathered Wayfarer improve consistency without breaking the bank. Upgrading lands to include utility lands like Emeria, Shattered Skies ensures smoother mana fixes. Balancing aggression with control elements, such as board wipes and card draw, ensures the deck remains competitive. These upgrades transform the precon into a formidable force, ready to dominate the battlefield.

9.2 Encouragement for Continuous Improvement

Continuous improvement is key to mastering the Riders of Rohan deck. As you play and experiment, stay open to new strategies and card combinations. Magic: The Gathering evolves constantly, so staying updated on meta shifts and new set releases can inspire fresh upgrades. Explore deck techs, gameplay videos, and community forums for inspiration. Budget constraints shouldn’t halt progress—prioritize affordable upgrades while saving for high-impact cards. Regularly test your deck in local games or online platforms to identify strengths and weaknesses. Engage with fellow players to trade cards or share ideas. Remember, improvement is a journey, and every small tweak brings you closer to your deck’s full potential. Embrace the process, and enjoy the evolution of your Riders of Rohan deck into a powerful force on the battlefield!

Manuals

drill doctor 750x user manual

The Drill Doctor 750X is a professional-grade drill bit sharpener designed for precision, versatility, and durability․ It sharpens high-speed steel, masonry, carbide, and TiN-coated bits with ease․

1․1 Overview of the Drill Doctor 750X

The Drill Doctor 750X is a high-performance drill bit sharpener designed for professionals and hobbyists alike․ It supports sharpening of high-speed steel, masonry, carbide, cobalt, and TiN-coated drill bits․ With adjustable angle settings from 115° to 140°, it offers versatility for various drilling applications․ The sharpener is compatible with drill bits ranging from 3/32″ to 3/4″ in diameter․ Its advanced features, including customizable bit geometry, make it a reliable tool for maintaining sharp, precise drill bits․ The unit is easy to use and comes with a comprehensive user guide for optimal performance․

1․2 Key Features and Benefits

The Drill Doctor 750X offers adjustable angle settings (115° to 140°), allowing precise sharpening for various drill bit types․ Its advanced motor ensures consistent performance, and the customizable point angle adjustment enables tailored bit geometry․ The sharpener supports drill bits from 3/32″ to 3/4″, catering to a wide range of applications․ Designed with durability in mind, it features a robust construction for long-lasting use․ The user-friendly interface and detailed manual make it accessible for both professionals and DIY enthusiasts, ensuring optimal sharpening results with minimal effort․

Safety Precautions

Always read the manual before use․ Avoid damaged cords and improper sharpening techniques․ Ensure the unit is undamaged after unpacking and follow all safety guidelines to prevent accidents․

2․1 General Safety Guidelines

Before using the Drill Doctor 750X, read the manual thoroughly․ Ensure the unit is undamaged after unpacking and properly assembled․ Avoid using damaged cords or improperly sharpened bits․ Keep loose clothing tied back and avoid overreaching․ Always follow electrical safety guidelines and avoid operating the sharpener in hazardous environments․ Proper setup on a stable surface is essential to prevent accidents․ Misuse can lead to injury, so adhere to all safety precautions outlined in the manual․ Regular maintenance and inspections are crucial for safe operation․

2․2 Handling and Usage Instructions

Handle the Drill Doctor 750X with care to avoid damage․ Place it on a stable, flat surface and ensure all components are securely assembled․ Always sharpen drill bits at the recommended angle settings to maintain accuracy․ Keep fingers away from moving parts during operation․ Use the provided alignment guide for optimal results․ Avoid overloading the motor, and never sharpen damaged or excessively worn bits․ Regularly clean the sharpening wheel to maintain performance․ Follow the step-by-step sharpening process outlined in the manual for consistent results․ Proper handling ensures longevity and effective performance of the sharpener․

Installation and Setup

Carefully unpack the Drill Doctor 750X and place it on a stable surface․ Check for damage and ensure all components are present․ Follow the User Guide for part identification and assembly instructions to ensure proper setup․ Plug in the device and familiarize yourself with the controls before starting․ Proper installation ensures safe and effective operation․ Always refer to the manual for detailed setup guidance․

3․1 Unboxing and Inventory of Components

Begin by carefully unpacking the Drill Doctor 750X from its box․ Inspect the sharpener for any damage incurred during shipping․ Check the packing material thoroughly to ensure all components are included․ The package should contain the Drill Doctor 750X unit, an alignment guide, a user manual, and any additional accessories specified by the manufacturer․ Compare the contents with the list provided in the User Guide to confirm everything is present․ This step ensures you have all necessary parts for proper assembly and operation of the sharpener․ If any items are missing or damaged, contact customer support immediately․

3․2 Assembly and Initial Setup

Place the Drill Doctor 750X on a stable, flat surface․ Ensure the unit is fully assembled, as it typically comes pre-assembled․ Inspect all components for damage or misalignment․ Refer to the User Guide for a diagram of the parts to confirm everything is in order․ Plug in the sharpener and familiarize yourself with the controls, such as the adjustment knob for angle settings․ Double-check that all accessories, like the alignment guide, are present and properly secured․ No additional assembly is required beyond initial setup, allowing you to begin sharpening drill bits immediately after unpacking․

Understanding the Components

The Drill Doctor 750X includes a motor, sharpening wheel, angle adjustment knob, alignment guide, and durable housing․ These components work together to ensure precise sharpening․

4․1 Identifying Key Parts of the Drill Doctor 750X

The Drill Doctor 750X features a robust motor for consistent sharpening, a high-quality sharpening wheel for precise edge restoration, and an adjustable angle knob to customize bit geometry․ The alignment guide ensures proper bit positioning, while the durable housing provides long-lasting reliability․ Additional components include a point angle adjustment knob and a user-friendly interface for easy operation․ These parts are designed to work seamlessly together to deliver professional-grade sharpening results for various drill bit types․

4․2 Description of Each Component

The motor powers the sharpening wheel, ensuring consistent performance․ The sharpening wheel is designed for precise edge restoration, while the alignment guide positions bits accurately․ The adjustable angle knob allows customization of bit geometry, enhancing versatility․ The durable housing ensures longevity, and the point angle adjustment knob fine-tunes sharpening angles․ These components work together to deliver professional-grade results, making the Drill Doctor 750X a reliable tool for maintaining drill bit efficiency and extending their lifespan․

Operating the Drill Doctor 750X

Operating the Drill Doctor 750X is straightforward, offering precise control over drill bit sharpening․ Its intuitive design ensures ease of use while maintaining professional-grade results consistently․

5․1 Step-by-Step Sharpening Process

Prepare the Drill Doctor 750X by ensuring it is properly assembled and placed on a stable surface․
Adjust the point angle to match your drill bit type, using the adjustment knob․
Securely insert the drill bit into the sharpening port, aligning it with the guide;
Gently move the sharpening lever to sharpen the bit, maintaining consistent pressure․
Check the bit’s edge periodically to avoid overheating or over-sharpening․
Once sharpened, remove the bit and inspect it for accuracy․
For optimal results, clean the sharpening wheel and store the tool properly after use․

5․2 Tips for Optimal Sharpening Results

To achieve the best results with the Drill Doctor 750X, start by selecting the correct angle for your drill bit type․ Use the alignment guide to ensure proper positioning․ Apply consistent, gentle pressure during sharpening to avoid uneven edges․ Regularly inspect the bit to prevent overheating, which can damage the tool․ For longer bit life, sharpen only until the edge is dull, avoiding over-sharpening․ Finally, clean the sharpening wheel after each use to maintain its effectiveness and extend the tool’s lifespan․

Maintenance and Troubleshooting

Regularly clean the sharpening wheel and ensure proper alignment․ Refer to the user guide for troubleshooting common issues like uneven sharpening or motor malfunction․

6․1 Cleaning and Maintenance Routine

Regular cleaning is essential for optimal performance․ Use a soft brush to remove dust and debris from the sharpening wheel and alignment guides; Inspect moving parts for wear and ensure proper lubrication․ Clean the metal shavings tray frequently to prevent buildup․ Always unplug the unit before performing maintenance․ Refer to the user manual for detailed instructions and diagrams to ensure proper care․ Routine upkeep extends the lifespan of your Drill Doctor 750X and maintains sharpening accuracy․

6․2 Common Issues and Solutions

Common issues with the Drill Doctor 750X include improper sharpening results or machine malfunction․ If the drill bit isn’t sharpening correctly, ensure proper alignment and secure seating․ Check the sharpening wheel for wear and replace it if necessary․ For power issues, verify the cord connection and ensure the unit is plugged into a functioning outlet․ Refer to the user manual for troubleshooting guides or contact customer support for assistance․ Regular maintenance and proper setup can prevent most issues and ensure optimal performance․

Advanced Features of the Drill Doctor 750X

  • Adjustable angle settings from 115° to 140° for precise sharpening control․
  • Customizable drill bit geometry to suit specific materials and tasks․
  • Advanced motor design for consistent, high-quality sharpening results․

7․1 Adjustable Angle Settings

The Drill Doctor 750X features adjustable angle settings, allowing users to sharpen drill bits at precise angles between 115° and 140°․ This versatility ensures optimal results for various drill bit types, including high-speed steel, masonry, carbide, and TiN-coated bits․ The angle adjustment knob enables fine-tuning to prevent damage and ensure sharp, consistent cutting edges․ By loosening the knob and selecting the desired angle, users can customize sharpening to suit specific materials and tasks, enhancing tool longevity and performance․
Angle precision is key to achieving professional-grade sharpening results․

7․2 Customizing Drill Bit Geometry

The Drill Doctor 750X allows users to customize drill bit geometry by adjusting the point angle and sharpening depth․ This feature ensures bits are tailored for specific materials and applications, improving efficiency and reducing wear․ By modifying the geometry, users can achieve sharper cutting edges and extend bit life․ The machine’s advanced settings enable precise control, making it ideal for professionals and DIYers seeking optimal results․ Customization enhances versatility, ensuring the tool meets diverse drilling needs․
Geometry adjustments are crucial for maximizing drill bit performance․

Accessories and Compatibility

The Drill Doctor 750X includes essential accessories like alignment guides and a user manual; It is compatible with high-speed steel, carbide, and masonry drill bits․

8․1 Included Accessories

The Drill Doctor 750X comes with a comprehensive set of accessories to ensure optimal performance․ Included are a detailed user guide, alignment guides, and a sturdy sharpener unit․ The user guide provides step-by-step instructions, while the alignment guides help achieve precise sharpening results․ Additionally, the package includes a French version of the user guide for bilingual users․ The sharpener is compatible with a wide range of drill bit types, making it versatile for various projects․ For further assistance, video instructions are also available online to complement the provided materials․

8․2 Compatible Drill Bit Types

The Drill Doctor 750X is compatible with a wide range of drill bit types, including high-speed steel, masonry, carbide, cobalt, and TiN-coated bits․ It supports drill bits with diameters from 3/32″ to 3/4″, making it versatile for various projects․ The sharpener also accommodates different drill geometries, allowing for precise sharpening regardless of the bit type․ This compatibility ensures that users can maintain sharp, efficient tools across multiple materials and applications, enhancing productivity and tool longevity․

Warranty and Customer Support

The Drill Doctor 750X is backed by a comprehensive warranty from Darex, LLC, covering manufacturing defects․ Customer support is available through their website, email, or phone for assistance․

9․1 Warranty Information


The Drill Doctor 750X is manufactured by Darex, LLC, a trusted brand in power tool accessories․ It comes with a comprehensive warranty covering manufacturing defects for a specific period․ The warranty ensures repair or replacement of defective parts, providing users with peace of mind․ For detailed terms and conditions, refer to the official user manual or contact Darex customer support․ Additionally, the product is backed by a 30-day money-back satisfaction guarantee, reflecting the company’s confidence in its quality and performance․

9․2 Contacting Customer Service

For any inquiries, troubleshooting, or warranty-related issues, contact Darex, LLC, the manufacturer of the Drill Doctor 750X․ Visit their official website or call their customer service team for assistance․ Email support is also available for detailed queries․ Ensure to have your product serial number ready for faster service․ The Drill Doctor team is committed to providing prompt and reliable support to enhance your user experience․ Visit www․drilldoctor․com for contact details and additional resources․

Appendices

The appendices include a glossary of terms and references for further reading, providing additional resources to support your understanding and troubleshooting of the Drill Doctor 750X․

10․1 Glossary of Terms

This section provides definitions for key terms related to the Drill Doctor 750X, ensuring clarity for users․ Carbide: Extremely hard material used in drill bits for durability․ Culinary Sharpener: Tool for sharpening knives, also offered by Darex․ Darex: Manufacturer of Drill Doctor and other sharpening tools․ High-Speed Steel (HSS): Common drill bit material for general-purpose drilling․ Point Angle: Angle at the tip of the drill bit, adjustable on the 750X․ TiN-Coated: Titanium nitride coating for reduced friction and wear․ These definitions help users understand technical specifications and operational features․

10․2 References and Further Reading

For additional information and resources, refer to the official Drill Doctor website at www․drilldoctor․com․ The Drill Doctor 750X User Manual is available for download on platforms like ManualsDir․com and Drill Master․ These resources provide detailed instructions, technical specifications, and troubleshooting guides․ The manual is also accessible in multiple languages, ensuring global accessibility․ For in-depth understanding, explore the comprehensive guides and instructional videos available on Darex’s official website, the manufacturer of Drill Doctor products․

PDF

a child called it pdf

A Child Called It by Dave Pelzer is a heart-wrenching memoir about his traumatic childhood, detailing severe physical and emotional abuse by his alcoholic mother. The book highlights his resilience and the importance of addressing child abuse, sparking crucial discussions on protection and intervention. Its raw honesty has made it a powerful resource for understanding the long-term effects of trauma.

Overview of the Book

A Child Called It is a heart-wrenching memoir by Dave Pelzer, recounting his traumatic childhood marked by severe physical and emotional abuse. The book spans his early years, from ages 4 to 12, detailing the horrors inflicted by his emotionally unstable, alcoholic mother. It vividly describes how he was starved, beaten, and dehumanized, treated as a slave rather than a child. The memoir also highlights his survival instincts and the eventual intervention that saved him from further abuse, offering a stark reminder of the long-term effects of such trauma. The book serves as a powerful call to action for child protection and awareness, resonating deeply with readers worldwide.

Importance of the Topic

A Child Called It addresses a critical issue—child abuse—a subject often shrouded in silence. Dave Pelzer’s memoir exposes the harsh realities of domestic violence and its lasting effects on victims. By sharing his experiences, he raises awareness about the need for early intervention and support systems for abused children. The book emphasizes the importance of breaking the cycle of abuse and fostering resilience, making it a vital read for understanding trauma’s impact and advocating for child welfare. Its message continues to resonate globally, inspiring change and compassion.


A Child Called It recounts Dave Pelzer’s harrowing childhood, detailing his abuse by his alcoholic mother. From age four to twelve, he endured starvation, physical torment, and emotional cruelty, treated as a slave rather than a son. The memoir highlights his survival through resilience and the hope of a better future, ultimately leading to his rescue and healing. It is a powerful account of one of California’s most severe child abuse cases.

Plot and Key Events

A Child Called It chronicles Dave Pelzer’s traumatic childhood, focusing on his abuse by his mother. Key events include his mother’s escalating cruelty, forced starvation, and physical torture, treating him as a slave. The memoir highlights his resilience, survival strategies, and eventual rescue. These events reveal the severity of his abuse and its lasting impact, shaping the narrative of his journey from victimhood to recovery. The book’s vivid detailing of these events underscores the horrors he endured and the strength required to survive.

Main Characters and Their Roles

Dave Pelzer is the protagonist and narrator, recounting his harrowing childhood; His mother, Catherine Roerva Pelzer, is portrayed as emotionally unstable and abusive, driven by alcoholism. Dave’s father is largely absent and fails to protect him. The memoir also highlights the roles of social workers and teachers, who eventually intervene to rescue Dave. These characters shape the narrative, illustrating the dynamics of abuse, neglect, and the crucial role of external intervention in saving his life.

Themes in the Book

The book explores themes of physical and emotional abuse, survival, family dynamics, and hope, highlighting resilience and the journey toward healing and recovery.

Physical and Emotional Abuse

Dave Pelzer endured unimaginable suffering at the hands of his mother, including brutal beatings, starvation, and psychological torments. Her alcoholism fueled erratic behavior, turning her into a tyrant who subjected Dave to inhumane treatment. The abuse stripped him of his identity, reducing him to an “it,” a dehumanizing label that reflected the depth of her cruelty. These harrowing experiences left lasting scars, both physical and emotional, shaping his tumultuous childhood. The book vividly portrays the horrors he faced, offering a raw glimpse into the cycle of abuse.

Survival and Resilience

Dave Pelzer’s story is a testament to his extraordinary resilience. Despite enduring relentless physical and emotional abuse, he found ways to survive, often relying on sheer willpower and hope. His ability to adapt and endure harsh conditions, such as starvation and brutal punishments, highlights his determination to live. The book reveals how he mentally detached from the abuse, creating a sense of self-preservation that ultimately helped him escape. His resilience not only allowed him to survive but also to heal and inspire others, transforming his trauma into a powerful message of hope and strength. His journey underscores the human spirit’s capacity to overcome even the darkest challenges.

Family Dynamics

The dysfunctional family dynamics in A Child Called It are central to the story. Dave’s mother, an alcoholic, subjected him to brutal abuse, while his father remained largely absent and neglectful. This toxic environment created a fractured family structure, where Dave was treated as an outsider. The psychological manipulation and emotional distance from his parents left him feeling isolated and unloved. The book highlights how family dynamics can deteriorate when addiction and abuse take hold, leading to a breakdown in trust and stability for the child. This dysfunction shaped Dave’s early life and struggles.

Hope and Recovery

Dave Pelzer’s journey from abuse to recovery is a testament to the human spirit’s resilience. After years of suffering, his rescue marked the beginning of healing. With support from caring individuals, he learned to rebuild his life and confront his trauma. The book emphasizes the importance of hope and intervention in breaking cycles of abuse. Dave’s story inspires readers to seek help and believe in the possibility of recovery, transforming pain into a platform for advocacy and empowerment.

Dave Pelzer’s Background

Born in 1960, Dave Pelzer endured a traumatic childhood marked by severe abuse from his alcoholic mother. Rescued at 12, he became a motivational speaker and author.

Early Life and Childhood

Dave Pelzer’s early life was marked by extreme neglect and abuse. From ages four to twelve, he suffered at the hands of his emotionally unstable, alcoholic mother, who subjected him to physical and psychological torture. Denied basic necessities, he was treated as a slave rather than a son. Despite the horrors, Dave’s resilience and determination laid the foundation for his survival and eventual healing.

The Author’s Journey to Healing

Dave Pelzer’s path to healing began with liberation from his abusive home at age twelve. Foster care provided stability, allowing him to rebuild trust and self-worth. Through therapy and support, he confronted childhood traumas, eventually becoming a motivational speaker and advocate for abuse survivors. His journey underscores the power of resilience and the importance of seeking help, inspiring countless readers to heal and overcome their own struggles.

Impact of His Story

Dave Pelzer’s harrowing account has profoundly impacted audiences globally, raising awareness about child abuse and the need for protective measures. His story inspired legislative changes, fostering stronger child protection laws. The book’s popularity, including its widely downloaded PDF version, has made it a crucial resource for educators, social workers, and survivors. Pelzer’s courage in sharing his experiences continues to motivate others to seek help and advocate for vulnerable children, leaving a lasting legacy of resilience and hope.

The Role of the Mother

Dave’s mother, Catherine, was central to his suffering. Her alcoholism and emotional instability led to brutal abuse, treating him as a slave rather than a son, eroding his childhood innocence.

Her Struggles with Alcoholism

Dave’s mother, Catherine, struggled with severe alcoholism, which drastically altered her behavior. When sober, she was a loving parent, but alcohol transformed her into a cruel, unpredictable figure. Her addiction fueled brutal abuse, leaving Dave starved, beaten, and emotionally shattered. The unpredictability of her drunken rage created a toxic environment, where Dave never knew when the next attack would occur. Her alcoholism not only destroyed her relationship with her son but also perpetuated a cycle of violence and fear within the family.

Abuse and Its Consequences

Dave Pelzer endured severe physical and emotional abuse at the hands of his mother, including starvation, beatings, and psychological torture. The abuse left him malnourished and constantly fearful, with deep emotional scars. His mother’s actions eroded his self-esteem, making him feel worthless. The long-term consequences included trust issues and a struggle to form healthy relationships. These experiences shaped his life, highlighting the devastating impact of unchecked abuse on a child’s development and well-being.

Complexity of Her Character

Dave’s mother, Catherine, was a multifaceted figure, presenting as a nurturing homemaker to outsiders while harboring a dark, abusive side. Her alcoholism fueled erratic behavior, shifting from affection to cruelty. She dehumanized Dave, treating him as an “it,” yet exhibited moments of manipulation, creating a toxic dynamic. Her complexity lies in the contrast between her public persona and private atrocities, making her a deeply conflicted and tragic character in Dave’s harrowing story of survival and resilience.

Impact of the Book

A Child Called It has sparked vital discussions on child protection and the need for intervention, raising awareness about severe abuse cases and inspiring advocacy for vulnerable children.

Reception and Reviews

A Child Called It has received widespread acclaim for its raw honesty and emotional impact. The PDF version has been particularly popular, making the book accessible to a global audience. Readers have praised Dave Pelzer’s courage in sharing his harrowing experiences, calling it a must-read for its unflinching portrayal of child abuse. The book has sparked crucial discussions on child protection and intervention, resonating deeply with those advocating for vulnerable children. Its poignant narrative continues to inspire and educate readers worldwide.

Discussion on Child Protection

A Child Called It has sparked urgent discussions about child protection, highlighting the need for stronger measures to safeguard vulnerable children. The memoir has become a catalyst for advocacy, urging communities to recognize signs of abuse and intervene promptly. Its vivid portrayal of neglect and trauma has educated readers about the importance of monitoring at-risk children and reporting suspicious behavior. The book’s impact extends to academic and professional realms, emphasizing the role of education in preventing abuse and supporting survivors in their journey toward healing and recovery.

Popularity of the PDF Version

The PDF version of A Child Called It has gained significant popularity due to its accessibility and convenience. Readers worldwide can easily download or read it online, making it a widely shared and discussed format. The book’s emotional depth and raw honesty resonate deeply, prompting many to recommend it as a must-read. Its digital availability has further amplified its reach, allowing more people to engage with Pelzer’s harrowing yet inspiring story. This accessibility has contributed to its enduring popularity and impact, ensuring its message continues to spread globally.

Key Events and Turning Points

The Beginning of Abuse

Dave’s abuse began at age four, escalating as his mother’s alcoholism worsened, transforming her from nurturing to cruel, subjecting him to physical and emotional torture.

The abuse began when Dave was four, after his mother’s alcoholism spiraled out of control. She transformed from a nurturing parent into a cruel tormentor, subjecting him to physical and emotional torture. Dave was forced to endure starvation, beatings, and dehumanizing games designed to break his spirit. His mother’s unpredictable behavior and escalating anger marked the start of a nightmare that would last for years, leaving him shattered and questioning his worth. This period laid the foundation for the horrific abuse that followed, shaping Dave’s early life into a desperate struggle for survival.

Intervention and Rescue

Dave’s rescue came at age 12 when a concerned teacher reported his condition to authorities. This intervention marked the end of his mother’s control and began his journey toward healing. Placed in foster care, he finally experienced safety and kindness. The rescue was a pivotal moment, offering him hope and a chance to rebuild his life after years of suffering. It underscored the importance of community vigilance in protecting vulnerable children and highlighted the transformative power of intervention in breaking cycles of abuse.

Long-term Effects

The trauma Dave endured left lasting emotional and psychological scars, shaping his worldview and relationships. He struggled with trust and self-worth, grappling with feelings of abandonment and guilt. However, his resilience and determination to heal allowed him to transform his suffering into a mission to help others. The long-term effects of his abuse were profound, yet his story serves as a testament to the human spirit’s capacity for survival and the importance of seeking help and understanding in overcoming adversity.

Reception and Legacy

A Child Called It received widespread acclaim for its raw honesty, becoming a bestseller and sparking global discussions on child abuse. Its legacy endures as a pivotal narrative in raising awareness and advocating for child protection, solidifying its impact on societal and cultural conversations about trauma and resilience.

Awards and Recognition

A Child Called It has earned significant acclaim as a bestseller, resonating deeply with readers worldwide. Its raw portrayal of resilience and abuse has garnered praise, though specific awards are less documented. The book’s impact lies in its ability to spark crucial conversations about child protection and trauma recovery. Its popularity in PDF format highlights its accessibility and enduring relevance, solidifying its place as a vital resource for understanding and addressing child abuse. This memoir continues to inspire and educate, leaving a lasting legacy in literature and advocacy.

Cultural and Social Influence

A Child Called It has left a profound cultural and social impact by shedding light on the often-hidden issue of child abuse. Its raw narrative has sparked global conversations, inspiring advocacy movements and policy discussions. The book has been instrumental in raising awareness about the long-term effects of abuse, encouraging societal change and fostering empathy. Its influence extends to education, with many professionals using it as a resource to understand trauma. The PDF version’s accessibility has further amplified its reach, making it a pivotal work in promoting child welfare and resilience.

Continued Relevance

A Child Called It remains a vital resource in discussions about child welfare and abuse prevention. Its unflinching portrayal of trauma continues to resonate, offering insights into the long-term effects of abuse. The book’s accessibility in PDF format has ensured its widespread reach, making it a cornerstone for educators and professionals addressing these issues. Its relevance endures as it continues to inspire advocacy and support for survivors, emphasizing the importance of understanding and addressing childhood trauma in modern society.

Personal Reflections

A Child Called It evokes deep emotional responses, offering lessons in resilience and hope. Readers often reflect on the strength required to survive such trauma, finding inspiration in Pelzer’s journey toward healing and advocacy.

Lessons Learned

A Child Called It teaches invaluable lessons about resilience, hope, and the importance of intervention. It highlights the need to recognize signs of abuse and act swiftly to protect vulnerable children. The memoir underscores the long-term effects of trauma and the significance of seeking help and healing. Pelzer’s journey shows that survival is possible through courage and determination, emphasizing the power of hope in overcoming adversity. His story inspires readers to advocate for child welfare and mental health awareness, leaving a lasting impact on all who read it.

Reader Responses

A Child Called It has evoked profound emotional responses from readers worldwide. Many have expressed deep empathy for Dave’s suffering, while others have been inspired by his resilience. The book has sparked critical discussions about child abuse and the need for intervention. Readers often describe feeling moved to tears, yet hopeful due to Pelzer’s ability to find light in darkness. The memoir has also prompted many to reflect on their own experiences, fostering a deeper appreciation for the importance of kindness and support in overcoming adversity. Its raw honesty has left an indelible mark on readers.

Inspiration and Motivation

A Child Called It transcends a mere memoir, offering readers a powerful source of inspiration. Dave Pelzer’s journey from victim to survivor to motivational speaker underscores the human capacity for resilience. His story motivates readers to confront adversity with courage and hope. The book’s themes of overcoming trauma have inspired countless individuals to seek healing and pursue positive change. Pelzer’s ability to transform his suffering into a message of strength has made his story a beacon of hope for many, encouraging personal growth and perseverance in the face of life’s challenges.

A Child Called It is a harrowing yet hopeful account of resilience and survival, urging readers to confront child abuse and advocate for change. Its impact endures, inspiring healing and awareness.

Final Thoughts

A Child Called It is a profound memoir that exposes the harsh realities of child abuse while highlighting the human capacity for survival and hope. Dave Pelzer’s courage in sharing his story has made it a vital resource for understanding trauma and resilience. The book’s enduring popularity, including its widely accessed PDF version, underscores its importance in fostering awareness and empathy. It serves as a powerful reminder of the need for compassion and the importance of protecting vulnerable children.

Call to Action

Reading A Child Called It is a crucial step in understanding the devastating impact of child abuse. We urge everyone to educate themselves on the signs of abuse and advocate for vulnerable children. By sharing Dave Pelzer’s story, we can raise awareness and foster a society that protects its youngest members. Together, we can make a difference and ensure no child suffers in silence. Download the PDF or read online to join the movement toward a safer, more compassionate world for all children.

PDF

381 pace bus schedule pdf

The Pace Bus Route 381 connects Chicago, Evergreen Park, Oak Lawn, and other communities, offering reliable service with schedules available in PDF format for easy access.

1.1 Overview of the 381 Bus Route

The Pace Bus Route 381 operates between Moraine Valley Community College and the 95th/Dan Ryan CTA Station, serving communities like Chicago, Evergreen Park, and Oak Lawn. It provides essential transit services, connecting residential areas with key destinations. The route is known for its reliability, with buses running frequently throughout the day. Passengers can access detailed schedules in PDF format, making it easy to plan trips. This route is a vital link for daily commuters and travelers, ensuring convenient travel across the region with well-timed departures and stops.

1.2 Importance of the Schedule PDF

The Schedule PDF for Pace Bus Route 381 is a crucial resource for passengers, offering detailed timetables, route maps, and service alerts. It provides a clear overview of departure times, stops, and trip duration, helping riders plan their journeys efficiently. The PDF format allows for easy downloading and offline access, making it accessible even without internet connectivity. This convenience is particularly beneficial for regular commuters who rely on consistent schedules. By referring to the PDF, passengers can avoid delays and make informed decisions about their travel plans. Its availability ensures transparency and accessibility, enhancing the overall user experience for Pace Bus Route 381 passengers.

Key Features of the 381 Bus Schedule

The 381 bus schedule offers detailed route coverage, frequent departures, and special alerts, ensuring passengers have essential information for smooth and timely travel across served communities.

2.1 Route Coverage and Service Areas

The 381 bus route provides extensive coverage across multiple communities, including Chicago, Evergreen Park, Oak Lawn, Chicago Ridge, and Bridgeview, ensuring convenient access for residents and commuters. The route connects key destinations like 95th/Dan Ryan Station and Moraine Valley Community College, making it a vital link for both daily commutes and educational pursuits. With stops strategically located throughout these areas, the 381 bus ensures that passengers can easily reach their desired locations. This comprehensive coverage highlights the route’s importance in facilitating transportation within the region.

2.2 Frequency of Bus Departures

The Pace Bus Route 381 operates with a consistent frequency, ensuring reliable service for commuters. On weekdays, the route offers 103 scheduled trips, starting as early as 4:41 AM and ending at 12:27 AM. Weekend service is slightly reduced, with 98 scheduled trips on Saturdays and Sundays, operating from 4:38 AM to 12:26 AM. Buses run approximately every 20-30 minutes during peak hours and less frequently during off-peak times. This regularity makes the 381 route a dependable option for travelers needing to connect between key locations like 95th/Dan Ryan Station and Moraine Valley Community College. The schedule is designed to accommodate both daily commutes and leisure trips.

2.3 Special Services and Alerts

The Pace Bus Route 381 offers special services to enhance passenger convenience. Recently, Pace introduced electric buses on this route, reducing emissions and providing a quieter ride. Additionally, service alerts are regularly issued to inform passengers of any disruptions, such as road closures or weather-related delays. These alerts are accessible via the Pace website, mobile app, or email notifications. Real-time updates ensure riders stay informed, minimizing travel disruptions. The schedule PDF also highlights any special service notes, such as holiday schedule adjustments or temporary route changes. These features make Route 381 a reliable and environmentally friendly transportation option for its commuters.

Route Overview

Pace Bus Route 381 connects Moraine Valley Community College to 95th/Dan Ryan Station, serving Chicago, Evergreen Park, Oak Lawn, and other communities with 104 stops along the way.

3.1 Start and End Points

The 381 Pace Bus route begins at the Moraine Valley Community College and concludes at the 95th/Dan Ryan CTA Station Bay A. This connection provides seamless access to Chicago’s South Side and nearby suburbs, linking educational institutions with major transit hubs. The route spans multiple communities, ensuring comprehensive coverage. Passengers can board at either endpoint to travel between these key locations, benefiting from the route’s extensive network. Both endpoints are major hubs, offering transfers to other Pace routes and CTA services, making it a vital link for daily commuters and students alike.

3.2 Communities Served

The 381 Pace Bus route serves several key communities, including Chicago, Evergreen Park, Oak Lawn, Chicago Ridge, Bridgeview, and Palos Hills. These areas are strategically connected, providing residents with accessible transportation options. The route ensures that commuters, students, and locals can travel efficiently between these suburbs and Chicago’s South Side. With multiple stops along the way, the 381 bus supports the daily needs of its diverse ridership, linking residential neighborhoods, commercial centers, and educational institutions like Moraine Valley Community College. This extensive coverage makes the 381 route a vital transit option for thousands of passengers.

3.3 Total Distance Covered

The Pace Bus Route 381 spans approximately 24 miles, connecting its start and end points effectively. It runs from 95th/Dan Ryan Station to Moraine Valley Community College, covering key areas in between. With a total of 104 stops, the route ensures comprehensive accessibility across its service area. The journey duration is about 53 minutes, making it a convenient option for both short and longer trips. This extensive coverage highlights the route’s importance in linking diverse communities, providing essential transportation for daily commuters and residents alike. The 24-mile distance underscores its role as a vital connector in the region’s transit network.

Major Stops on the 381 Route

Route 381 includes 104 stops, with key destinations like 95th/Dan Ryan Station and Moraine Valley Community College, ensuring convenient access across its service area.

4.1 List of Major Stops

Route 381 features 104 stops, starting from Moraine Valley Community College and ending at West 95th Street & 30th Street. Key stops include 95th/Dan Ryan CTA Station, Oak Lawn, Chicago Ridge, and Bridgeview. The PDF schedule details all stops, providing a clear overview of the route’s coverage. Passengers can plan their journeys efficiently by referencing the stops listed in the official Pace Bus schedule, ensuring convenient travel across the served communities.

4.2 Identifying Bus Stop Locations

Bus stops for Route 381 are clearly marked with Pace Bus signs displaying the route number and destination. Major stops include 95th/Dan Ryan CTA Station, Moraine Valley Community College, and Oak Lawn. Riders can identify stops by looking for blue Pace Bus signs with route information. The PDF schedule and online maps provide precise stop locations, making it easy to plan trips. Additionally, stops are listed in sequence, helping passengers track their journey. Real-time tools like the Pace Bus Tracker also assist in locating buses and verifying stop positions, ensuring a smooth travel experience.

Schedule Details

The Pace Bus Route 381 schedule is detailed in a downloadable PDF, offering timing for Monday-Friday, Saturday, and Sunday services, including holiday adjustments for seamless trip planning.

5.1 Monday-Friday Schedule

The Pace Bus Route 381 operates on weekdays with a comprehensive schedule starting as early as 4:41 AM and ending at 12:27 AM. The route offers 103 scheduled trips, ensuring frequent service throughout the day. Buses run approximately every 20-30 minutes during peak hours, adjusting to 30-40 minutes during off-peak times. Specific trips are designated to serve Moraine Valley Community College via 95th Street and 88th Avenue, providing convenient access for students and commuters. The detailed timing for each stop is outlined in the downloadable PDF schedule, allowing passengers to plan their journeys efficiently. Regular updates ensure the schedule remains accurate and reliable for daily travel needs.

5.2 Saturday and Sunday Schedules

On weekends, the Pace Bus Route 381 operates with a slightly reduced schedule compared to weekdays. Saturday service begins at 4:38 AM and ends at 12:26 AM, with 98 scheduled trips throughout the day. Sunday service follows a similar pattern, ensuring consistent availability for weekend travelers. Buses run approximately every 30-45 minutes, with adjustments during early mornings and late evenings. The weekend schedule is designed to accommodate typical weekend travel needs, providing reliable connections between communities. The detailed timing for both Saturday and Sunday is included in the downloadable PDF schedule, allowing passengers to plan their weekend journeys with ease and accuracy. Regular updates ensure the schedule remains current and accessible for all users.

5.3 Holiday Schedule Adjustments

Holiday schedules for Pace Bus Route 381 are adjusted to accommodate reduced travel demands. On major holidays such as New Year’s Day, Memorial Day, Independence Day, Thanksgiving, and Christmas, the service operates on a reduced schedule, typically following a Saturday-level service pattern. This means fewer trips and modified timings to match holiday travel needs. Passengers should consult the official Pace Bus website or the downloadable PDF schedule for specific holiday timetables, as exact adjustments may vary by year and holiday. Planning ahead is recommended to ensure smooth travel during these periods. The holiday schedule is usually published in advance to help riders prepare for their journeys.

5.4 Trip Duration and Frequency

The Pace Bus Route 381 operates with consistent trip durations and frequencies to ensure reliable service. On weekdays, trips start as early as 4:41 AM, with buses running approximately every 30 to 60 minutes, depending on peak hours. The total trip duration from 95th/Dan Ryan Station to Moraine Valley Community College is about 53 minutes. Weekday service includes 103 scheduled trips, while Saturdays offer 98 trips, maintaining similar intervals. Frequencies may vary slightly during off-peak hours but remain consistent to accommodate commuter needs. This schedule ensures passengers can plan their journeys efficiently, with clear timing and frequency information available in the PDF schedule for easy reference.

Accessing the 381 Bus Schedule PDF

The Pace Bus Route 381 schedule is available as a downloadable PDF from the official Pace website or third-party transit apps like Moovit, ensuring easy access for planning trips.

6.1 Downloading the Schedule

To download the Pace Bus Route 381 schedule, visit the official Pace website or platforms like Moovitapp.com. Navigate to the “Schedules” section, select Route 381, and click the PDF link. The document includes detailed timetables, route maps, and service alerts. For offline access, save the PDF to your device. Ensure you have a PDF reader installed to view the file. This convenient option allows passengers to plan trips efficiently, even without internet connectivity. Regularly check for updates, as schedules may change due to service adjustments or special events.

6.2 Printing the PDF

Printing the Pace Bus Route 381 schedule PDF is straightforward. Open the downloaded PDF file using a reader like Adobe Acrobat. Ensure your printer is set to “Fit to Page” for proper formatting. Print on standard letter-sized paper for clear readability. For convenience, select double-sided printing to conserve paper. If needed, adjust the layout or zoom settings to enhance text visibility. Printed schedules are ideal for planning trips without digital access. Always verify the print date, as schedules may update periodically. Keep a printed copy handy for quick reference during your commute.

6.3 Previewing the Schedule Online

Previewing the Pace Bus Route 381 schedule online is convenient and user-friendly. Visit the Pace Bus website or use the Transit app to access the PDF schedule. Utilize the built-in search bar to quickly locate Route 381. The online viewer allows you to scroll through the schedule, view route maps, and plan trips in advance. Zoom in for better readability or navigate through pages using arrows. This feature is ideal for passengers who prefer digital access or want to confirm timings before downloading or printing. Real-time updates ensure the online schedule reflects the most current information, helping you stay informed about any service changes or alerts.


Real-Time Tracking of Bus 381

Real-Time Tracking of Bus 381 allows passengers to monitor arrivals and plan trips efficiently using the Pace Bus Tracker, accessible via the Pace website or Transit app.

7.1 How to Use the Pace Bus Tracker

To use the Pace Bus Tracker for Route 381, visit the Pace website or download the Transit app. Enter Route 381 in the search bar to view real-time bus locations. Select your desired stop to see estimated arrival times. The tracker provides live updates, allowing you to plan your trip efficiently. You can also set alerts for specific arrivals. This tool helps reduce wait times and ensures you catch your bus on time. Additionally, the tracker integrates with the PDF schedule, offering a comprehensive view of Route 381’s service. By leveraging real-time data, passengers can enjoy a smoother and more convenient commuting experience.

7.2 Benefits of Real-Time Tracking

Real-time tracking for Pace Bus Route 381 offers numerous benefits, including reduced wait times and improved trip planning. Passengers can access live updates on bus locations and arrival times, ensuring they reach their stops promptly. This feature also helps commuters avoid delays by providing immediate alerts about service disruptions. Additionally, real-time tracking enhances overall reliability, allowing riders to adjust their schedules dynamically. By integrating with the PDF schedule, it offers a seamless commuting experience. The ability to monitor buses in real time fosters greater confidence and convenience for passengers, making their daily travel more efficient and stress-free.

Connections and Transfers

The 381 route offers seamless connections to other Pace routes and CTA services, enhancing travel flexibility for passengers heading to various destinations efficiently.

8.1 Connecting to Other Pace Routes

Passengers on the 381 route can transfer to other Pace routes at key stops, ensuring connectivity to nearby suburbs and cities. This integration allows riders to reach destinations like Moraine Valley Community College and 95th/Dan Ryan Station seamlessly. Transfer points are clearly marked on the PDF schedule, making trip planning efficient. By connecting with routes such as 386, travelers gain access to a broader network, reducing the need for multiple apps or maps. This interconnected system simplifies commuting, offering a convenient and time-saving experience for daily travelers.

8.2 Transferring to CTA Services

The 381 bus route seamlessly connects with CTA services, primarily at major hubs like the 95th/Dan Ryan Station. This station offers access to the CTA Red Line and multiple bus routes, enabling passengers to continue their journey within Chicago and its suburbs. The PDF schedule highlights these transfer points, ensuring riders can plan their trips efficiently. By transferring to CTA services, passengers can reach additional destinations, such as downtown Chicago, without the need for additional apps or maps. This integration between Pace and CTA services enhances the overall commuting experience, providing a convenient and well-coordinated transit network for daily travelers.

Service Alerts and Updates

Stay informed about service alerts, delays, and route changes through real-time updates. The Pace Bus Tracker and schedule PDF ensure passengers are prepared for any disruptions or adjustments.

9.1 Types of Service Alerts

Service alerts for Pace Bus Route 381 include planned and unplanned notifications. Planned alerts involve scheduled maintenance, route changes, or special events impacting service. Unplanned alerts address unexpected disruptions like accidents or weather-related issues. These updates ensure passengers are informed about delays, detours, or stop closures. Alerts are categorized to reflect their urgency and impact, helping riders adjust their travel plans accordingly.

Examples include construction-related detours, bus stop closures, or temporary schedule adjustments. Passengers can stay updated through the Pace Bus Tracker, email notifications, or the official website, ensuring they remain informed about any changes affecting their commute.

9.2 How to Receive Alerts

To stay informed about service alerts for Pace Bus Route 381, passengers can sign up for email or text notifications through the Pace Bus Tracker. The Pace website offers a subscription service, ensuring timely updates on schedule changes, delays, or disruptions. Additionally, real-time alerts are available via the Pace Bus Tracker app, which provides push notifications for registered routes. Passengers can also follow Pace’s official social media accounts for instant updates. By enabling these features, riders can plan their commutes more effectively and avoid unexpected delays. Regularly checking the Pace website or PDF schedules is another reliable way to stay informed about service adjustments.

Environmental Impact

Pace Bus Route 381’s environmental impact is minimized through fuel-efficient vehicles and reduced emissions. The introduction of electric buses significantly enhances sustainability, aligning with eco-friendly public transport goals.

10.1 Fuel Efficiency and Emissions

Pace Bus Route 381 prioritizes fuel efficiency to reduce emissions. Modern buses are equipped with cleaner engines, lowering greenhouse gas output. This eco-conscious approach supports regional air quality goals and aligns with sustainability initiatives.

10.2 Electric Bus Initiatives

Pace Bus has introduced electric buses on Route 381, enhancing sustainability. These buses reduce emissions and operating costs while providing a quieter ride. The initiative aligns with environmental goals and modernizes public transit.

Historical Context

Pace Bus Route 381 began service in 1993, providing essential transit across Chicago’s southern suburbs. The route has evolved, introducing electric buses in 2024, enhancing sustainability.

11.1 Past Schedule Changes

Historically, the Pace Bus Route 381 schedule has undergone several adjustments to meet commuter needs. One notable change occurred in 1993 when the route was introduced, initially serving key stops between 95th/Dan Ryan Station and Moraine Valley Community College. Over the years, minor tweaks were made to departure times and frequencies to optimize service efficiency. In 2024, the introduction of electric buses marked a significant shift, aligning with environmental goals while maintaining the same reliable service. These changes reflect Pace’s commitment to adapting to community demands and technological advancements, ensuring the route remains a vital transit option for residents and commuters alike.

In 2024, Pace introduced its first electric bus, primarily assigned to Route 381, marking a significant step toward sustainability. This initiative aimed to reduce environmental impact by lowering emissions while maintaining the same reliable service. The electric buses operate on the existing schedule, ensuring no disruptions to passengers. This move aligns with Pace’s broader goal of modernizing its fleet and promoting eco-friendly transportation solutions. The introduction of electric buses highlights Pace’s commitment to innovation and environmental responsibility, setting a precedent for future route enhancements. This change underscores the balance between technological advancement and consistent service quality for the communities served by Route 381.

Pace Bus Route 381 provides reliable service, connecting key communities with efficient schedules. The PDF schedule ensures accessibility, while electric buses highlight Pace’s commitment to sustainability and modernization.

12.1 Summary of Key Points

Pace Bus Route 381 provides essential transportation services across Chicago and surrounding communities. The route spans from Moraine Valley Community College to 95th/Dan Ryan Station, serving 104 stops. Schedules are available in PDF format for easy access, detailing Monday-Friday, Saturday, and Sunday services. Real-time tracking via the Pace Bus Tracker enhances passenger convenience. The route supports connections to other Pace and CTA services, ensuring seamless travel options. Environmental efforts, including electric buses, highlight Pace’s commitment to sustainability. Regular service alerts and updates keep riders informed, making Route 381 a reliable choice for daily commutes and regional travel needs.

12.2 Final Remarks on Route 381

Manuals

troy-bilt service manual pdf download

Troy-Bilt service manuals are essential for maintaining and repairing outdoor equipment. These PDF guides provide detailed instructions, diagrams, and troubleshooting tips for lawn mowers, tillers, and more.

Overview of Troy-Bilt Products and Manuals

Troy-Bilt manufactures a wide range of outdoor power equipment, including lawn mowers, tillers, snow blowers, and chippers. Their service manuals are designed to help users maintain, repair, and operate these products effectively. Available in PDF format, these manuals cover detailed instructions, parts diagrams, and troubleshooting guides. Whether you’re a DIY enthusiast or a professional, Troy-Bilt manuals provide essential information to keep equipment running smoothly. They are accessible via the official Troy-Bilt website, third-party platforms like ManualsLib, or the Internet Archive. These resources ensure users can easily find and download the specific manual for their model, promoting efficient repairs and maintenance.

Why Download a Troy-Bilt Service Manual?

Downloading a Troy-Bilt service manual is crucial for maintaining and repairing your outdoor equipment effectively. These manuals provide detailed instructions, diagrams, and troubleshooting tips tailored to your specific model. Whether you’re addressing common issues or performing routine maintenance, the manual ensures you have the knowledge to keep your equipment running efficiently. It also includes safety guidelines and parts diagrams, which are essential for DIY repairs and avoiding costly mistakes. By referencing the official manual, you can extend the lifespan of your Troy-Bilt products and ensure optimal performance. Additionally, having a PDF copy allows for easy access and portability, making it a valuable resource for homeowners and professionals alike.

Where to Download Troy-Bilt Service Manuals

Troy-Bilt service manuals are available on the official Troy-Bilt website, third-party platforms like ManualsLib, and free resources such as the Internet Archive. Ensure to use model numbers for accurate downloads.

Official Troy-Bilt Website Resources

The official Troy-Bilt website provides a dedicated section for service manuals, ensuring users can access authentic and up-to-date documentation. By visiting the site, customers can input their model and serial numbers to download the specific manual for their equipment. The platform offers a user-friendly interface, making it easy to navigate and find the required resources. In addition to service manuals, the site often includes parts diagrams, troubleshooting guides, and maintenance tips. This ensures that users have everything they need for repairs, maintenance, and operation. The official website is the most reliable source for accurate and comprehensive information, reducing the risk of using incorrect or outdated manuals. It’s a one-stop solution for all Troy-Bilt equipment needs.

Third-Party Platforms for Manual Downloads

Several third-party platforms offer Troy-Bilt service manuals for download, providing convenient access to essential documentation. Websites like ManualsLib and Internet Archive host a wide range of Troy-Bilt manuals, including operator and service guides. These platforms allow users to search by model number, ensuring they find the correct manual for their equipment. While these resources are helpful, it’s important to verify the authenticity and accuracy of the documents. Some platforms may offer free downloads, while others might require registration or a subscription. Users should exercise caution when using third-party sites to avoid downloading incorrect or outdated manuals. Always cross-check the model and serial numbers before proceeding with any download to ensure compatibility and reliability.

Internet Archive and Other Free Resources

The Internet Archive is a valuable resource for downloading Troy-Bilt service manuals for free. This digital library offers a wide range of PDF manuals, including those for lawn mowers, tillers, and other equipment. Users can search by model numbers like Mustang 50 XP or TB230 to find specific guides. These manuals are often available for immediate download without registration. Additionally, other free resources like ManualsLib and Archive.org provide access to Troy-Bilt documentation. Always verify the model and serial numbers before downloading to ensure compatibility. These platforms are ideal for users seeking cost-effective solutions for maintaining or repairing their Troy-Bilt equipment. Explore multiple sources to find the most comprehensive manual for your needs.

How to Download Troy-Bilt Service Manuals

Steps to Find and Download the Correct Manual

Locate your Troy-Bilt model and serial number, then visit the official website or platforms like ManualsLib. Search, select, and download the matching PDF manual instantly.

To find and download the correct Troy-Bilt service manual, start by identifying your product’s model and serial number, usually located on the unit or in the owner’s manual. Visit the official Troy-Bilt website or trusted platforms like ManualsLib. Use the search bar to enter your model number and browse the results. Select the appropriate manual, ensuring it matches your equipment. Download the PDF file, which may include repair guides, parts diagrams, and troubleshooting tips. Always verify the manual’s relevance to your specific model to avoid confusion. For convenience, save the file for future reference or print it if needed. This process ensures you access accurate and reliable information for maintenance and repairs.


Importance of Model and Serial Numbers

Model and serial numbers are crucial for accurately identifying Troy-Bilt equipment and accessing the correct service manual. These numbers, typically found on the product’s data plate or owner’s manual, ensure precise information retrieval. Using the wrong manual can lead to incorrect repair procedures, potentially damaging the equipment or causing safety hazards. Always verify the model and serial numbers before downloading or using a manual to guarantee compatibility and safety. This step ensures that all instructions, parts lists, and troubleshooting guides align with your specific unit, providing reliable support for maintenance and repairs.

Types of Troy-Bilt Service Manuals

Troy-Bilt offers various manuals, including operator, service, repair, and parts manuals. Each type provides specific guidance for operation, maintenance, troubleshooting, and component identification, catering to different user needs.

Operator Manuals vs. Service Manuals

Operator manuals focus on safe usage, basic maintenance, and operational guidelines for Troy-Bilt equipment. They are designed for everyday users, providing essential instructions for assembling, starting, and using the machinery. In contrast, service manuals are detailed technical guides intended for repairs, diagnostics, and advanced maintenance. These manuals include troubleshooting steps, parts diagrams, and repair procedures, catering to professionals or experienced DIYers. Understanding the difference is crucial, as operator manuals ensure proper use, while service manuals support in-depth maintenance and fixes. Both are vital resources for maximizing equipment performance and longevity, but serve distinct purposes for different user needs.

Repair and Maintenance Guides

Troy-Bilt repair and maintenance guides offer step-by-step instructions for fixing common issues, ensuring equipment longevity. These guides cover troubleshooting, part replacement, and routine upkeep, with detailed diagrams and tool lists. By following these resources, users can address problems like faulty engines, transmission issues, or mower deck malfunctions confidently. Regular maintenance tasks, such as oil changes and blade sharpening, are also outlined to prevent premature wear. Accessible in PDF format, these guides empower users to perform repairs independently, saving time and money. They are indispensable for maintaining optimal performance and extending the lifespan of Troy-Bilt equipment, catering to both novice and experienced users.

Parts Manuals and Diagrams

Troy-Bilt parts manuals and diagrams provide detailed information for identifying and replacing components. These resources include exploded views of equipment, part numbers, and descriptions, ensuring accurate repairs; Specific models, like the TB105 and TB230, have dedicated sections for engine, mower deck, and transmission parts. Users can download these manuals from Troy-Bilt’s official website or platforms like ManualsLib. The diagrams simplify the process of ordering correct parts and performing repairs without professional assistance. This ensures that users can maintain their equipment efficiently. By referencing these materials, individuals can avoid purchasing incorrect parts and ensure compatibility. These manuals are essential for DIY enthusiasts and professionals alike, offering a clear guide for troubleshooting and restoration.

Troubleshooting with Troy-Bilt Manuals

Troy-Bilt manuals provide solutions for common issues, aiding users in diagnosing problems and performing repairs efficiently with detailed guides and diagrams.

Common Issues Addressed in Manuals

Troy-Bilt service manuals address common issues such as engine problems, starting difficulties, and mower deck malfunctions. They provide step-by-step solutions for troubleshooting and repairing these problems, ensuring efficient resolution.

How to Use Manuals for DIY Repairs

Troy-Bilt service manuals are designed to empower users with detailed guidance for DIY repairs; Start by identifying your equipment’s model and serial number to ensure you’re using the correct manual. The manual typically includes troubleshooting sections, repair procedures, and diagrams to help diagnose and fix common issues. Familiarize yourself with the tools and parts required, as outlined in the manual, and follow step-by-step instructions for disassembly, inspection, and reassembly. Pay attention to safety guidelines and torque specifications to avoid further damage. By referencing the manual, you can address problems like faulty engines, blade malfunctions, or transmission issues with confidence and precision, ensuring your equipment runs smoothly.

Legal and Safety Considerations

Using Troy-Bilt service manuals is at your own risk. Disclaimers outline liability limitations, emphasizing proper safety practices to avoid injury or equipment damage. Adhere strictly to guidelines provided.

Downloading and using Troy-Bilt service manuals is done at your own risk. The provided information is for general guidance and may not cover all specific models or situations. Troy-Bilt and its affiliates disclaim liability for any damages or injuries resulting from improper repairs or maintenance. Ensure you use the correct manual for your equipment by verifying the model and serial number. Professional shop manuals and parts diagrams are available for accuracy. Always follow safety guidelines and manufacturer instructions to avoid legal or safety issues. Proper usage ensures compliance with warranty terms and prevents potential hazards. Refer to official sources for the most reliable information.

Importance of Following Safety Guidelines

Importance of Following Safety Guidelines

Adhering to safety guidelines in Troy-Bilt service manuals is crucial for preventing accidents and ensuring proper equipment maintenance. These manuals outline specific precautions to protect users from potential hazards, such as moving parts or electrical components. Failure to follow safety protocols can result in serious injury or equipment damage. Always wear protective gear, disconnect power sources before servicing, and follow recommended procedures. Ignoring safety guidelines may void warranties or lead to legal consequences. Prioritize safety to maintain equipment longevity and user well-being. By complying with these guidelines, users can perform repairs confidently and effectively, minimizing risks associated with DIY maintenance. Safety should never be compromised during any repair or maintenance task.

Additional Resources and Support

Troy-Bilt offers customer service, online help centers, and forums for troubleshooting. Users can access technical support for manual authenticity and expert guidance, ensuring reliable assistance.

Troy-Bilt Customer Service and Help Centers

Troy-Bilt provides dedicated customer support through their official website and help centers. Users can access phone support at (800) 828-5500 or visit www.troybilt.com for assistance. The website offers a “Parts & Support” section, where customers can find service centers, download manuals, and get troubleshooting tips. Additionally, Troy-Bilt’s customer service team is available to address queries about manual downloads, repair guidance, and product maintenance. For convenience, online resources like FAQs and live chat options are also available. These support channels ensure users receive reliable help for their equipment, making maintenance and repairs more straightforward. By utilizing these resources, customers can resolve issues efficiently and keep their Troy-Bilt products in optimal condition.

Online Communities and Forums

Online communities and forums are invaluable resources for Troy-Bilt users seeking advice or manual downloads. Platforms like Reddit and GardenWeb host discussions where users share tips, ask questions, and provide links to service manuals. Facebook groups dedicated to lawn care and equipment repair often include threads about Troy-Bilt products. These forums allow users to troubleshoot issues, share repair experiences, and access downloadable PDF manuals. Many community members offer step-by-step guidance, making DIY repairs more manageable. Additionally, some forums archive older manuals, ensuring availability for discontinued models. Engaging with these communities can provide practical insights and solutions, complementing official support channels. They foster collaboration and knowledge sharing among Troy-Bilt enthusiasts and professionals alike.

Troy-Bilt service manuals are invaluable for troubleshooting and maintaining equipment. Easily downloadable, they empower users with model-specific guidance, ensuring optimal performance and DIY repair confidence.

Final Tips for Using Troy-Bilt Service Manuals

Always start by verifying the model and serial number to ensure the correct manual. Use the troubleshooting sections to identify common issues quickly. Follow safety guidelines precisely to avoid accidents. Regularly refer to maintenance schedules to keep your equipment in top shape. For complex repairs, consider consulting additional resources or professional help. Keep the manual handy for easy reference during DIY projects. By adhering to these tips, you can maximize the effectiveness of your Troy-Bilt service manual and extend the lifespan of your equipment.

Benefits of Referencing Official Documentation

Referencing official Troy-Bilt service manuals ensures accuracy and safety in repairs. These documents provide detailed parts diagrams, troubleshooting guides, and step-by-step instructions tailored to your specific model. By following official guidelines, you avoid costly mistakes and maintain equipment warranty compliance. The manuals also include safety precautions to protect you and your machinery. Additionally, they offer comprehensive maintenance schedules to prevent future issues. Official documentation is regularly updated, ensuring the latest repair techniques and model-specific information. Whether you’re a DIY enthusiast or a professional, relying on official manuals guarantees reliable results and extends the lifespan of your Troy-Bilt equipment. They are indispensable for maintaining performance and addressing complex repairs effectively.

PreviousNext

You Want To Have Your Favorite Car?

We have a big list of modern & classic cars in both used and new categories.