the benchwarmers parents guide
Welcome to The Benchwarmers Parents Guide, a comprehensive resource designed to help parents support young athletes facing limited playing time in sports.
Understanding the Concept of Benchwarmers
A “benchwarmer” refers to an athlete who spends most of their time on the sidelines during games, receiving limited playing time. This situation can stem from various factors, such as skill level, team dynamics, or coach preferences. Being a benchwarmer can lead to frustration, as athletes may feel undervalued or overlooked, despite their effort and dedication. Parents play a crucial role in helping their children navigate this challenge, fostering resilience and encouraging a growth mindset. Understanding the emotional and social implications of being a benchwarmer is essential for providing effective support and guiding young athletes toward positive outcomes in sports and beyond.
Importance of Parental Involvement in Youth Sports
Parental involvement plays a vital role in shaping a young athlete’s experience in sports; By providing emotional support and encouragement, parents help their children navigate challenges, such as limited playing time, with resilience. Positive reinforcement from parents fosters confidence and a growth mindset, enabling kids to focus on improvement rather than disappointment. Active involvement also helps parents understand team dynamics and coach decisions, allowing them to guide their child effectively. Moreover, parents can advocate for their child’s needs while teaching valuable life lessons like perseverance and teamwork. This support system ensures young athletes remain motivated and develop a lifelong passion for sports.
Objective of the Guide
The primary objective of The Benchwarmers Parents Guide is to empower parents with the tools and insights needed to support their children through the challenges of limited playing time in sports. By addressing emotional, psychological, and sociological factors, this guide aims to foster resilience, confidence, and a growth mindset in young athletes. It provides practical strategies for improving playing time, effective communication with coaches, and navigating team dynamics. The guide also emphasizes the importance of balancing sports with academics and mental well-being, ensuring parents can help their child thrive both on and off the field while maintaining a passion for the game.

Understanding the Challenges of Being a Benchwarmer
Being a benchwarmer can lead to emotional struggles, lower self-esteem, and reduced motivation in young athletes, impacting their overall sports experience and personal growth.
Psychological Impact on Young Athletes
Being a benchwarmer can lead to feelings of frustration, low self-esteem, and a lack of motivation in young athletes. Many struggle with emotional challenges, such as feeling undervalued or overlooked, which can affect their confidence and overall enjoyment of the sport. Some athletes may lose passion for the game or experience anxiety about their role on the team. It’s crucial for parents to recognize these emotional struggles and provide a supportive environment to help their children cope. Addressing these psychological impacts early can prevent long-term effects on their mental well-being and love for sports.
Sociological Factors Influencing Playing Time
Sociological factors, such as team dynamics, coach-player relationships, and social hierarchies, significantly influence playing time. Coaches may favor athletes with stronger reputations or those who align with their leadership style. Additionally, peer pressure and teammate preferences can affect who gets selected to play. External factors like socioeconomic status and access to resources can also impact opportunities. Understanding these social influences helps parents recognize that playing time isn’t solely based on skill. Addressing these dynamics requires open communication and advocacy to ensure fair chances for all athletes, fostering a more inclusive and supportive sports environment.
Common Reasons for Limited Playing Time
Young athletes may experience limited playing time due to various factors. Skill level and performance are primary considerations, as coaches often prioritize players who demonstrate readiness for game situations. Behavior, attitude, and teamwork skills also play a role, as coaches value players who contribute positively to the team dynamic. Additionally, positional needs and roster depth can influence playing time, with coaches making strategic decisions based on game requirements. In some cases, personal biases or misunderstandings may affect opportunities, highlighting the importance of open communication between players, parents, and coaches to address concerns and ensure fair chances for growth and participation.
The Role of Parents in Supporting Benchwarmers
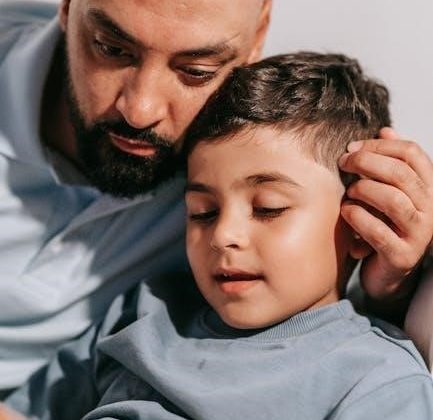
Parents play a crucial role in supporting young athletes who experience limited playing time, fostering resilience, and encouraging personal growth through positive communication and guidance;
Communicating Effectively with Your Child
Effective communication is vital for helping your child navigate the challenges of being a benchwarmer. Start by creating a safe, non-judgmental space where they feel comfortable sharing their feelings. Listen actively and empathetically, acknowledging their frustrations without being overly critical or dismissive. Encourage open dialogue by asking questions that help them reflect on their experiences, such as “How do you feel about your role on the team?” or “What do you think you can do to improve?” Avoid giving unsolicited advice; instead, guide them toward finding their own solutions. Validate their emotions and remind them that their worth isn’t defined by playing time. Foster a growth mindset by emphasizing effort, learning, and teamwork over outcomes. By doing so, you help build resilience and reinforce their love for the sport.
Building Resilience and Confidence
Helping your child build resilience and confidence is crucial when they’re facing limited playing time. Start by fostering a growth mindset, emphasizing that challenges are opportunities to improve. Praise their effort, persistence, and progress rather than just outcomes. Encourage them to focus on what they can control, such as their attitude and work ethic. Set realistic, achievable goals together, celebrating small victories along the way. Teach them to embrace feedback as a tool for growth and to view setbacks as temporary obstacles. Remind them of their value beyond sports, reinforcing their identity and self-worth; By nurturing resilience, you empower your child to stay motivated and confident, both on and off the field.
Setting Realistic Expectations
Setting realistic expectations is vital for helping your child navigate their role as a benchwarmer. Parents should acknowledge their child’s current skill level, the team’s dynamics, and the coach’s strategies. Align your expectations with your child’s goals, focusing on progress rather than perfection. Emphasize the importance of effort, sportsmanship, and teamwork over playing time. Avoid comparing your child to others, as this can create unnecessary pressure. Instead, encourage your child to concentrate on what they can control, such as their attitude, practice habits, and willingness to learn. By fostering a balanced perspective, you help your child stay motivated and positive, even when playing time is limited.
Understanding Coach and Team Dynamics
Understanding Coach and Team Dynamics helps parents grasp how roles are assigned, communicate effectively with coaches, and support their child within the team structure through collaboration and clear expectations.
Coach-Parent Relationships
Building a positive coach-parent relationship is crucial for supporting benchwarmers. Open communication fosters trust and collaboration, ensuring alignment on the athlete’s development. Parents should approach coaches respectfully, focusing on understanding their perspective rather than assigning blame. By addressing concerns constructively, parents can advocate effectively while maintaining a professional dynamic. Coaches value parents who support team decisions and encourage their child’s growth. A harmonious relationship benefits everyone, fostering an environment where athletes can thrive emotionally and athletically. It’s important to avoid confrontations and instead seek solutions that prioritize the child’s well-being and progress.
Team Hierarchy and Player Roles
Understanding team hierarchy and player roles is essential for parents of benchwarmers. Each team has a structure where players are assigned roles based on skill, experience, and performance. Starting players often receive more playing time, while bench players may have limited opportunities. It’s important for parents to help their child accept their role and see the value they bring to the team. Encouraging communication with coaches about their role can provide clarity and help athletes focus on improvement. Parents should emphasize teamwork and resilience, reinforcing that every role contributes to the team’s success. This perspective fosters a positive mindset and strengthens overall team cohesion.
Navigating Conflicts with Coaches
Navigating conflicts with coaches can be challenging for parents of benchwarmers. It’s important to remain calm and approach conversations with a constructive mindset. Parents should focus on understanding the coach’s perspective while advocating for their child. Open communication can help clarify expectations and address concerns about playing time. Encouraging your child to take initiative in discussing their role with the coach fosters independence. Conflicts can arise from differing opinions on player potential or team dynamics, but resolving them respectfully is key. Parents should avoid confrontational behavior and instead seek solutions that benefit both the child and the team. This approach promotes a positive relationship and supports your child’s growth as an athlete.
Mental and Emotional Well-Being
Supporting young athletes’ mental health is crucial, especially when facing challenges like limited playing time. Encourage open communication and foster resilience to help them cope with frustration and build confidence.
Signs of Low Self-Esteem in Athletes
Athletes experiencing low self-esteem may exhibit reluctance to participate, fear of failure, or negative self-talk. They might show frustration, disengage during practices, or avoid challenges. Parents should watch for signs like decreased confidence, lack of enthusiasm, or comparing themselves unfavorably to others. These behaviors often stem from feeling undervalued or overlooked, such as when benchwarmers feel their contributions aren’t recognized. It’s important to address these signs early to help young athletes rebuild their self-worth and maintain a positive relationship with sports. Open communication and encouragement can play a vital role in fostering resilience and helping them overcome emotional struggles.
Encouraging a Growth Mindset
Encouraging a growth mindset helps young athletes view challenges as opportunities for improvement rather than setbacks. Parents can foster this by praising effort, not just talent, and setting realistic, achievable goals. Emphasize progress over perfection, teaching athletes to embrace challenges and learn from failures. Focus on the process of improvement, such as skill development and teamwork, rather than just winning. Celebrate small successes and provide constructive feedback to build confidence. By instilling a growth mindset, athletes can develop resilience, perseverance, and a lifelong love for sports, even when facing limited playing time or other challenges.
Dealing with Frustration and Disappointment
Dealing with frustration and disappointment is a crucial part of supporting young athletes who experience limited playing time. Parents should acknowledge their child’s emotions, offering empathy and understanding. Encourage open conversations to help them express feelings without judgment. Teach healthy coping mechanisms, such as deep breathing or journaling, to manage frustration. Focus on effort rather than outcomes, highlighting progress and perseverance. Gradually expose them to challenging situations to build resilience. Remind them that setbacks are temporary and growth often comes from adversity. By fostering emotional regulation, parents can help their child navigate disappointment constructively and maintain a positive outlook on their athletic journey.
Strategies for Improving Playing Time
Focus on enhancing athletic skills, attending extra practices, and seeking feedback from coaches. A positive attitude, dedication, and continuous improvement can increase opportunities to play.
Enhancing Athletic Skills
Improving athletic skills is crucial for increasing playing time. Encourage focused training sessions, targeting areas like speed, agility, and strength. Work with coaches to identify weaknesses and create personalized drills. Consistent practice helps build confidence and competence. Remind your child to stay committed and patient, as progress takes time. Celebrate small improvements to maintain motivation. Additionally, mental preparation and a positive attitude can enhance performance. By addressing skill gaps and dedicating time to practice, your child can become a more valuable asset to the team, fostering opportunities for increased participation and success in their sport.
Understanding the Importance of Practice
Practice is the cornerstone of improvement in sports. Regular, focused training helps young athletes develop and refine their skills, increasing their chances of earning more playing time. Consistent practice builds discipline, mental toughness, and a deeper understanding of the game. Encourage your child to set aside time daily for drills and exercises, even outside of team sessions. Coaches often favor players who demonstrate dedication and progress through practice. Emphasize the value of persistence and hard work, as these qualities are essential for overcoming challenges and achieving success in sports. By prioritizing practice, your child can improve their performance and confidence.
Developing a Positive Attitude
Instilling a positive attitude in young athletes is crucial for their growth and resilience. Encourage your child to embrace challenges as opportunities for improvement rather than setbacks. Teach them to focus on effort, not just outcomes, and to view bench time as a chance to learn and observe. Foster gratitude for the chance to participate and improve. Positive attitudes help athletes stay motivated, even when playing time is limited. Remind them that success is not just about performance but also about perseverance and sportsmanship. By nurturing a positive mindset, your child can overcome frustrations and develop a lifelong love for the game.

Communication with Coaches and Trainers
Open dialogue with coaches and trainers is vital for understanding your child’s role and opportunities for growth. Encourage collaboration and mutual respect to foster a supportive environment.
Asking the Right Questions
When communicating with coaches, parents should ask open-ended, constructive questions to understand their child’s role and opportunities for improvement. Questions like, “What can my child do to earn more playing time?” or “How can we support their development?” foster collaboration. Avoid confrontational tone and focus on growth. Parents should also inquire about specific skills or areas needing attention, showing willingness to help their child improve. By asking the right questions, parents can gain insights into their child’s progress and build a positive relationship with the coaching staff, ensuring a supportive environment for their young athlete.
Understanding Feedback from Coaches
Understanding feedback from coaches is crucial for helping your child grow as an athlete and a person. Coaches often provide insights into areas needing improvement, such as skills, effort, or teamwork. Parents should listen actively and focus on constructive criticism rather than taking feedback personally. It’s important to differentiate between opinions and facts, ensuring feedback is specific and actionable. Encourage your child to use this feedback to set goals and improve. By fostering open communication and maintaining a positive attitude, parents can help their child navigate feedback effectively, promoting personal and athletic development while balancing sports with academic responsibilities. This support is key to their long-term success.
Advocating for Your Child
Advocating for your child as a benchwarmer involves understanding their role and communicating effectively with coaches. Parents should foster open dialogue, asking questions about their child’s contribution to the team and areas for improvement. It’s important to balance advocacy with respect for the coach’s decisions, ensuring your child feels supported without creating conflict. Encourage your child to take ownership of their growth, focusing on skill development and positive attitude. By advocating thoughtfully, you help your child navigate their role with resilience and confidence, fostering a mindset that values effort and learning over playing time alone. This approach supports their long-term success in sports and beyond.

Supporting Your Child’s Passion for Sports
Encourage your child’s love for sports by fostering a positive environment, celebrating effort, and guiding them to set achievable goals. Provide unwavering support and resources to help them thrive.
Fostering a Love for the Game
Helping your child develop a genuine passion for sports is crucial, even when they’re not seeing much playing time. Encourage their curiosity and interest by focusing on the enjoyment of the game rather than just outcomes. Attend practices, ask about their experiences, and celebrate their efforts, not just successes. Provide resources like instructional videos or books to deepen their understanding. Foster a growth mindset by linking challenges to improvement opportunities. Let them see sports as a journey of skill development and camaraderie. By nurturing this love, you’ll help them stay motivated and resilient, even when facing limited playing time.
Encouraging Teamwork and Camaraderie
Teach your child the value of teamwork by emphasizing that every role, whether on the field or the bench, contributes to the team’s success. Encourage them to support teammates, celebrate others’ achievements, and communicate positively. Attend practices and games, cheering not just for their performance but for the team’s collective effort. Discuss how being a good teammate builds trust and camaraderie, which are essential for long-term success in sports and life. By fostering this mindset, your child will learn that teamwork transcends individual playing time, helping them stay engaged and positive, even when they’re not in the spotlight.
Helping Your Child Set and Achieve Goals
Guide your child in setting realistic, achievable goals focused on improvement rather than just playing time. Encourage them to identify specific areas for growth, such as skill development or teamwork. Help them break these goals into smaller, manageable steps and track progress together. Celebrate their effort and resilience, not just outcomes, to build confidence. Teach your child to embrace challenges as opportunities to learn and improve. By fostering a growth mindset, you empower them to stay motivated and focused, even when facing limited playing time. This approach helps them develop a lifelong commitment to personal and athletic development.

Physical and Mental Health Considerations
Monitor your child’s physical health and mental well-being, ensuring they maintain proper hydration, nutrition, and sleep. Watch for signs of burnout or stress, addressing concerns promptly to support their overall development.
Preventing Burnout in Young Athletes
Preventing burnout in young athletes is crucial for their long-term physical and mental well-being. Recognize early signs such as decreased enthusiasm, fatigue, or persistent injuries. Encourage a balance between sports and other activities to avoid overexertion. Ensure your child gets adequate rest, proper nutrition, and time for recovery. Foster a growth mindset, emphasizing effort over outcomes, to reduce pressure. Encourage open communication about their feelings and concerns. Support their passion for the sport while setting realistic expectations. By prioritizing their overall health, you can help them maintain a positive relationship with athletics and avoid the risks of burnout.
Managing Injuries and Recovery
Managing injuries and recovery is essential to ensure young athletes return to sports safely and effectively. Immediate care for injuries, such as applying ice or seeking professional diagnosis, can prevent long-term damage. Encourage rest and gradual return to activity to avoid re-injury. Proper nutrition and hydration support healing, while mental support helps athletes cope with downtime. Open communication with coaches and trainers is vital to ensure recovery plans are followed. Focus on rehabilitation exercises to rebuild strength and flexibility. Prioritize your child’s well-being over competition, fostering a patient and supportive environment for full recovery. This approach promotes resilience and safeguards their future in sports.
Balancing Sports and Academics
Balancing sports and academics requires careful time management and prioritization. Encourage your child to create a structured schedule, allocating specific hours for study, practice, and rest. Open communication with teachers and coaches can help identify areas needing extra attention. Parents should monitor workload and ensure academic commitments are met alongside athletic pursuits. Foster a mindset where education is valued equally with sports, emphasizing the importance of both for long-term success. By setting clear goals and maintaining organization, young athletes can thrive in both realms, ensuring their development is well-rounded and balanced.

Resources for Parents and Athletes
Explore recommended reading, online forums, and professional counseling services to support your child. Utilize educational guides and community platforms for shared experiences and expert advice.
Recommended Reading and Guides
Discover essential resources like The Benchwarmers Parents Guide and other literature offering insights into youth sports dynamics. Explore online forums and communities where parents share experiences and strategies. Professional counseling services can also provide tailored guidance for supporting young athletes. These resources help foster resilience, improve communication, and navigate challenges effectively; They offer practical advice on enhancing skills, understanding coach feedback, and maintaining a healthy balance between sports and academics. By leveraging these tools, parents can empower their children to thrive both on and off the field, ensuring a positive and rewarding sports experience.
Online Communities and Forums
Engage with online communities and forums where parents and athletes share experiences and strategies for navigating limited playing time. Platforms like youth sports forums and social media groups offer valuable insights and emotional support. Many communities discuss challenges such as benchwarming, providing practical advice and encouragement. These spaces allow parents to connect with others facing similar situations, fostering a sense of camaraderie and shared understanding. By participating in these discussions, parents can gain new perspectives and strategies to support their child’s athletic journey effectively. These resources are invaluable for building resilience and confidence in young athletes.
Professional Counseling Services
Professional counseling services can play a crucial role in supporting young athletes and their families. Sports psychologists and counselors specialize in addressing the emotional and psychological challenges faced by benchwarmers, such as low self-esteem, frustration, and anxiety. These professionals provide tailored strategies to help athletes cope with limited playing time and build resilience. Additionally, counseling services can improve communication between parents and children, fostering a supportive home environment. For parents seeking guidance, counseling offers practical advice on navigating coach relationships and encouraging their child’s passion for sports. Utilizing these resources ensures a holistic approach to fostering emotional well-being and long-term success in athletics.
Concluding, The Benchwarmers Parents Guide emphasizes the importance of fostering resilience, open communication, and emotional well-being in young athletes. Parental support is key to their long-term success in sports.
Summarizing Key Takeaways
This guide underscores the importance of fostering resilience, communication, and emotional well-being for young athletes facing limited playing time. Parents play a pivotal role in helping children navigate challenges, build confidence, and maintain a passion for sports. By setting realistic expectations, encouraging growth mindsets, and advocating effectively, parents can support their child’s journey. Open dialogue with coaches and fostering teamwork are essential. Ultimately, balancing sports with mental health and academics ensures a well-rounded, fulfilling experience for young athletes.
Encouraging Long-Term Success
Encouraging long-term success involves fostering a mindset that prioritizes skill development, resilience, and a genuine passion for sports. Parents should emphasize effort over outcomes, celebrating progress and perseverance. By helping athletes set achievable goals and focus on improvement, parents cultivate a growth mindset. It’s essential to balance sports with academics and mental well-being, ensuring a holistic approach to development. Encouraging teamwork and camaraderie strengthens social bonds, while maintaining open communication with coaches ensures alignment on goals. Ultimately, nurturing a love for the game and supporting continuous growth empowers young athletes to thrive both on and off the field, fostering lifelong success.
Final Words of Encouragement
As you navigate the challenges of being a benchwarmer, remember that sports are about more than playing time—they’re about growth, camaraderie, and resilience. Encourage your child to embrace the journey, focusing on effort over outcomes. Celebrate small victories, like improved skills or teamwork, and remind them that every role on the team matters. Foster a mindset that values perseverance and learning from setbacks. By maintaining a positive attitude and balancing sports with academics and well-being, your child can thrive beyond the field. Trust in their potential, support their passion, and guide them toward a future where sports shape their character and confidence.