helianas guide to monster hunting
Embark on thrilling adventures with Heliana’s Guide to Monster Hunting, a comprehensive 600-page supplement for 5E campaigns․ Discover innovative tracking, harvesting, and crafting mechanics, plus 11 unique monster hunt adventures designed for scalability and excitement․ Perfect for players and DMs seeking to elevate their D&D experience with epic challenges and immersive gameplay․
Overview of the Guide
Heliana’s Guide to Monster Hunting is a 600-page supplement designed to elevate your 5E campaigns with fresh mechanics and thrilling adventures․ This comprehensive resource blends exploration, combat, and creativity, offering players and DMs a dynamic way to engage with monsters․ The guide introduces detailed tracking and harvesting systems, allowing characters to craft powerful items from defeated foes․ It also features 11 unique monster hunt adventures, each scalable to different levels, ensuring accessibility for diverse playstyles․ With a focus on downtime activities and character optimization, the guide encourages strategic planning and teamwork․ Whether you’re a seasoned DM or a curious player, Heliana’s Guide promises to enrich your D&D experience with epic challenges and limitless possibilities․
Importance of Monster Hunting in 5E Campaigns
Monster hunting adds depth and excitement to 5E campaigns by creating meaningful challenges and rewarding player creativity․ It shifts the narrative from passive encounters to active pursuits, where players must investigate, prepare, and execute strategies․ This dynamic approach fosters collaboration and character development, as players optimize their builds and utilize downtime effectively․ The integration of harvesting and crafting systems ties combat success to resource management, enhancing immersion․ Additionally, unique twists on classic monsters keep the game fresh and unpredictable, ensuring memorable experiences for both players and DMs․ By prioritizing monster hunting, campaigns become more engaging, strategic, and story-driven, offering endless opportunities for epic adventures and character growth․
Key Features of Heliana’s Guide
Heliana’s Guide offers detailed tracking and hunting mechanics, a robust harvesting and crafting system, and unique cooking recipes using monster parts, enhancing 5E gameplay with versatility․
Tracking and Hunting Mechanics
Heliana’s Guide introduces intricate tracking and hunting mechanics, enhancing immersion in 5E campaigns․ Players must investigate creatures to uncover weaknesses, plan strategic attacks, and utilize environmental clues․ The system emphasizes preparation and teamwork, making each hunt a dynamic experience․ With scalable challenges, these mechanics cater to diverse party levels, ensuring thrilling encounters for all; Integrated with character builds and downtime activities, tracking and hunting become core elements of adventure, rewarding creativity and strategy․ This innovative approach transforms monster hunting into a multifaceted gameplay pillar, offering depth and excitement for both new and veteran players․
Harvesting and Crafting System
Heliana’s Guide offers a detailed harvesting and crafting system, allowing players to utilize monster parts in creative ways․ From crafting powerful gear to brewing potions, this system adds depth to gameplay․ Players can harvest materials post-combat, which are then used in recipes to create unique items․ The guide provides extensive lists of components and crafting rules, making it easy for DMs to integrate these mechanics․ Downtime activities are enriched as characters prepare for future hunts by crafting essential tools․ This system encourages strategic planning and resource management, enhancing the overall campaign experience․ With countless possibilities, the harvesting and crafting system becomes a central pillar of adventure, offering endless opportunities for creativity and progression․
Cooking and Utilizing Monster Parts
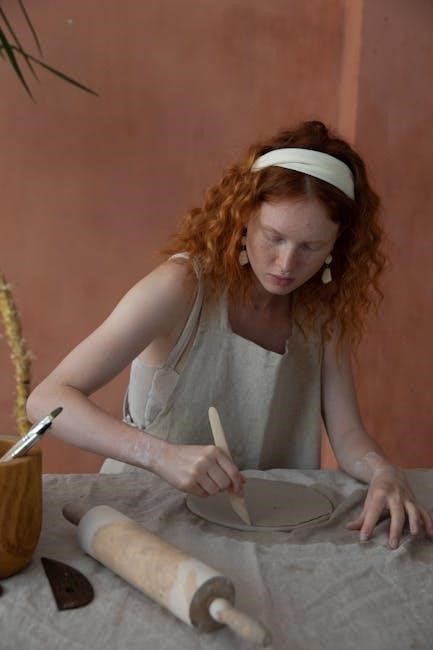
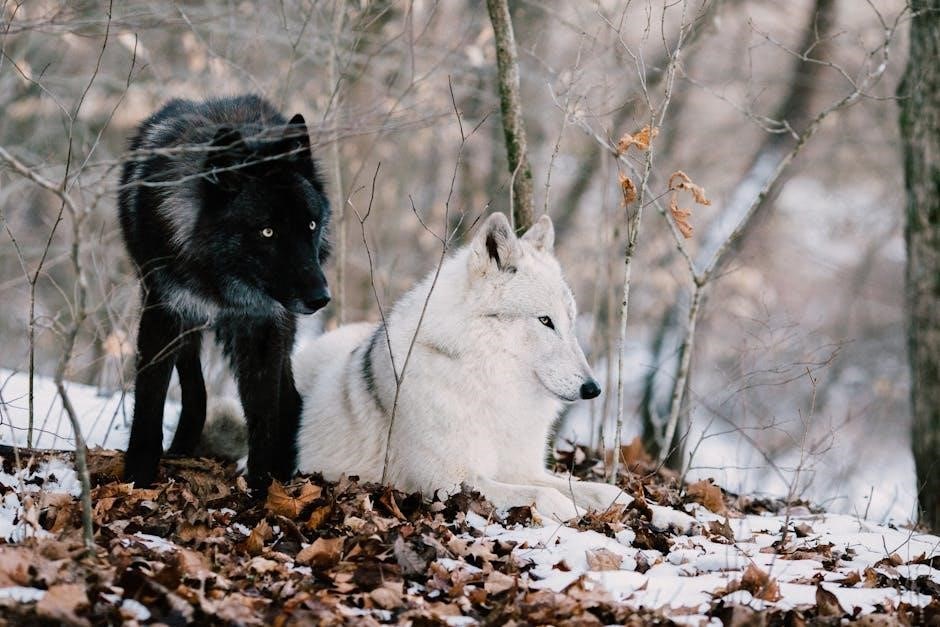
Heliana’s Guide introduces a unique cooking system that allows players to transform monster parts into delicious and potent dishes․ This feature expands the utility of harvested materials, offering new ways to gain advantages in and out of combat․ From grilled dragon meat to wolf stew, each recipe provides unique bonuses, such as increased strength or resistance to certain elements․ The guide includes detailed cooking mechanics, making it easy for DMs to integrate this system into their campaigns; Players can experiment with different ingredients and recipes, adding a culinary layer to their monster-hunting adventures․ This creative system not only enhances gameplay but also deepens the connection between characters and the world they inhabit, making every hunt a flavorful experience․

Monster Hunts and Adventures
Heliana’s Guide offers 11 unique monster hunt adventures, each scalable to various levels․ Players face thrilling challenges with creative twists on classic monsters, ensuring diverse and exciting encounters․
11 Unique Monster Hunt Adventures
Heliana’s Guide presents 11 distinct monster hunt adventures, each crafted with scalability in mind․ These adventures are designed to accommodate a wide range of levels, ensuring that both new and seasoned players can engage in thrilling encounters․ Each hunt is meticulously detailed, offering unique challenges and creative twists on classic monsters․ Players will encounter formidable foes, from towering beasts to cunning adversaries, each with their own strengths and weaknesses․ The adventures are structured to allow Dungeon Masters to seamlessly integrate them into their campaigns, providing memorable experiences that enhance the overall narrative․ With diverse settings and objectives, these monster hunts promise endless excitement and opportunities for heroism, making them a standout feature of Heliana’s Guide․
Scalability for Different Levels
Heliana’s Guide ensures that every monster hunt is accessible and challenging for parties of all levels․ The guide includes scalable encounters, allowing Dungeon Masters to adjust difficulty based on their players’ strengths․ Whether you’re guiding a group of low-level adventurers or seasoned veterans, the adventures are designed to adapt seamlessly․ Key challenges and enemy stats are tailored to match the party’s capabilities, ensuring balanced and engaging combat․ This flexibility makes the guide versatile for any campaign, providing epic experiences for players at every stage of their journey․ The scalability feature enhances replayability, giving DMs the tools to revisit adventures with higher-level parties for fresh challenges and rewards․

Twists on Classic Monsters
Heliana’s Guide breathes new life into iconic creatures by introducing fresh twists and reimagined mechanics․ Classic monsters like dragons, liches, and vampires are redefined with unique abilities, behaviors, and weaknesses, offering players unexpected challenges․ These twists ensure that even seasoned adventurers will encounter surprises, keeping combat dynamic and engaging․ The guide also provides alternative lore and backstories for these creatures, enriching the world and giving DMs more narrative tools․ By reinventing familiar foes, Heliana’s Guide creates a sense of discovery and excitement, making even the most well-known monsters feel new and formidable․ This approach keeps players on their toes and enhances the overall immersion in the game, ensuring memorable encounters and epic showdowns․
Character Optimization for Monster Hunting
Optimize your characters for crafting and combat with Heliana’s Guide․ Utilize downtime effectively, craft powerful gear, and leverage NPCs for inspiration, ensuring your party is ready to hunt epic monsters․
Building Characters for Crafting and Combat
Building characters for both crafting and combat is essential in Heliana’s Guide to Monster Hunting․ Players must balance their character’s skills to excel in battle and crafting․ Downtime becomes crucial for preparing gear and utilizing harvested monster parts․ The guide emphasizes scaling character builds to tackle epic monsters, ensuring crafted items remain relevant as the campaign progresses․ Whether focusing on combat prowess or becoming a master crafter, the system allows for diverse playstyles․ NPCs can inspire unique crafting ideas, adding depth to character development․ This approach ensures every character, from warriors to artisans, plays a vital role in monster hunting adventures․ The guide seamlessly integrates crafting and combat, making it a must-have for players seeking a dynamic 5E experience․
Role of Downtime in Preparation
Downtime plays a critical role in Heliana’s Guide to Monster Hunting, serving as a cornerstone for preparation and strategy․ Players must utilize this time to craft gear, study monster weaknesses, and plan their next moves․ The guide emphasizes the importance of preparation, as hunting epic monsters requires more than just combat prowess․ Crafting and harvesting systems rely heavily on downtime, allowing players to create powerful items and tools․ Additionally, downtime fosters collaboration, enabling parties to strategize and adapt their tactics․ This focus on preparation elevates the game, making each hunt feel deliberate and rewarding․ By integrating downtime into the core mechanics, the guide ensures that players are always ready for the challenges ahead, enhancing the overall campaign experience․
Using NPCs for Crafting Inspiration

Heliana’s Guide to Monster Hunting cleverly incorporates NPCs to inspire and guide players in crafting․ These non-playable characters, such as skilled artisans or seasoned hunters, provide valuable insights and requests, helping players discover new crafting opportunities․ By engaging with these NPCs, players gain direction for creating specific items or tools, enhancing their preparation for monster hunts․ This feature ensures that crafting feels organic and integrated into the campaign world․ The guide encourages DMs to use these interactions to deepen immersion, making the crafting system more engaging and connected to the game’s narrative․ This approach not only enriches gameplay but also helps players feel more invested in their characters’ roles as monster hunters and crafters․

Community and Development
Heliana’s Guide to Monster Hunting fosters a vibrant community through Kickstarter updates, live streams, and beta testing feedback․ Developers actively engage with fans, ensuring the supplement reflects player needs and creativity, while transparent updates keep backers informed about its progress and evolution․
Kickstarter Campaign and Funding
Loot Tavern successfully funded Heliana’s Guide to Monster Hunting through a highly anticipated Kickstarter campaign․ The project garnered significant attention from the D&D community, with backers eager to enhance their 5E games․ The campaign offered exclusive rewards, including early access to content and unique in-game items․ Its success was driven by the supplement’s promise of innovative mechanics and engaging adventures, appealing to both players and Dungeon Masters․ The campaign’s transparency and regular updates fostered trust and excitement, ensuring its goals were met and paving the way for its release as a premium 5E resource․
Streams and WIP Previews
The development of Heliana’s Guide to Monster Hunting was enriched by engaging streams and WIP previews, offering glimpses into its creation․ These live streams showcased artwork, such as the WIP of a main antagonist, and provided insights into the supplement’s design process․ Fans were invited to participate, sharing feedback that influenced the final product․ Regular updates and sneak peeks fostered a sense of community, building anticipation for the guide’s release․ This transparency not only excited players and DMs but also demonstrated the creators’ commitment to crafting a high-quality, community-driven resource for 5E campaigns․

Feedback from Beta Testing
Beta testing for Heliana’s Guide to Monster Hunting yielded valuable insights, shaping the final product․ Players and DMs praised the guide’s innovative mechanics, particularly the hunt-and-fight structure, which added depth to encounters․ Many highlighted the scalability of monster hunts, making them accessible to various party levels․ Feedback also emphasized the importance of downtime for crafting and character preparation, which enhanced immersion․ Some testers suggested minor adjustments for clarity in the harvesting and crafting systems, but overall, the guide was well-received for its creativity and usability․ This feedback played a crucial role in refining the supplement, ensuring it met the community’s expectations for a dynamic and engaging D&D experience․
Rules and Gameplay
Heliana’s Guide introduces dynamic hunt-and-fight mechanics, allowing players to track, battle, and harvest monsters․ Epic encounters enable leveling up, while integration with D&D Beyond enhances gameplay seamlessly․
Hunt and Fight Mechanics
Heliana’s Guide revolutionizes combat with structured hunt-and-fight mechanics․ Players investigate monsters to uncover weaknesses, plan strategic attacks, and execute hunts seamlessly․ Each encounter is divided into two phases: the hunt, where tracking and preparation are key, and the fight, where tactical combat shines․ The system encourages teamwork and creativity, with dynamic scaling to suit various party levels․ Monsters are crafted with unique twists, offering fresh challenges and epic showdowns․ The guide also integrates harvesting mechanics post-combat, allowing players to craft powerful gear and items․ This blend of strategy, exploration, and combat creates a immersive experience, making every monster hunt feel rewarding and memorable in your 5E campaign․
Leveling Up with Epic Monsters
Epic monsters in Heliana’s Guide offer unparalleled challenges and rewards․ Defeating these formidable foes grants unique resources for crafting powerful gear and unlocks advanced abilities․ Each epic monster is designed to push players to their limits, with battles that demand strategic planning and skill․ The guide provides scalable encounters, ensuring epic monsters remain relevant as characters grow stronger․ Harvesting epic monster parts allows for crafting legendary items, enhancing character progression․ The integration with D&D Beyond streamlines managing these epic showdowns, making it easier for DMs to track monster stats and rewards․ This system creates a rewarding loop of challenge, victory, and growth, elevating the 5E experience for both players and DMs․ Epic monsters are the pinnacle of adventure in Heliana’s Guide, offering unforgettable battles and lasting character improvements․
Integration with D&D Beyond
Heliana’s Guide to Monster Hunting seamlessly integrates with D&D Beyond, enhancing your 5E experience․ The guide’s content, including its innovative tracking, harvesting, and crafting mechanics, is available digitally on the platform․ Players and DMs can access character builder support for crafting and harvesting rules, ensuring easy implementation․ The integration also features interactive tools for managing monster hunts and adventures directly within D&D Beyond․ This allows for streamlined gameplay, with all the guide’s epic monsters, scalable adventures, and crafting systems readily accessible․ Whether you’re building a character or preparing a campaign, Heliana’s Guide on D&D Beyond offers a cohesive and user-friendly experience, making it easier to bring its exciting content to your table․
Heliana’s Guide to Monster Hunting is a must-have supplement for elevating your 5E campaigns․ With thrilling adventures, innovative mechanics, and endless creativity, it enhances every aspect of your game․
Final Thoughts on the Guide
Heliana’s Guide to Monster Hunting stands out as a transformative resource for 5E enthusiasts․ Its blend of detailed mechanics, creative crafting systems, and engaging adventures ensures a fresh layer of depth to any campaign․ Players and DMs alike will appreciate the emphasis on strategy, customization, and storytelling․ The guide’s scalability and integration with platforms like D&D Beyond make it a versatile tool for all playstyles․ Whether you’re crafting unique gear or facing legendary monsters, this guide offers endless opportunities to enrich your D&D experience․ It’s a testament to community-driven design, proving that monster hunting can be both thrilling and rewarding in the world of 5E․
Enhancing Your 5E Campaign
Heliana’s Guide to Monster Hunting is a 600-page supplement that elevates your 5E campaign with innovative mechanics and rich content․ It introduces detailed tracking, harvesting, and crafting systems, allowing players to create unique gear and strategize encounters․ The guide offers 11 scalable monster hunt adventures, ensuring excitement for all levels․ By integrating with D&D Beyond, it seamlessly enhances gameplay․ This comprehensive resource not only adds depth to your world but also enriches the role-playing experience, making it a must-have for both players and DMs seeking to expand their 5E adventures with creativity and strategy․

About the Author
Heliana, a visionary designer and passionate D&D enthusiast, created this guide to bring depth and excitement to 5E campaigns․ Her expertise in crafting and monster design shines through․
Heliana and Her Vision for Monster Hunting
Heliana, a passionate D&D enthusiast and skilled designer, envisioned a guide that would redefine monster hunting in 5E campaigns․ Drawing from her expertise in crafting and monster lore, she aimed to create a system where players could immerse themselves in the thrill of the hunt, from tracking to crafting․ Her vision emphasizes strategic preparation, rewarding creativity, and integrating seamlessly with existing D&D mechanics․ By blending epic adventures with practical gameplay enhancements, Heliana’s work offers a fresh perspective, making monster hunting a core aspect of any campaign․