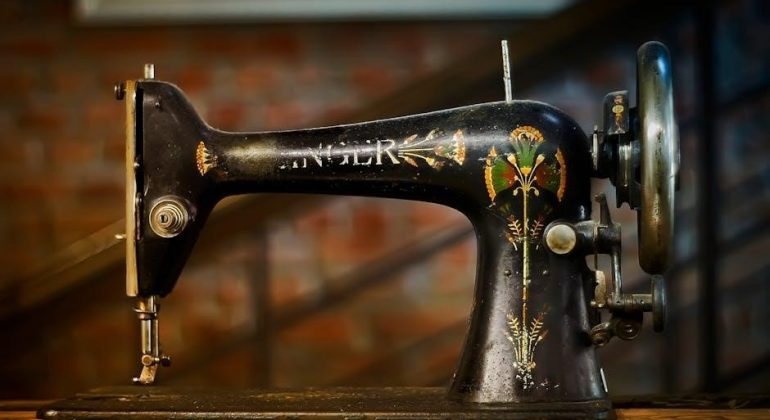
Welcome to the Singer Sewing Machine User Guide, your comprehensive resource for mastering your machine. Discover tips, troubleshooting, and maintenance advice to enhance your sewing experience.
1.1 Importance of the User Guide
The Singer Sewing Machine User Guide is an essential tool for optimizing your sewing experience. It provides step-by-step instructions for setting up, operating, and maintaining your machine. Whether you’re a beginner or an experienced sewer, the guide helps you understand the machine’s features, troubleshoot common issues, and ensure proper maintenance. It also highlights safety precautions and offers tips for achieving professional results. By following the guide, you can maximize your machine’s performance, extend its lifespan, and enhance your sewing skills. Singer has shifted to digital manuals as part of their Green Initiative, making it easier to access the latest updates and instructions online. This guide is your key to unlocking the full potential of your Singer sewing machine.
1.2 Key Features of Singer Sewing Machines
Singer sewing machines are renowned for their innovative features designed to enhance sewing efficiency and creativity. Key features include automatic threading systems, variable stitch length and width adjustments, and a free arm for sewing cuffs and sleeves. Many models offer multiple stitch options, including decorative and stretch stitches, catering to diverse fabrics; Some machines feature heavy-duty metal frames and powerful motors, ideal for thick materials like leather and denim; Additionally, Singer machines often come with customizable settings, allowing users to tailor their sewing experience. These features, combined with user-friendly interfaces, make Singer machines versatile tools for both beginners and experienced sewers, ensuring high-quality results across various projects.
Parts Identification
Identify essential components like the spool pin, tension discs, and bobbin case. Understand the free arm, feed dogs, and stitch selectors to optimize your sewing experience effectively.
2.1 External Components of the Machine
The Singer sewing machine features a durable design with key external components. The spool pin holds the thread, while the tension discs regulate thread tightness. The stitch selector allows choosing stitch types, and the power switch controls operation. The free arm enables sewing cylindrical items like sleeves. Additional components include the bobbin winder, thread take-up lever, and reverse stitch lever. Understanding these parts is essential for effective machine operation and maintenance. Regularly inspecting and cleaning these components ensures optimal performance. Familiarize yourself with their locations and functions to maximize your sewing experience. Proper care of these external parts enhances durability and sewing accuracy, making your Singer machine a reliable companion for all projects.
2.2 Internal Components and Their Functions
The internal components of your Singer sewing machine are crucial for its operation. The bobbin case holds the bobbin, ensuring proper thread delivery. The feed dogs move fabric smoothly under the needle, maintaining even stitch formation. The shuttle hook loops the thread around the bobbin thread, creating stitches. The gear system transmits power from the motor to the needle and other moving parts. These components work together to ensure consistent stitching and fabric movement. Understanding their roles helps in identifying potential issues. Regular maintenance, like cleaning and oiling (if applicable), keeps these parts functioning optimally. Proper care extends the machine’s lifespan and ensures reliable performance for all your sewing projects. Always refer to the manual for specific maintenance instructions tailored to your Singer model.
Setting Up Your Singer Sewing Machine
Setting up your Singer sewing machine involves unpacking, inspecting, and threading. Follow the included Quick Start Guide for initial steps to ensure smooth operation and prevent issues.
3.1 Unpacking and Initial Inspection
Unpacking your Singer sewing machine is an exciting first step. Ensure you have a clean, stable workspace. Carefully remove the machine from its box and packaging materials. Inspect the machine for any visible damage or scratches. Check the included accessories, such as the power cord, foot pedal, and sewing feet, to ensure nothing is missing. Plug in the machine to test basic functions, like turning it on and checking the stitch selector. If any damage is found, contact customer support immediately. Refer to the Quick Start Guide for initial setup instructions. Proper inspection ensures your machine is ready for use and prevents future issues. Proceed to threading and bobbin installation once satisfied with your machine’s condition.
3.2 Threading the Machine
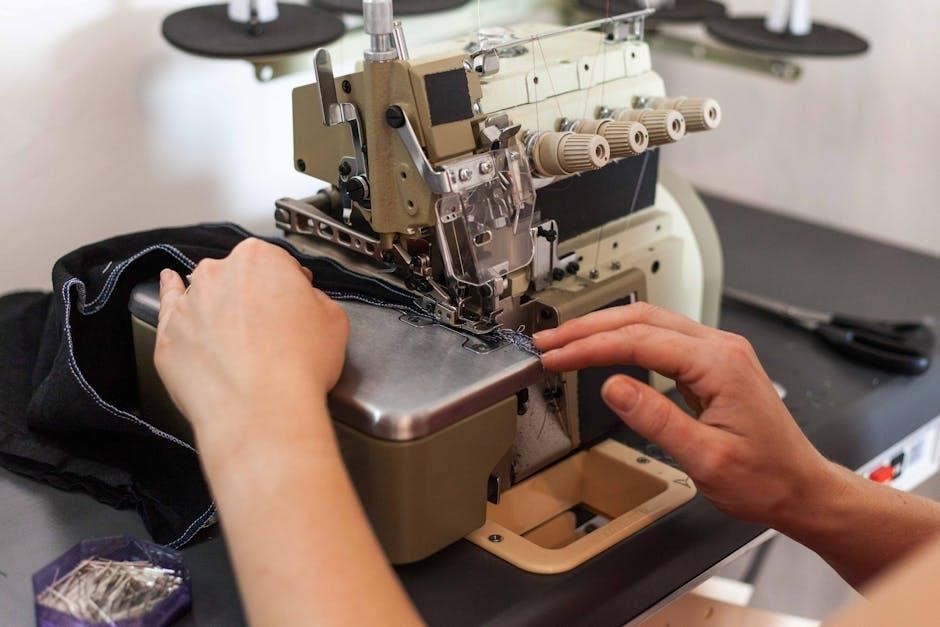
Threading your Singer sewing machine is essential for smooth operation. Begin by placing the spool of thread on the spool pin. Guide the thread through the tension discs, ensuring it clicks into place. Follow the machine’s thread path, looping the thread around the take-up lever and through the needle’s eye. Use the automatic needle threader if available. Gently pull the thread to remove any slack and create a small tail. Always use high-quality thread and genuine Singer needles for optimal performance. Proper threading ensures consistent stitch quality and prevents issues like thread breakage. If unsure, refer to the Quick Start Guide or online tutorials for visual guidance. Correct threading is the foundation of successful sewing.
3.3 Winding and Installing the Bobbin
Winding and installing the bobbin correctly is crucial for smooth stitching. Begin by placing an empty bobbin on the winder and secure it. Thread the machine as described earlier, ensuring the thread passes through the tension disc. Wind the thread onto the bobbin by pressing the foot pedal gently. Stop when the bobbin is about 80% full. Trim the excess thread, leaving a small tail. Remove the bobbin and insert it into the bobbin case, ensuring it sits properly. Pull the thread gently to seat the bobbin. Close the bobbin case and test the tension by gently tugging the thread. Properly wound and installed bobbins prevent jams and ensure even stitching. Always use the correct thread type for your fabric to avoid issues. Regularly check the bobbin for damage or wear. Replace it if necessary to maintain optimal performance. This step ensures your machine runs smoothly and consistently, reducing the risk of thread breakage or uneven stitches. By following these steps, you can achieve professional-quality results with your Singer sewing machine. Always refer to your user guide for specific model instructions. Correct bobbin installation is key to successful sewing projects. Ensure the bobbin is seated correctly to avoid machine jamming or skipped stitches. If you experience issues, consult the troubleshooting section or Singer support resources. Proper maintenance of the bobbin and its case will extend the life of your machine and enhance your sewing experience. Never overlook the importance of this step, as it directly impacts the quality of your work. Happy sewing! For further assistance, visit Singer’s official website or download the complete user manual for detailed guidance. Remember to use genuine Singer accessories for the best results.
3.4 Adjusting Thread Tension
Proper thread tension is essential for consistent stitching. Begin by threading the machine as described earlier. Locate the tension dials, typically on the front or top of the machine. Turn the dials to increase or decrease tension. For most fabrics, a balanced tension is ideal. Test the tension by pulling the thread gently; it should feel firm but not overly tight; If the thread is too loose, stitches may be uneven. If too tight, the thread may break. Adjust in small increments, then sew a test line to check the results. Ensure the bobbin tension is also balanced for smooth operation. Avoid using damaged or low-quality thread, as it can disrupt tension. Regularly clean the tension discs to prevent thread buildup. For specific guidance, refer to your machine’s manual or Singer’s online resources. Proper tension adjustment ensures professional-quality stitches and extends the machine’s lifespan. Always test on scrap fabric before sewing your final project. If issues persist, consult the troubleshooting section or contact Singer support.
Basic Sewing Operations
Master essential sewing tasks with ease. Learn to sew straight lines, backstitch, and create buttonholes. Understand stitch selection and basic techniques for consistent, professional results.
4.1 Selecting the Right Stitch Type
Selecting the right stitch type is crucial for achieving professional results. Singer sewing machines offer various stitches, including straight, zigzag, and decorative options. For everyday sewing, the straight stitch is ideal for seaming fabrics. The zigzag stitch is perfect for preventing fraying on raw edges. Decorative stitches add a creative touch to your projects. Always refer to your machine’s stitch guide to explore the full range of options. Proper stitch selection ensures durability and enhances the visual appeal of your work. Experiment with different stitches to find the best match for your fabric type and sewing goal.
4.2 Sewing Straight Lines and Basic Stitches
Sewing straight lines and basic stitches is fundamental for any sewing project. Start by aligning the fabric edge with the machine’s edge guide or markings. Use the straight stitch for seaming and the backstitch for secure starts and ends. For accuracy, engage the walking foot or Teflon foot for smooth fabric movement. Keep the fabric taut but not stretched, and maintain a steady pace. Avoid pulling the fabric, as this can cause uneven stitching. Practice on scrap fabric to master straight-line sewing before working on your final project. This ensures clean, professional results and builds confidence in your sewing skills.
4.3 Backstitching for Secure Seams
Backstitching is essential for securing seams, especially at the beginning and end of your stitching. To backstitch, start sewing forward, then press the reverse stitch button or lever to sew a few stitches backward. This reinforces the seam and prevents unraveling. On Singer machines, the backstitch function is typically easy to access, ensuring strong starts and finishes. For heavier fabrics, consider using a shorter stitch length for added security. Avoid pulling the fabric while backstitching, as this can misalign the stitches. Proper backstitching ensures durability and professional-looking results, making it a crucial technique for all sewing projects. Regular practice will help you master this fundamental skill.
4.4 Creating Buttonholes
Creating buttonholes is a breeze with Singer sewing machines, which often feature a one-step buttonhole setting. To begin, measure and mark the desired buttonhole location on your fabric. Select the buttonhole stitch on your machine and adjust the size if necessary. Place the fabric under the presser foot, aligning the mark with the needle. Gently start sewing, letting the machine automate the process. For manual machines, you may need to guide the fabric back and forth to create the hole. Once complete, trim the excess thread and reinforce the edges with a zigzag stitch. Singer machines simplify buttonhole creation, ensuring uniform and professional-looking results every time. This feature is especially useful for garments and home decor projects. Regular practice enhances precision and speed.
Maintenance and Care
Regularly clean your Singer sewing machine to prevent dust buildup. Oil internal parts if applicable, and store it in a dry place to maintain optimal performance.
5.1 Cleaning the Machine
Cleaning your Singer sewing machine is essential to ensure optimal performance and longevity. Start by turning off and unplugging the machine. Use a soft, dry brush to remove dust, lint, and thread fragments from the exterior and internal components, such as the bobbin area and feed dogs. For stubborn debris, lightly dampen a cloth with water, but avoid harsh chemicals or excessive moisture that could damage electrical parts. Regularly cleaning prevents dust buildup, which can cause mechanical issues or fabric snags. After cleaning, ensure all surfaces are dry before storing the machine to prevent rust or corrosion. This simple maintenance routine keeps your Singer sewing machine in top working condition.
5.2 Oiling the Machine (if applicable)
Regular oiling is crucial for maintaining the smooth operation of certain Singer sewing machines, particularly mechanical or heavy-duty models. Check your user manual to confirm if your machine requires oiling, as many modern computerized models are sealed and do not need additional lubrication. For applicable machines, locate the oiling points, typically found near moving parts like the bobbin hook or handwheel. Use only Singer-recommended sewing machine oil to avoid damaging the mechanism. Apply a few drops sparingly, as over-oiling can attract dust and cause malfunctions. After oiling, run the machine without fabric to distribute the oil evenly. Always refer to the manual for specific guidance, and if unsure, contact Singer support for assistance.
5.3 Storing the Machine Properly
Proper storage is essential to maintain the performance and longevity of your Singer sewing machine. Before storing, ensure the machine is clean and free from dust or debris. Cover the machine with a protective cover or dust bag to prevent damage. Store it in a dry, cool place away from direct sunlight and moisture. Avoid extreme temperatures, as they can affect the machine’s internal components. If storing for an extended period, disconnect the power cord and secure it neatly. For portable machines, consider using the original carrying case. Always keep the machine out of children’s reach. Follow these steps to preserve your Singer sewing machine in excellent condition for future use.
Troubleshooting Common Issues
Identify and resolve common problems like thread breakage, machine jamming, or uneven stitching. Check thread tension, clear debris, and ensure proper needle alignment for smooth operation.
6.1 Thread Breakage and Tension Problems
Thread breakage and tension issues are common challenges. Check for incorrect thread routing, improper tension settings, or using the wrong needle type. Adjust the tension dials to balance the thread flow. Ensure the bobbin is correctly wound and seated. If the thread frequently breaks, inspect for sharp edges or debris in the machine. Regularly cleaning the machine and using genuine Singer needles can prevent such issues. Refer to the manual for specific tension adjustments and maintenance tips to resolve these problems effectively.
6.2 Machine Jamming or Skipping Stitches
Machine jamming or skipping stitches can disrupt your sewing flow. These issues often arise from tangled bobbins, incorrect threading, or improper needle usage. To resolve, first, turn off the machine and gently remove any tangled thread. Check the bobbin for correct installation and ensure the needle is compatible with your fabric type. Re-thread the machine following the guide, and verify that the stitch settings are appropriate. If stitches are skipping, inspect the needle for damage or dullness and replace it if necessary. Regular cleaning and proper maintenance can also prevent such issues. Always refer to the manual for specific troubleshooting steps tailored to your Singer model.
6.3 Bobbin Winding Issues
Bobbin winding issues can hinder your sewing progress. Common problems include uneven winding, thread tangling, or the bobbin not fitting properly. To address these, ensure the bobbin is wound correctly by guiding the thread smoothly and avoiding overfilling. Check if the thread is compatible with your fabric and machine. If the bobbin winder is faulty or misaligned, consult the manual for adjustment steps. Regularly clean lint from the bobbin area to prevent jams. If issues persist, consider using pre-wound bobbins or referring to the Singer troubleshooting guide for specific solutions tailored to your machine model. Proper bobbin management is essential for smooth stitching and overall machine performance.
Accessories and Attachments
Essential accessories like bobbins, needles, and specialized attachments enhance your sewing experience. Explore Singer’s range of genuine parts and attachments for optimal performance and versatility in your projects.
7.1 Essential Accessories for Singer Machines
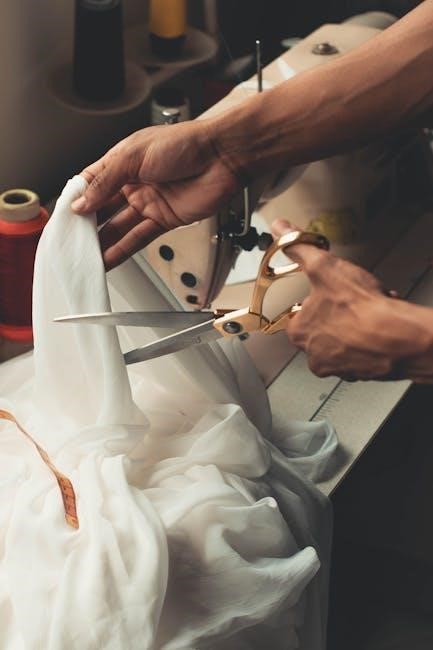
The right accessories can elevate your sewing experience. Genuine Singer needles, bobbins, and presser feet are must-haves for optimal performance. Use specialized attachments like zipper feet or blind hem feet for tailored results. Singer offers a variety of kits and bundles tailored to specific models, ensuring compatibility and ease of use. Accessories like seam rippers, lint brushes, and thread cutters are handy for everyday tasks. Always opt for genuine Singer parts to maintain your machine’s quality and prevent issues like thread breakage or skipped stitches. Explore Singer’s official resources or authorized dealers for authentic accessories designed to enhance your sewing journey.
7.2 Using Specialized Attachments
Specialized attachments expand your Singer machine’s capabilities, enabling precise stitching for specific tasks. The zipper foot simplifies zipper installations, while the blind hem foot is ideal for invisible hems. Use the edge joining attachment for effortless seam alignment. Singer offers a variety of attachments tailored to different models, ensuring compatibility and ease of use. For heavy-duty projects, consider the heavy-duty sewing attachment. Always refer to your machine’s compatibility list to choose the right tools. Properly attaching and adjusting these accessories ensures professional results. Regularly clean and maintain your machine when using attachments to prevent thread jams and wear. Explore Singer’s official resources for guidance on selecting and using attachments effectively. This enhances your sewing experience and expands your creative possibilities.
Advanced Features and Customization
Explore advanced features like stitch length and width adjustment, fabric-specific settings, and customizable sewing options for enhanced creativity and precision in your projects.
8.1 Adjusting Stitch Length and Width
Adjusting stitch length and width on your Singer sewing machine allows for precise control over your stitches. To modify the stitch length, locate the stitch length dial, typically found on the front or top of the machine. Rotate the dial to increase or decrease the length, ensuring it suits your fabric type. Similarly, the stitch width adjustment, often controlled by a separate dial, enables you to customize the width of decorative or utility stitches. Always refer to your Singer machine’s specific guide for exact dial locations and settings. Proper adjustments ensure professional-looking seams and prevent fabric damage. Experiment with different settings to achieve the desired results for various projects.
8.2 Customizing Sewing Settings
Customizing sewing settings on your Singer machine enhances your sewing experience by tailoring the machine to your project needs. Many Singer models allow you to adjust stitch patterns, tension, and speed. For advanced customization, explore memory settings to save your favorite stitches or create custom combinations. Some machines also offer programmable functions, enabling you to pre-set specific sewing parameters. Additionally, adjust presser foot pressure to accommodate different fabric thicknesses. Consult your machine’s guide to access these features. Customizing settings ensures optimal performance for various fabrics and techniques, from delicate embroidery to heavy-duty sewing. Experiment with these options to unlock your machine’s full potential and achieve professional results. Always refer to your Singer user guide for specific customization instructions.

Safety Precautions
Ensure safe operation by following Singer’s guidelines. Keep loose clothing tied back, avoid distractions, and unplug the machine during maintenance to prevent accidents and injuries.
9.1 General Safety Guidelines
Always prioritize safety when operating your Singer sewing machine. Keep children and pets away while sewing. Avoid wearing loose clothing or jewelry that could get caught. Ensure the machine is placed on a stable, flat surface. Never sew near flammable materials or in humid environments. Keep the work area well-lit to maintain clear visibility. Unplug the machine during maintenance or when not in use. Avoid sewing when tired or distracted. Use genuine Singer needles and follow proper threading techniques to prevent accidents. Regularly inspect the machine for damage or wear. By adhering to these guidelines, you ensure a safe and enjoyable sewing experience.
9.2 Handling the Machine Safely
Handling your Singer sewing machine with care ensures longevity and prevents accidents. Always lift the machine with both hands, supporting the base firmly. Avoid sudden movements or tilting, as this could damage internal components. Store the machine in a dry, cool place, away from direct sunlight or extreme temperatures. Clean the machine before storing it to prevent dust buildup. Use the original carrying case if available to protect the machine during transport. Never leave the machine unattended near children or pets. By handling the machine with care and attention, you maintain its performance and ensure safe operation for years to come.
Congratulations! You’ve completed the Singer Sewing Machine User Guide. Mastering these techniques enhances your sewing skills. Explore creative projects, maintain your machine, and enjoy sewing with confidence always. For further assistance, visit Singer’s official support page or download additional guides. Happy sewing!
10.1 Final Tips for Effective Sewing
To achieve professional results, always use genuine Singer needles and replace them frequently. Maintain proper thread tension and clean your machine regularly. Practice on scrap fabric before sewing actual projects. Keep your sewing area well-lit and organized. Experiment with different stitches and fabrics to expand your skills. Regularly oil your machine if applicable, and store it properly when not in use. For best results, follow the guidelines in your user manual. Explore Singer’s official resources for additional tips and tutorials. Happy sewing!
10.2 Resources for Further Assistance
For additional support, Singer offers a wealth of resources. Visit Singer’s official website for downloadable manuals, stitch guides, and machine updates. Explore the Singer App for free owners’ classes and tutorials. Check out YouTube tutorials for step-by-step guidance. Join sewing communities and forums for tips and troubleshooting. Singer’s customer support is also available for specific inquiries. Remember, Singer has partnered with Husqvarna Viking and Pfaff to provide comprehensive support across all models. Utilize these resources to maximize your sewing machine’s potential and enhance your sewing journey. Ensure to refer to genuine Singer materials for accurate information and optimal performance. Happy sewing!