Manuals

urge speaker manual

Urge Speaker Manual: A Comprehensive Guide

This manual provides essential information for Urge Basics Soundbrick users, detailing setup, features, troubleshooting, and care instructions for optimal performance.

The Urge Basics Soundbrick is designed as an ultra-portable Bluetooth stereo speaker, offering convenient audio solutions for various devices. This speaker boasts excellent stereo sound quality, enhanced by a built-in microphone for hands-free calling.

Its compact design and non-slip rubber finish ensure stability and portability. Compatibility extends to iPads, Samsung Galaxy Tabs, and other Bluetooth-enabled devices, making it a versatile choice. The package includes the Soundbrick speaker itself, an operation manual for guidance, and a USB charging cable for power. Some models also include a 3.5mm Aux cable for wired connections.

Understanding the Package Contents

Upon opening your Urge Basics Soundbrick package, you’ll find several key components. First, the Soundbrick Speaker itself, ready for immediate use. A comprehensive Operation Manual is included, detailing setup, features, and troubleshooting steps.

Essential for powering your speaker is the included USB Charging Cable, allowing connection to a power source. Certain models also feature a 3.5mm Aux Cable, providing an alternative wired connection option for devices lacking Bluetooth capability. Ensure all items are present for a complete and enjoyable user experience.
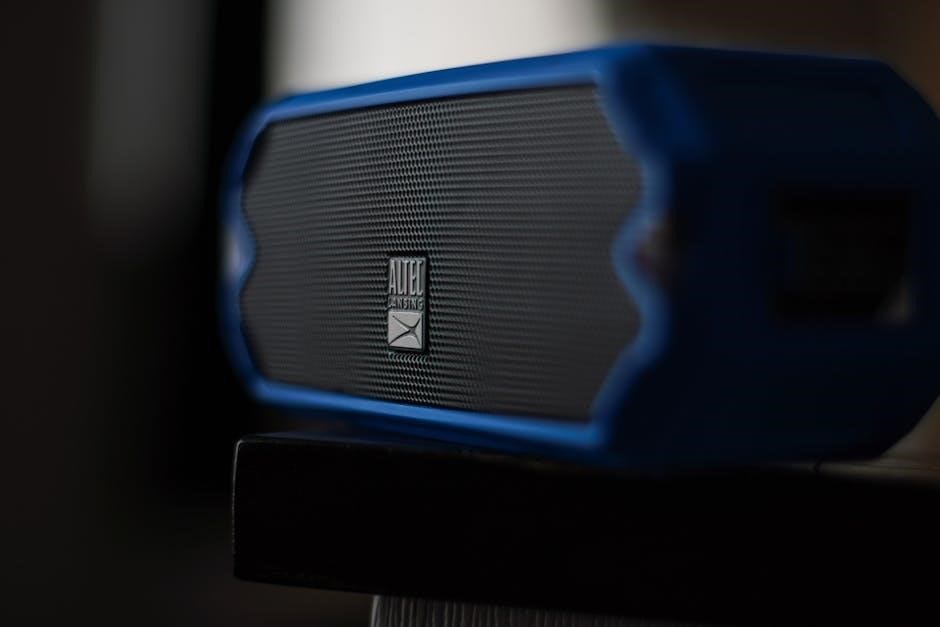
Soundbrick Speaker

The Urge Basics Soundbrick Speaker is designed for ultra-portable audio enjoyment. It boasts excellent stereo sound quality, enhanced by a built-in microphone for hands-free calling. A non-slip rubber finish ensures stability during use, preventing unwanted movement.

This compact speaker is engineered for compatibility with a wide range of devices, including iPads and Samsung Galaxy Tabs, alongside other Bluetooth-enabled tablets and smartphones. Its robust construction and user-friendly design make it an ideal audio companion for any setting, delivering impressive sound in a small package.

Operation Manual

The included Operation Manual serves as a comprehensive guide to unlocking the full potential of your Urge Basics Soundbrick. It details the speaker’s features, controls, and troubleshooting steps.

Users will find clear instructions on initial charging, Bluetooth pairing with iOS and Android devices, and utilizing the one-touch answer button for calls. The manual also provides guidance on maintaining optimal sound quality and addressing common issues like connection problems or sound distortion. Refer to it for detailed information on maximizing your listening experience.

USB Charging Cable

A standard USB charging cable is included within the Urge Basics Soundbrick package, facilitating convenient power replenishment for extended listening sessions. This cable allows you to connect the speaker to a USB power source, such as a computer, wall adapter, or portable power bank.

The manual details proper charging practices to ensure optimal battery life and longevity. It’s recommended to use a compatible USB power adapter for efficient charging. Avoid overcharging, and disconnect the cable once the speaker is fully charged to preserve battery health;

3.5mm Aux Cable (Specific Models)

Certain Urge Basics Soundbrick models include a 3.5mm auxiliary (Aux) cable, offering an alternative wired connection option for devices lacking Bluetooth capability. This cable allows direct audio input from smartphones, MP3 players, or other audio sources.

The manual explains how to properly connect the Aux cable to both the speaker and your audio device. Utilizing the Aux input bypasses the Bluetooth connection, providing a stable and reliable audio experience. It’s a useful feature for devices with limited Bluetooth functionality or when a wired connection is preferred.

Setting Up Your Urge Speaker

Initial setup involves charging the speaker and establishing a Bluetooth connection with your preferred device for seamless wireless audio enjoyment.

Initial Charging

Before first use, fully charge your Urge Basics Soundbrick using the provided USB charging cable. Connect the cable to a USB power source and the speaker’s charging port.

A full charge typically takes several hours, though specific charging time isn’t detailed in available resources. While charging, some models may indicate charging status with a light.

Optimal battery performance is achieved through full initial charging. Disconnect the charger once fully charged to prevent overcharging and potential battery damage. A charged battery ensures extended playback and reliable operation of your Soundbrick speaker.

Bluetooth Pairing

To connect your Urge Basics Soundbrick via Bluetooth, first ensure the speaker is powered on. Activate Bluetooth on your desired device (smartphone, tablet, etc.).

The Soundbrick will likely enter pairing mode automatically upon initial power-up, or may require a button press (consult the operation manual for specifics). Locate the Soundbrick in your device’s Bluetooth settings and select it to initiate pairing.

Successful pairing is usually indicated by an audible tone or a visual confirmation on both devices. Once paired, the speaker will automatically reconnect to the device when in range.

Pairing with iOS Devices

For iOS devices (iPhones, iPads), navigate to “Settings” then “Bluetooth.” Ensure Bluetooth is toggled “On.” Your Urge Basics Soundbrick should appear in the “Other Devices” list once powered on and in pairing mode.

Tap the Soundbrick’s name to initiate the pairing process. You may be prompted to confirm a pairing code – confirm if necessary. Once connected, the Soundbrick will move to the “My Devices” list, indicating a successful connection.

Volume control can then be managed both from the iOS device and the speaker itself. Enjoy seamless audio streaming!

Pairing with Android Devices

To pair with Android smartphones or tablets, access “Settings” and then “Bluetooth.” Activate Bluetooth if it’s currently off. Your Urge Basics Soundbrick will become visible in the list of available Bluetooth devices when in pairing mode.

Select the Soundbrick from the list. Android may request pairing confirmation; accept the prompt. A successful connection will display the Soundbrick as “Connected” or “Paired” within the Bluetooth settings.

Now you can enjoy wireless audio! Control playback and volume directly from your Android device or utilize the speaker’s controls.

Pairing with Other Bluetooth Devices

The Urge Basics Soundbrick is designed for broad compatibility. To pair with devices beyond iOS and Android, ensure the device has Bluetooth capability and is in pairing mode – consult its manual for instructions.

Activate pairing mode on the Soundbrick by holding the power button until the indicator light flashes. Scan for Bluetooth devices on your other device and select “Soundbrick” from the list.

Confirm any pairing requests. Once connected, enjoy seamless wireless audio streaming. Remember that range and performance may vary based on the device.

Speaker Features and Controls

The Soundbrick boasts intuitive controls, including power, volume adjustment, and a one-touch answer button for hands-free calls and microphone functionality.

Powering On/Off

To power on your Urge Basics Soundbrick, simply press and hold the power button located on the speaker’s control panel for approximately two seconds. A visual indicator, often a light, will illuminate to confirm the speaker is active and ready for use.

Conversely, to power off the Soundbrick, repeat the process – press and hold the power button for around two seconds. The indicator light will typically turn off, signifying that the speaker is now in a powered-down state. Ensuring the speaker is fully powered off when not in use helps conserve battery life and prevents accidental connections.

Note: Some models may feature an audible tone alongside the visual indicator to confirm power status.

Volume Control

Adjusting the volume on your Urge Basics Soundbrick is straightforward. The speaker features dedicated volume control buttons, typically marked with “+” and “-” symbols, conveniently located on the control panel.

Pressing the “+” button incrementally increases the audio output, while pressing the “-” button decreases it. A short press adjusts the volume in small steps, allowing for precise control. Some models may offer audible cues as you adjust the volume levels.

Be mindful of your listening environment and avoid excessively high volumes to protect your hearing. The Soundbrick delivers excellent stereo sound, even at moderate volume settings.

One-Touch Answer Button

The Urge Basics Soundbrick incorporates a convenient one-touch answer button, streamlining call management when paired with a Bluetooth-enabled smartphone. This multi-functional button allows you to effortlessly answer incoming calls with a single press.

During an active call, pressing the button again will typically end the call. In some instances, a double-press may be required to redial the last contacted number. The button’s responsiveness ensures quick and reliable call control.

This feature enhances usability, providing hands-free operation and simplifying communication while on the go.

Built-in Microphone Functionality

The Urge Basics Soundbrick features a built-in microphone, transforming the speaker into a hands-free communication device. When connected to a smartphone via Bluetooth, the microphone enables clear voice calls without needing a headset.

This functionality is ideal for conference calls, speakerphone conversations, or simply taking calls while multitasking. The microphone’s placement is optimized to capture your voice effectively, minimizing background noise for improved clarity.

Combined with the one-touch answer button, the built-in microphone provides a seamless and convenient communication experience.

Sound Quality and Performance

Experience excellent stereo sound with the Urge Basics Soundbrick, designed for immersive audio and boasting a non-slip rubber finish for stability.

Stereo Sound Experience

The Urge Basics Soundbrick is engineered to deliver a remarkably rich and clear stereo sound experience, despite its compact size. This portable speaker provides balanced audio, ensuring that both high and low frequencies are reproduced with impressive fidelity. Whether you’re enjoying music, podcasts, or audiobooks, the Soundbrick aims to provide an immersive listening experience.

The built-in microphone further enhances the audio capabilities, allowing for clear hands-free calling. Users consistently praise the speaker’s ability to fill a room with sound, making it ideal for both indoor and outdoor use. The quality is particularly notable considering the speaker’s affordability and portability.

Non-Slip Rubber Finish

The Urge Basics Soundbrick features a thoughtfully designed non-slip rubber finish, providing enhanced stability and preventing unwanted movement during use. This practical design element ensures the speaker remains securely in place on various surfaces, minimizing vibrations and reducing the risk of it sliding or falling.

This rubberized coating not only improves grip but also offers a degree of protection against minor bumps and scratches. It’s particularly beneficial when using the speaker outdoors or in environments where surfaces may be uneven. The finish contributes to the overall durability and user-friendly design of the Soundbrick.

Compatibility with Devices

The Urge Basics Soundbrick is engineered for broad device compatibility, seamlessly connecting with a wide range of Bluetooth-enabled smartphones, tablets, and computers. Specifically, it’s confirmed to work flawlessly with popular devices like the iPad and Samsung Galaxy Tab, delivering a superior audio experience.

Beyond these, the Soundbrick readily pairs with most Bluetooth-enabled tablets and devices, offering versatile connectivity options. Whether you’re an iOS or Android user, or utilize other Bluetooth-capable gadgets, the Soundbrick provides a reliable and convenient wireless audio solution. Enjoy your music across all your favorite platforms!

iPad Compatibility

The Urge Basics Soundbrick demonstrates excellent compatibility with all iPad models, providing a seamless and high-quality audio experience. Users can effortlessly connect via Bluetooth, enjoying their favorite music, podcasts, and audiobooks with clear sound reproduction.

Pairing is straightforward, following standard Bluetooth connection procedures on the iPad. The Soundbrick’s non-slip rubber finish ensures stable placement during use, enhancing the listening experience. It’s a perfect companion for iPad users seeking portable and reliable audio, whether at home, traveling, or on the go. Enjoy superior stereo sound!

Samsung Galaxy Tab Compatibility

Urge Basics Soundbrick offers robust compatibility with the Samsung Galaxy Tab series, delivering a convenient and enjoyable audio solution for tablet users. Connecting via Bluetooth is simple and quick, allowing for wireless music streaming and hands-free calling.

The speaker’s design complements the portability of the Galaxy Tab, making it ideal for travel or use around the house. Users can expect clear audio quality and reliable performance, enhancing their multimedia experience. The non-slip base ensures stability, and the built-in microphone facilitates calls.

Other Bluetooth Enabled Devices

The Urge Basics Soundbrick excels in its broad compatibility, seamlessly connecting with a wide array of Bluetooth-enabled devices beyond tablets. This includes smartphones, laptops, and even some smart TVs, offering versatile audio solutions.

Pairing is generally straightforward, following standard Bluetooth connection procedures. Expect consistent performance and reliable audio transmission across different brands and operating systems. The speaker’s compact size makes it a convenient companion for various devices, providing enhanced sound wherever you go. Enjoy music, podcasts, and more with ease!

Troubleshooting Common Issues

Resolve connectivity, sound quality, and charging problems with our guide. We offer solutions for Bluetooth pairing failures, distortion, and power issues.

Bluetooth Connection Problems

Experiencing difficulty pairing your Urge Basics Soundbrick? First, ensure Bluetooth is enabled on your device and the speaker is in pairing mode. If the issue persists, try forgetting the speaker in your device’s Bluetooth settings and re-pairing.

Check for interference from other wireless devices, as they can disrupt the connection. Moving closer to the speaker can also improve stability. Restarting both your device and the speaker is a simple yet effective troubleshooting step. Confirm the speaker isn’t already connected to another device.

If problems continue, consult the operation manual or seek support online for further assistance.

Sound Distortion

If you notice distorted audio from your Urge Basics Soundbrick, begin by lowering the volume on both the speaker and your connected device. Excessive volume levels are a common cause of distortion. Ensure the audio source file isn’t corrupted or of poor quality, as this can also lead to undesirable sound.

Check the 3.5mm aux cable (if used) for damage or loose connections. Try a different cable to rule out a cable issue. Restarting the speaker can sometimes resolve temporary glitches causing distortion.

If distortion persists, test with a different audio source to isolate the problem.

Charging Issues

If your Urge Basics Soundbrick isn’t charging, first verify the USB charging cable is securely connected to both the speaker and a functioning USB port or wall adapter. Try a different USB cable and adapter to eliminate those as potential causes. Ensure the USB port provides sufficient power; some ports have limited output.

Allow ample charging time – a full charge may take several hours. If the speaker still doesn’t charge, inspect the charging port for any debris or damage;

Avoid using damaged or frayed cables. Contact support if charging issues continue.

Maintenance and Care

Regular cleaning with a soft, dry cloth will maintain the speaker’s appearance. Store in a cool, dry place when not in use for longevity.

Cleaning the Speaker

To ensure the longevity and optimal performance of your Urge Basics Soundbrick, regular cleaning is recommended. Always power off the speaker and disconnect any charging cables before beginning the cleaning process. Use a soft, dry cloth to gently wipe down the exterior surfaces.

Avoid using abrasive cleaners, solvents, or excessive moisture, as these can damage the speaker’s finish or internal components. For stubborn dirt or grime, lightly dampen the cloth with water, ensuring it is wrung out thoroughly to prevent water from entering the speaker. Pay particular attention to the non-slip rubber finish, as dust and debris can accumulate there.

Do not submerge the speaker in water or any other liquid. After cleaning, ensure the speaker is completely dry before powering it on or connecting any cables.

Storage Recommendations

Proper storage is crucial for maintaining your Urge Basics Soundbrick’s condition when not in use. Before storing, ensure the speaker is completely dry and free of dust or debris. Store the speaker in a cool, dry place, away from direct sunlight and extreme temperatures.

Avoid storing the speaker in humid environments, as moisture can cause damage to internal components. It’s best to store the speaker in its original packaging or a protective case to prevent scratches or impacts. Keep the USB charging cable and 3.5mm aux cable (if included) organized and stored alongside the speaker.

Do not place heavy objects on top of the speaker during storage, as this could cause physical damage.

Safety Precautions

Always avoid exposing the Urge Basics Soundbrick to water or excessive moisture, and use only the recommended charging practices for safe operation.

Avoiding Water Damage

Protecting your Urge Basics Soundbrick from water damage is crucial for its longevity and performance. While the speaker isn’t explicitly waterproof, minimizing exposure to liquids is essential. Avoid using the speaker in humid environments like bathrooms during showers or near swimming pools.


If the speaker gets wet, immediately power it off and do not attempt to charge it. Gently dry the exterior with a soft cloth. Allowing moisture to remain inside can cause corrosion and permanent damage to the internal components.

Never submerge the speaker in water or any other liquid. Accidental spills should be addressed promptly to prevent internal damage. Careful handling and storage will significantly reduce the risk of water-related issues.

Proper Charging Practices

To maximize the battery life and ensure the longevity of your Urge Basics Soundbrick, follow these charging guidelines. Always use the provided USB charging cable or a certified equivalent. Avoid using fast chargers or high-voltage power adapters, as they can damage the battery.

Initially, fully charge the speaker before its first use. Once charged, disconnect the cable to prevent overcharging. Do not leave the speaker plugged in for extended periods after it reaches full capacity.

Optimal charging temperatures are between 59°F and 77°F (15°C and 25°C). Avoid charging in extremely hot or cold environments. Regularly using and charging the speaker will help maintain optimal battery health.

Technical Specifications

The Urge Basics Soundbrick comes in models UG-SNDBRCKBLK and Cuatro, featuring Bluetooth connectivity and a battery life designed for portable use.

Model Numbers (UG-SNDBRCKBLK, Cuatro)

Urge Basics offers the Soundbrick Bluetooth speaker in distinct model numbers, primarily the UG-SNDBRCKBLK, often recognized as the standard black version. This model is widely available through retailers like Amazon and Newegg.

Additionally, the “Cuatro” model exists, though information specifically detailing differences beyond the name is limited. Both models share core functionalities – portable stereo sound, a built-in microphone for hands-free calls, and Bluetooth connectivity.

Regardless of the model number, users can expect a compact design, non-slip rubber finish, and compatibility with a range of devices, including iPads and Samsung Galaxy Tabs.

Bluetooth Version

Specific Bluetooth version details for the Urge Basics Soundbrick are not explicitly stated in readily available documentation. However, given its release timeframe (around 2013-2014) and compatibility with a wide range of devices, it’s reasonable to assume the speaker utilizes Bluetooth 4.0 or an earlier iteration.

This version provides a stable wireless connection for audio streaming from smartphones, tablets, and other Bluetooth-enabled devices.

The range typically extends up to 33 feet (10 meters), though interference can affect performance. Successful pairing with iOS and Android devices confirms basic Bluetooth functionality.

Battery Life

Detailed battery life specifications for the Urge Basics Soundbrick are limited in publicly available resources. However, user experience and product descriptions suggest a typical playtime of approximately 6-8 hours on a full charge at moderate volume levels.

Actual battery performance will vary depending on usage, volume settings, and Bluetooth connection stability.

The speaker utilizes a built-in rechargeable battery, conveniently charged via the included USB cable. A full charge typically takes around 2-3 hours, ensuring quick access to wireless audio enjoyment.

PDF

pasar de pdf a mobi

Understanding PDF and MOBI Formats

Kindle devices offer a fantastic reading experience, yet PDF compatibility can be tricky; converting to MOBI unlocks optimal functionality, especially on older models.

Newer Kindle models boast native PDF support, but first-generation readers require conversion to MOBI or AZW for seamless ebook enjoyment.

What is a PDF File?

PDF, or Portable Document Format, is a file format developed by Adobe that’s widely used to present and exchange documents reliably, independent of software, hardware, or operating systems. Essentially, a PDF file captures a document’s layout, fonts, graphics, and images in a fixed, universally viewable format.

This makes PDFs ideal for sharing documents that need to appear exactly as intended, regardless of the recipient’s setup. However, PDFs aren’t always the most adaptable format for all devices, particularly e-readers like the Kindle. Their fixed layout can cause issues with reflowing text on smaller screens.

While newer Kindle models offer some native PDF support, the experience isn’t always optimal. This is where converting PDFs to more e-reader-friendly formats like MOBI becomes crucial for a comfortable reading experience.

What is a MOBI File?

MOBI (Mobipocket) is an ebook file format that was specifically designed for use on e-readers, most notably the Kindle. It’s known for its efficient compression and ability to dynamically adjust text to fit different screen sizes – a feature called reflowing.

Unlike PDFs, which maintain a fixed layout, MOBI files allow readers to customize font sizes and styles, making them much more comfortable to read on smaller screens. This adaptability is a key reason why MOBI was the preferred format for older Kindle devices.

Although Amazon has introduced its own format, AZW, MOBI remains a widely supported and versatile option. Converting from PDF to MOBI ensures a better reading experience on Kindle, especially for text-heavy documents.

Why Convert PDF to MOBI for Kindle?

Converting PDF files to MOBI significantly enhances the reading experience on Kindle devices. PDFs, designed for fixed-layout document presentation, often appear small and require excessive zooming on Kindle’s screen, leading to discomfort.

MOBI files, however, are optimized for e-readers, allowing text to reflow and adapt to the screen size. This enables users to adjust font sizes and styles for comfortable reading. Older Kindle models, lacking native PDF support, require conversion to MOBI or AZW to display content.

Even newer Kindles benefit from MOBI conversion, as it often results in a cleaner, more readable format compared to directly viewing a PDF. Ultimately, MOBI unlocks the full potential of your Kindle for enjoying ebooks.

Methods for Converting PDF to MOBI

Conversion options range from user-friendly software like Calibre, convenient online tools, and automated solutions utilizing Python scripting for efficient file transformation.

Using Calibre: A Comprehensive Solution

Calibre stands out as a powerful, free, and open-source ebook management software, offering robust PDF to MOBI conversion capabilities. It’s a desktop application, providing more control and privacy compared to online tools. Initially, Calibre requires installation and a brief setup process, but the benefits are substantial for frequent converters.

The software’s interface is designed for managing extensive ebook libraries, alongside its conversion features. Beyond simple format changes, Calibre allows for metadata editing, ebook organization, and even syncing with various e-readers. Its conversion engine supports a wide array of customization options, ensuring the final MOBI file is tailored to your specific Kindle preferences.

Calibre’s strength lies in its ability to handle complex PDF layouts and offer advanced settings for optimizing the output. This makes it an ideal choice for users who demand precision and control over their ebook conversions.

Installing and Setting Up Calibre

Calibre installation is straightforward across most operating systems – Windows, macOS, and Linux. Download the appropriate installer from the official Calibre website (calibre-ebook.com) and follow the on-screen instructions. During installation, you can choose to associate Calibre with common ebook formats, streamlining future file opening.

Upon first launch, Calibre prompts you to set up your ebook library. This involves specifying a directory where your ebooks will be stored. You can also configure device connections for direct transfer to your Kindle. Take time to explore the preferences menu; here, you can customize various settings, including the conversion engine and ebook display options.

While initial setup is simple, familiarizing yourself with Calibre’s interface will maximize its potential for efficient PDF to MOBI conversions.

Converting PDF to MOBI with Calibre: Step-by-Step

Begin by adding your PDF file to Calibre. Click the “Add books” button and select the desired PDF. Once imported, select the book and click the “Convert books” button. A conversion window will appear, allowing you to choose the output format. Select “MOBI” from the dropdown menu.

Next, customize conversion settings if needed (discussed later). Otherwise, click “OK” to initiate the conversion. Calibre will process the PDF, and a progress bar will indicate the status. Upon completion, the converted MOBI file will appear alongside the original PDF in your Calibre library.

Finally, connect your Kindle to your computer and use Calibre to transfer the MOBI file directly to your device.

Calibre’s Advanced Conversion Options

Calibre offers extensive customization for PDF to MOBI conversions. Within the conversion window, explore the “Look & Feel” section to adjust font sizes, styles, and margins. The “Heuristic Processing” option can improve formatting, especially for poorly structured PDFs. Experiment with “Structure Detection” to enhance table of contents creation.

The “Page Setup” allows tweaking input profiles and output dimensions. For image-heavy PDFs, adjust image conversion settings under “MOBI Output” to balance quality and file size. Utilize the “Table of Contents” tab to manually edit or automatically generate a table of contents. Remember to test different settings to achieve optimal results for each PDF.

Online Conversion Tools

Online conversion tools provide a convenient alternative to software installation for PDF to MOBI transformations. Services like Online-Convert.com and Zamzar are popular choices, offering user-friendly interfaces and broad format support. These platforms typically involve uploading your PDF file, selecting MOBI as the output format, and initiating the conversion process.

However, be mindful of potential drawbacks. Online converters often have file size limitations and may raise privacy concerns regarding uploaded documents. Conversion speed depends on file size and server load. While convenient, they generally lack the advanced customization options available in dedicated software like Calibre, potentially impacting formatting fidelity.

Online-Convert.com: A Popular Choice

Online-Convert.com stands out as a widely-used platform for PDF to MOBI conversion, boasting a straightforward interface and support for numerous file formats. It allows conversions directly from a URL, or by uploading a local file, offering flexibility for various source documents. The service provides basic customization options, such as margin adjustments and metadata editing, though it’s less extensive than dedicated software.

A key advantage is its accessibility – no software installation is required. However, users should be aware of potential file size limits and the inherent privacy considerations of uploading documents to a third-party service. Conversion speed can vary based on server load and file complexity, but generally provides quick results.

Zamzar: Another Reliable Online Converter

Zamzar presents itself as a dependable alternative for converting PDF files to the MOBI format, mirroring Online-Convert.com in its ease of use and web-based accessibility. Users can upload files from their computer, or provide a URL where the PDF is hosted, streamlining the conversion process. Zamzar supports a vast array of file types beyond just PDF and MOBI, making it a versatile tool for various conversion needs.

Like other online converters, Zamzar has file size restrictions and relies on uploading your document to their servers. It typically sends the converted MOBI file to your email address, adding a layer of convenience. While offering a simple solution, it lacks the advanced customization options found in desktop software like Calibre.

Advantages and Disadvantages of Online Converters

Online converters, such as Online-Convert.com and Zamzar, offer a convenient and accessible method for transforming PDF files into the MOBI format without requiring software installation. Their primary advantage lies in their platform independence – they function on any device with a web browser and internet connection. This makes them ideal for quick, one-off conversions when desktop software isn’t readily available.

However, these tools have limitations. File size restrictions are common, and uploading sensitive documents raises privacy concerns. Furthermore, online converters generally lack the advanced customization options available in dedicated software like Calibre, potentially resulting in formatting inconsistencies. Reliance on a stable internet connection is also crucial for successful conversion.

Using Python Scripts for Automated Conversion

Python scripting provides a powerful and flexible approach to automating PDF to MOBI conversion, particularly for batch processing or integration into larger workflows. By leveraging online conversion APIs, like those offered by Online-Convert.com, scripts can programmatically submit files and retrieve the converted MOBI output. This eliminates the need for manual intervention, saving significant time and effort.

A basic Python script can handle file uploads, manage conversion parameters, and download the resulting MOBI file. Setting up the Python environment involves installing necessary libraries, such as ‘requests’ for making HTTP requests to the API. This method is especially useful for automating conversions on a server or within a continuous integration pipeline.

Leveraging Online Conversion APIs

Online Conversion APIs, such as the one provided by ebook.online-convert.com, offer a programmatic interface for converting files, including PDF to MOBI, directly from your code. These APIs typically require an API key for authentication and utilize HTTP requests to submit files and receive the converted output. This approach is ideal for automating conversions without relying on desktop software or manual uploads.

Using an API allows for greater control over the conversion process, enabling you to specify parameters like output quality and file format options. The API handles the complex conversion logic, returning the MOBI file once the process is complete, streamlining the workflow and enabling scalable solutions.

Example Python Script using Online-Convert.com

Here’s a basic Python 2.7 script demonstrating PDF to MOBI conversion using Online-Convert.com’s API. This script requires the ‘requests’ library for making HTTP requests. First, obtain an API key from Online-Convert.com. The script sends the PDF file to the API, specifying the desired output format as MOBI. It then retrieves the converted file from the provided download link.

Remember to handle potential errors, such as network issues or invalid API keys. This example provides a foundation for automating conversions; you can expand upon it to include error handling, progress tracking, and integration with other applications. Ensure proper error handling and security measures when working with APIs and file conversions.

Setting up the Python Environment

Before running the Python script for PDF to MOBI conversion, ensure you have a suitable environment. Python 2.7 is required for the provided example script, though newer versions may work with adjustments. Install the ‘requests’ library using pip: pip install requests. This library facilitates making HTTP requests to the Online-Convert.com API.

Verify Python is correctly installed and accessible from your command line. Create a new directory for your script and save the code within it. Obtain an API key from Online-Convert.com and securely store it – avoid hardcoding it directly into the script. Consider using environment variables for better security and portability.

Optimizing MOBI Files for Kindle

MOBI files benefit from adjustments to font sizes, styles, and image optimization for a superior Kindle reading experience, enhancing overall visual clarity.

Adjusting Font Sizes and Styles

Kindle allows extensive customization of the reading experience, and adjusting font sizes and styles within the MOBI file itself, or directly on the device, is crucial for comfort. After converting from PDF to MOBI, the default font may not be ideal for all readers.

Many users find that increasing the font size improves readability, particularly on smaller Kindle screens. Experimenting with different font families can also significantly enhance the visual appeal and ease of reading. Kindle supports a variety of fonts, allowing you to choose one that suits your preferences.

Consider using sans-serif fonts like Arial or Helvetica for a cleaner look, or serif fonts like Times New Roman for a more traditional reading experience. Bold and italic styles can be used sparingly to emphasize key points, but avoid overusing them, as it can make the text appear cluttered. Remember that optimal font settings are subjective and depend on individual eyesight and preferences.

Image Optimization for Better Viewing

PDF to MOBI conversions can sometimes result in suboptimal image quality on Kindle devices. Images within the original PDF may be high resolution, leading to large file sizes and slow loading times on the Kindle. Optimizing these images is essential for a smooth reading experience.

Reducing image resolution and file size can significantly improve performance without noticeably sacrificing visual clarity, especially on Kindle’s e-ink screens. Converting images to a more efficient format, such as JPEG, can also help; Consider the intended use of the images; detailed diagrams may require higher resolution than simple illustrations.

Tools like Calibre offer options to automatically optimize images during the conversion process. Experiment with different settings to find a balance between image quality and file size. Properly optimized images ensure a visually appealing and responsive reading experience on your Kindle.

Table of Contents Creation and Management

A well-structured Table of Contents (TOC) is crucial for navigating longer ebooks on your Kindle. When converting from PDF to MOBI, automatically generated TOCs aren’t always accurate or present. Ensuring a functional TOC significantly enhances the reading experience, allowing quick access to specific chapters or sections.

Calibre provides robust tools for creating and editing TOCs during the conversion process. It can detect headings within the PDF and automatically generate a TOC based on them. However, manual review and adjustments are often necessary to ensure accuracy.

Verify that all chapter titles are correctly listed and linked. For PDFs lacking clear headings, you may need to manually create a TOC within Calibre. A properly managed TOC transforms a lengthy ebook into a navigable and enjoyable read on your Kindle.

Troubleshooting Conversion Issues

PDF to MOBI conversions can encounter errors; scanned PDFs pose unique challenges, often requiring Optical Character Recognition (OCR) for proper formatting preservation.

Common Conversion Errors and Solutions

PDF to MOBI conversion isn’t always flawless; several common errors can arise. Formatting inconsistencies are frequent, particularly with complex layouts, leading to text reflowing or misplaced elements. Image issues, like distorted or missing pictures, also occur. Sometimes, the entire conversion fails, resulting in an unreadable MOBI file.

To address formatting problems, experiment with Calibre’s advanced conversion settings, adjusting the output profile and fine-tuning the structure detection. For image issues, ensure the PDF contains properly embedded images and try increasing the image quality settings during conversion. If the conversion consistently fails, verify the PDF isn’t corrupted or password-protected.

Consider using a different conversion tool if one consistently produces errors. Cleaning the PDF beforehand – removing unnecessary elements or correcting errors – can also improve conversion success. Remember that complex PDFs often require more manual intervention to achieve optimal results.

Dealing with Scanned PDFs

Scanned PDFs present unique challenges for MOBI conversion because they consist of images of text, not actual selectable text. Direct conversion often results in a MOBI file that’s essentially a series of images, lacking searchability and reflow capabilities. Optical Character Recognition (OCR) is crucial for these files.

Calibre integrates OCR functionality, allowing it to recognize text within scanned PDFs during conversion. Ensure you have a suitable OCR engine installed (like Tesseract) and configured within Calibre’s settings. The accuracy of OCR significantly impacts the final MOBI file; clean, high-resolution scans yield better results.

Post-conversion, carefully proofread the MOBI file for OCR errors and correct any misrecognized characters. Online conversion tools may also offer OCR, but Calibre provides greater control and customization for scanned document processing.

Preserving Formatting During Conversion

PDF to MOBI conversion rarely results in perfect formatting replication. PDFs are designed for fixed layouts, while MOBI is reflowable, adapting to different screen sizes. Complex layouts – multiple columns, intricate tables, and precise image placement – often require manual adjustments post-conversion.

Calibre offers extensive formatting options to mitigate these issues. Experiment with different conversion profiles and settings, particularly those related to line breaks, hyphenation, and table handling. Utilizing Calibre’s “Structure Detection” can help identify headings and paragraphs.

For best results, simplify the PDF before converting. Remove unnecessary elements and ensure a logical reading order. Be prepared to edit the resulting MOBI file to fine-tune the formatting and achieve a readable experience on your Kindle.

Kindle Support for PDF and MOBI

Kindle Fire and second-generation readers natively support PDF files, however, older models benefit greatly from MOBI or AZW format conversions.

Native PDF Support on Newer Kindle Models

Kindle’s evolution has brought enhanced functionality, notably native PDF support on newer devices like the Kindle Fire and second-generation Kindle Readers. This means you can directly transfer and read PDF documents without needing conversion to formats like MOBI or AZW.

However, while convenient, native PDF reading isn’t always optimal. PDFs aren’t reflowable, meaning text doesn’t automatically adjust to the screen size, potentially requiring zooming and panning. This can be less comfortable for extended reading sessions. Furthermore, complex PDF layouts might not translate perfectly, leading to formatting inconsistencies.

Despite these limitations, the inclusion of native PDF support provides flexibility for users who occasionally read PDFs. For a consistently optimized reading experience, especially with text-heavy documents, converting to MOBI remains a valuable option, particularly for older Kindle models lacking native PDF capabilities.

MOBI as the Preferred Format for Older Kindles


For owners of first-generation Kindle Readers, the MOBI format remains the gold standard for ebook reading. These earlier models lack the native PDF support found in newer devices, making MOBI conversion essential for enjoying PDF content on their screens.

MOBI files are specifically designed for Kindle devices, offering reflowable text that adjusts to the screen size, enhancing readability. This eliminates the need for constant zooming and panning often required when reading fixed-layout PDFs. The conversion process optimizes the text for the Kindle’s e-ink display, providing a comfortable reading experience.

While AZW is another compatible format, MOBI continues to be widely supported and offers excellent compatibility. Converting PDFs to MOBI ensures that users with older Kindle models can fully utilize their devices and access a vast library of ebook content.

AZW3 Format: An Alternative to MOBI

Although newer Kindle devices natively support both MOBI and AZW3, converting PDFs to AZW3 can result in a richer reading experience, particularly for books with complex formatting. AZW3 preserves more of the original document’s layout, making it ideal for textbooks or documents with intricate designs.

However, AZW3 isn’t universally supported across all ebook readers, unlike MOBI. If compatibility is a primary concern, MOBI remains a safer choice. Nevertheless, for Kindle users seeking the best possible visual fidelity, AZW3 presents a compelling alternative.

Manuals

singer curvy manual

Singer Curvy Manual: An Overview

Curvy singing, a contemporary vocal style, blends vocal fry, elongated vowels, and modified “S” sounds, gaining prominence in modern music.

It’s characterized by a unique, often breathy timbre, and is increasingly discussed within vocal pedagogy circles, sparking debate and analysis.

What is “Curvy” Singing?

Curvy singing represents a distinct vocal production style gaining traction in contemporary music, often associated with artists like Britney Spears. It’s not a formally defined technique with rigid rules, but rather a constellation of vocal characteristics frequently observed together.

Key elements include the prominent use of vocal fry – that gravelly, creaky sound – combined with significantly elongated vowels. Furthermore, a subtle but noticeable modification of the “S” sound contributes to the overall texture. Jamie Lynn Hart of Berklee College of Music aptly describes it as this specific combination.

Interestingly, some associate the style with a clenched jaw and limited oral space, potentially impacting resonance. While not inherently negative, these physical aspects are often noted when analyzing the technique. It’s a stylistic choice that prioritizes a particular sonic aesthetic over traditional vocal ideals.

The Rise of the Technique in Contemporary Music

The emergence of “curvy” singing correlates with the increasing popularity of vocal styles prioritizing intimacy and a less “polished” sound in mainstream music. Artists began embracing vocal textures previously considered imperfections, shifting aesthetic preferences.

Britney Spears is often cited as a pioneering example, her signature vocal delivery heavily featuring vocal fry and elongated vowels. This style resonated with audiences and influenced subsequent generations of singers. As pop music evolved, a demand for unique vocal timbres grew, creating space for this technique.

The rise also coincides with the influence of online music communities and platforms like YouTube, where vocal techniques are dissected and shared. This accessibility has fostered experimentation and wider adoption of “curvy” vocal production, solidifying its place in contemporary music.

Technical Aspects of Curvy Vocal Production

Curvy singing technically involves manipulating vocal fry, extending vowel lengths, and subtly altering the articulation of the “S” sound for a distinct texture.

Vocal Fry and its Role

Vocal fry, the lowest register of the human voice, is a foundational element of the curvy singing technique. Often described as a gravelly or creaky sound, it’s created by a loose closure of the vocal folds, allowing air to bubble through.

In curvy singing, vocal fry isn’t merely an embellishment; it’s integrated into the core vocal production, providing a textural base upon which other elements are built. It contributes significantly to the technique’s characteristic breathiness and relaxed quality. However, the Reddit discussion highlights potential issues – overly pressed vocal cords can lead to stiffness and hyperfunction.

While artists like Britney Spears are often cited as pioneers of this sound, achieving a balanced and healthy vocal fry requires careful coordination and awareness to avoid strain.

Elongated Vowels: A Key Component

Elongated vowels are crucial in defining the curvy singing aesthetic, working in tandem with vocal fry to create a distinctive sonic texture. This technique involves extending the duration of vowel sounds beyond their typical length, often with a relaxed and open vocal tract.

The Guardian article identifies this as a core feature, contributing to the overall “soft” and “velvety” quality often associated with the style. This elongation isn’t simply about holding notes longer; it’s about shaping the vowel sound itself, allowing for subtle variations in timbre and resonance.

Combined with vocal fry, elongated vowels create a sense of languidness and expressiveness, central to the technique’s appeal.

The “S” Sound Modification

A subtle, yet significant, aspect of curvy singing involves a deliberate modification of the “S” sound. As highlighted by Jamie Lynn Hart, a Berklee College of Music instructor, this isn’t a complete avoidance of the sound, but rather a nuanced alteration in its articulation;

The technique often involves softening or reducing the sharpness of the “S,” contributing to the overall breathy and relaxed quality of the vocal delivery. This modification helps to avoid a harsh or piercing tone, aligning with the desired aesthetic of the style.

It’s a subtle detail, but one that contributes significantly to the unique timbre and characteristic sound of curvy vocal production.

Physiological Considerations

Curvy singing’s execution involves specific physiological actions, notably jaw tension and oral space management, impacting resonance and laryngeal function.

Jaw Tension and its Impact

Jaw tension is frequently associated with the “curvy” vocal technique, often described as a clenched jaw position during performance. This constriction significantly alters the oral cavity’s shape and size, impacting resonance and potentially hindering vocal flexibility.

A tight jaw restricts the space needed for optimal vowel formation and can contribute to a more compressed, less open sound. This can lead to a perceived “squeezed” quality, contrasting with the open throat favored in traditional operatic techniques like that of Caruso.

While some artists, like Del Monaco, successfully employed a more pressed sound, achieving a balance is crucial. Excessive jaw tension can promote laryngeal hyperfunction and potentially contribute to vocal strain over time, making mindful release techniques essential for healthy execution.

Oral Space and Resonance

Optimal oral space is paramount for achieving rich resonance in any vocal technique, but particularly crucial when contrasting “curvy” singing with traditional methods. The technique often involves a reduction in oral cavity size, impacting the available space for sound to amplify and resonate freely.

Unlike the open throat approach of singers like Caruso, which fosters a mellow, round tone, “curvy” singing can create a more focused, sometimes metallic resonance. This altered resonance is partly due to the modified vowel shapes and potential jaw constriction.

Understanding how manipulating oral space affects timbre is key. Singers must consciously explore the balance between a smaller, more intimate sound and maintaining sufficient space to avoid strain and promote vocal health.

Laryngeal Function in Curvy Singing

Laryngeal function in “curvy” singing often exhibits a tendency towards increased vocal fold compression, as noted in discussions comparing it to Complete Vocal Technique (CVT). This compression, while enabling vocal fry and specific timbral qualities, can potentially lead to laryngeal hyperfunction if not carefully managed.

The coordination differs from traditional opera, where a more open throat and relaxed larynx are prioritized, like in Caruso’s technique. While Del Monaco utilized some compression, “curvy” singing may push this further, potentially creating stiffness.

Monitoring for signs of strain and ensuring efficient airflow are vital to prevent vocal fatigue and maintain healthy laryngeal function when employing this technique.

Comparing Curvy Singing to Traditional Techniques

Curvy singing contrasts sharply with traditional opera, prioritizing vocal fry and compression versus open throats and resonance, as exemplified by Caruso and Del Monaco’s styles.

Complete Vocal Technique (CVT) and Curvy Singing

Complete Vocal Technique (CVT) acknowledges a coordination involving somewhat pressed vocal cords, potentially leading to stiffness and laryngeal hyperfunction, though skillful application, like Del Monaco’s, is possible.

However, this contrasts with the more open and free-flowing approach favored by singers like Caruso, who prioritized a relaxed throat and a mellow, round sound.

CVT’s focus on specific vocal cord closures can inadvertently encourage the qualities found in “curvy” singing, but doesn’t necessarily equate to the same aesthetic or potential drawbacks.

While CVT offers tools for control, the “curvy” style often emphasizes a specific sonic texture—a gravelly tone—that isn’t inherently a CVT goal, but can be achieved through CVT principles.

Curvy Singing vs. Traditional Opera Technique (Caruso vs. Del Monaco)

Traditional opera technique, exemplified by Enrico Caruso, prioritized an open throat, relaxed vocal production, and a mellow, resonant sound – a “soft and velvety” quality with substantial ring from chest voice.

Conversely, Francesco Del Monaco, while powerful, exhibited a less open and more “squeezed” sound, hinting at a coordination closer to what’s now identified in “curvy” singing.

This difference highlights a spectrum: Caruso’s free-flowing tone versus Del Monaco’s potentially more pressed approach.

“Curvy” singing often embraces a degree of vocal cord compression, potentially leading to a harder, more acidic tone, a departure from the traditional operatic ideal of warmth and roundness.

Potential for Vocal Strain and Hyperfunction

Curvy singing’s coordination, involving increased vocal cord compression, carries a risk of laryngeal hyperfunction – excessive muscle tension in the larynx. This can manifest as stiffness and hardness in the voice, potentially leading to strain.

While singers like Del Monaco utilized a similar coordination, achieving it without excessive tension requires significant skill and awareness.

Improper execution can result in an “acidic/metallic” quality, indicative of overworked vocal muscles.

Consistent hyperfunction can contribute to vocal fatigue, hoarseness, and, over time, potentially more serious vocal damage. Careful monitoring and proper technique are crucial to mitigate these risks.

Benefits and Drawbacks

Curvy singing offers unique artistic expression and a distinctive timbre, but presents potential vocal health risks due to increased laryngeal compression and strain.

Artistic Expression and Unique Timbre

Curvy singing unlocks a realm of artistic possibilities, allowing vocalists to explore textures and emotional nuances previously unattainable with traditional techniques. The incorporation of vocal fry introduces a gravelly, intimate quality, fostering a direct connection with listeners.

Elongated vowels contribute to a languid, expressive phrasing, while the modified “S” sound adds a subtle, yet impactful, sonic characteristic. This combination results in a highly individualized timbre, setting artists apart and enabling them to convey vulnerability and authenticity.

The technique’s flexibility allows for stylistic experimentation, seamlessly blending into various genres, from pop and R&B to alternative and electronic music. It empowers singers to push boundaries and redefine vocal aesthetics, creating a signature sound that resonates with audiences seeking innovation and emotional depth.

Potential Risks to Vocal Health

Curvy singing, while artistically liberating, presents potential risks if not approached with mindful technique and proper vocal training. The frequent use of vocal fry can lead to vocal cord irritation and strain, particularly with excessive or improper application.

The tendency towards jaw tension and reduced oral space, often associated with the style, can contribute to laryngeal hyperfunction and vocal fatigue. Overly pressed vocal cords, as noted in discussions of Complete Vocal Technique (CVT), may result in stiffness and a harsh sound quality.

Without adequate support and breath control, singers risk developing nodules or polyps. Prioritizing vocal health through consistent warm-ups, cool-downs, and guidance from a qualified vocal coach is crucial to mitigate these potential drawbacks and ensure long-term vocal sustainability.

Training and Exercises

Developing a curvy vocal style requires targeted exercises focusing on vocal fry initiation, vowel elongation, and jaw release techniques for optimal resonance and control.

Exercises for Developing Vocal Fry

Initiating vocal fry requires gentle breath support and a relaxed larynx. Begin with a sigh, allowing your vocal cords to loosen and vibrate minimally. Practice descending scales on a neutral vowel like “uh,” consciously reducing airflow to encourage the fry effect.

Focus on maintaining a consistent, controlled fry without forcing it. Avoid tension in the jaw or neck. A helpful exercise involves humming a low pitch and gradually decreasing the volume until only the fry remains. Remember, the goal isn’t a harsh rasp, but a subtle, controlled vocal texture.

Experiment with different vowel sounds to understand how they affect the fry quality. Consistent practice, combined with mindful awareness of your vocal mechanism, will help develop this technique safely and effectively.

Techniques for Elongating Vowels

Elongating vowels in the “curvy” style isn’t simply about holding a note longer; it’s about manipulating resonance and airflow. Begin by practicing sustained vowels – “ah,” “ee,” “oo” – focusing on maintaining a consistent, relaxed vocal production. Visualize the sound expanding within your oral cavity, creating space for the vowel to resonate fully.

Experiment with subtle shifts in tongue position and jaw opening to discover how these adjustments impact vowel elongation. Gentle breath support is crucial; avoid pushing or straining. Think of the vowel as floating on the breath, rather than being forced out.

Record yourself and listen critically, paying attention to the quality and consistency of the elongated vowel sounds.

Jaw Release Exercises

Jaw tension is frequently associated with “curvy” singing, often described as a “clenched jaw.” Releasing this tension is vital for healthy vocal production. Begin with gentle jaw massage, using circular motions to loosen the muscles around the jaw joint. Practice dropping your jaw open, allowing it to hang loosely, feeling the stretch in your neck and throat.

Humming exercises can also be beneficial. Focus on keeping your jaw relaxed while humming a simple melody. Visualize your jaw as heavy, allowing gravity to do the work. Avoid forcing the movement.

Yawning deliberately can help release tension, creating space in the oral cavity. Consistent practice is key to retraining jaw muscles.

Notable Artists Utilizing the Technique

Britney Spears is often cited as a pioneer of this style, showcasing prominent vocal fry. Many contemporary artists now employ similar techniques for unique vocal textures.

Britney Spears: A Pioneering Example

Britney Spears’ vocal delivery, particularly in her earlier work, is frequently referenced as a foundational example of what is now termed “curvy” singing. Her signature sound prominently features vocal fry – that gravelly, creaky tone often found at the lower end of a singer’s range.

This wasn’t necessarily a conscious stylistic choice initially, but rather a natural element of her vocal production. Spears’ use of elongated vowels and a relaxed approach to articulation further contributed to the characteristic “curvy” sound.

Her influence is undeniable; many contemporary artists emulate aspects of her vocal style, demonstrating the technique’s widespread adoption and impact on popular music. Analyzing her recordings provides valuable insight into the core components of this evolving vocal aesthetic.

Contemporary Artists and Curvy Vocal Style

Beyond Britney Spears, numerous contemporary artists now incorporate elements of the “curvy” vocal style into their performances. This trend spans various genres, including pop, R&B, and even indie music, showcasing its versatility and broad appeal.

Artists are experimenting with vocal fry, elongated vowels, and subtle modifications to sounds like the “S” to create unique timbres and expressive nuances; This technique allows for a more intimate and conversational vocal delivery, resonating with modern audiences.

The style’s prevalence suggests a shift in aesthetic preferences, valuing texture and individuality over traditional vocal perfection. It’s a testament to the evolving landscape of vocal production and artistic expression.

The Future of Curvy Singing

Curvy singing’s future involves greater acceptance within vocal pedagogy, alongside ongoing research into its physiological effects and safe implementation for vocal health.

Acceptance and Integration into Vocal Pedagogy

Historically, many traditional vocal techniques dismissed “curvy” elements like vocal fry as detrimental, associating them with poor technique or vocal damage. However, a shift is occurring as educators and vocal scientists begin to analyze the coordination involved.

The challenge lies in understanding how artists achieve these sounds safely and effectively, rather than simply labeling them as “wrong.” Integrating this style requires acknowledging its aesthetic value while prioritizing vocal health.

This means developing exercises that cultivate the desired timbre without inducing strain or hyperfunction. Pedagogues must move beyond prescriptive rules and embrace a more nuanced understanding of vocal production, recognizing that diverse stylistic choices can coexist with healthy vocal practices.

Ongoing Research and Vocal Science

Currently, vocal science is actively investigating the physiological mechanisms behind “curvy” singing, aiming to move beyond anecdotal observations. Researchers are employing tools like high-speed imaging and acoustic analysis to understand laryngeal behavior during vocal fry and vowel modification.

A key focus is differentiating between healthy and potentially damaging applications of the technique. Studies are exploring the relationship between jaw tension, oral space, and resonance in achieving the desired sound without inducing strain.

Further research is needed to establish clear guidelines for safe practice and to debunk common misconceptions surrounding vocal fry and its long-term effects. This scientific scrutiny will be crucial for legitimizing the style within the broader vocal community.

Addressing Common Misconceptions

Many believe curvy singing inherently damages the voice, but proper technique—avoiding excessive pressure and tension—can mitigate risks. It’s not inherently “bad” when executed correctly.

Is Curvy Singing “Bad” for Your Voice?


The question of whether curvy singing is detrimental to vocal health is complex and often debated. It isn’t automatically “bad,” but improper execution can lead to strain and hyperfunction. The core issue lies in the potential for increased vocal cord compression, which, if unchecked, can create stiffness and hardness in the sound.

As noted in discussions on platforms like Reddit’s r/singing, a tendency towards overly pressed vocal cords isn’t ideal for efficient or beautiful sound production. However, skilled singers, like Del Monaco, demonstrated that this coordination can be managed. The key difference, highlighted when comparing to singers like Caruso, is maintaining sufficient oral space and avoiding excessive squeezing of the larynx.

Ultimately, the impact depends on the singer’s technique, awareness of their body, and guidance from a qualified vocal coach.

The Relationship Between Curvy Singing and Vocal Damage

While not inherently damaging, the techniques within curvy singing – particularly vocal fry and excessive cord compression – present risks if not approached with careful technique. Laryngeal hyperfunction, a common concern, arises from consistently squeezing the vocal cords, potentially leading to fatigue and even nodules.

The potential for damage stems from the coordination often associated with the style, as discussed on r/singing. If the throat remains closed and lacks openness, similar to the contrast between Del Monaco and Caruso, the resulting sound can be acidic and metallic, indicating strain.

Proper training emphasizing jaw release and oral space is crucial to mitigate these risks and ensure vocal health while exploring this contemporary style.

Manuals

bestway rectangular pool manual pdf

Bestway Rectangular Pool Manual PDF: A Comprehensive Guide

Accessing the Bestway rectangular pool manual PDF is crucial for safe setup, maintenance, and troubleshooting; find resources on the official Bestway website or third-party databases.

Bestway rectangular pools offer an affordable and convenient way to enjoy summer fun right in your backyard. These pools are known for their ease of assembly, often requiring no tools, and durable construction, utilizing features like steel frames for enhanced stability. Popular models, such as the Power Steel and Steel Pro series, cater to various sizes and needs;

However, proper installation and maintenance, guided by the Bestway rectangular pool manual PDF, are essential for a safe and enjoyable experience. Understanding the components, following setup instructions carefully, and adhering to safety guidelines outlined in the manual will maximize the pool’s lifespan and prevent potential issues. The manual provides critical information regarding water chemistry, filter operation, and winterizing procedures.

Understanding the Importance of the Manual

The Bestway rectangular pool manual PDF isn’t merely a set of assembly instructions; it’s a comprehensive guide to ensuring a safe, enjoyable, and long-lasting swimming pool experience. It details crucial safety precautions, preventing accidents and potential hazards. Ignoring the manual can lead to improper setup, structural instability, or incorrect water chemistry, impacting both safety and the pool’s longevity.

Furthermore, the manual provides essential troubleshooting advice for common issues like leaks, pump malfunctions, and frame problems. Bestway explicitly states responsibility isn’t accepted for damage resulting from mishandling or ignoring instructions. Accessing and understanding this document is paramount for responsible pool ownership and maximizing your investment.

Pool Setup and Assembly

Proper assembly, guided by the Bestway manual PDF, ensures structural integrity and safe operation; tool-free setup is often possible for frame pools.

Unboxing and Parts Inventory

Begin by carefully unboxing your Bestway rectangular pool, referencing the parts list within the manual PDF to verify all components are present. Lay out each item – frame sections, liner, filter pump, ladder, and any included accessories – in an organized manner. The manual’s diagrams are invaluable during this stage, illustrating what each part looks like and its corresponding label.

Mishandling or missing parts can delay setup and compromise safety, so a thorough inventory is essential. Compare the physical parts against the manual’s checklist. Note any discrepancies immediately and contact Bestway support if something is missing or damaged. Retain the packaging until assembly is complete, as it may be needed for returns or warranty claims.


Site Preparation for Installation

Prior to assembly, meticulous site preparation is paramount, as detailed in the Bestway rectangular pool manual PDF. Select a completely level surface, free from rocks, roots, and any sharp objects that could puncture the liner. A firm, stable base is crucial to prevent frame instability and potential collapse.

Consider drainage; the chosen location should allow water to safely disperse during draining or overflow. Avoid placing the pool directly on grass, as this can lead to algae growth and uneven support. A protective ground cloth or sand bedding is highly recommended. Ensure sufficient space around the pool for access and maintenance, as outlined in the manual’s guidelines.

Step-by-Step Assembly Instructions (Tool-Free)

The Bestway rectangular pool manual PDF emphasizes tool-free assembly for many models, simplifying the setup process. Begin by laying out all components and verifying against the parts list. Connect the frame sections, ensuring secure locking of each joint – typically a push-and-click mechanism.

Next, carefully unfold and position the pool liner within the assembled frame. Gradually fill the pool with water, allowing the liner to settle and the frame to stabilize. Regularly check for proper alignment and adjust as needed, following the visual diagrams in the manual. Avoid over-tightening connections, as this can cause damage.

Frame Pool Assembly Details

The Bestway rectangular pool manual PDF provides detailed illustrations of the frame assembly process. It highlights the importance of correctly connecting the metal frame pieces, often utilizing a snap-button or clip system. Ensure all frame components are securely fastened to provide a stable and robust structure.

Pay close attention to the orientation of each frame part, as incorrect placement can compromise the pool’s integrity. The manual stresses the need to level the ground before assembly to prevent uneven stress on the frame. Regularly inspect connections during and after assembly for any signs of loosening or damage, ensuring long-lasting durability.

Safety Guidelines and Warnings

The Bestway manual PDF emphasizes crucial safety precautions, including adult supervision, ladder safety, and electrical considerations, to prevent accidents and ensure user well-being.

General Safety Precautions

The Bestway rectangular pool manual PDF consistently stresses the importance of diligent supervision, particularly around children, and the necessity of learning to swim before pool use. It cautions against diving or jumping into shallow water, highlighting potential for serious injury.

Furthermore, the manual details the need to maintain proper water chemistry to avoid irritation and illness. It warns against modifying the pool structure and emphasizes regular inspection for damage.

Users are advised to familiarize themselves with all safety warnings and guidelines before assembly and operation. The document also stresses responsible pool ownership, including securing the pool area when not in use to prevent unauthorized access and potential hazards. Ignoring these precautions can lead to accidents.

Ladder Safety and Assembly

The Bestway rectangular pool manual PDF provides detailed instructions for proper ladder assembly, emphasizing the critical need for secure connections and stable placement. It repeatedly warns against using the ladder if any components are damaged or missing, stressing potential fall risks;

Specifically, the manual highlights the importance of regularly checking ladder stability and ensuring all steps are firmly attached. It advises against exceeding the ladder’s weight capacity and cautions users to climb slowly and carefully.

Moreover, the document stresses the necessity of removing the ladder or its steps when the pool is not in use, preventing unsupervised access. Proper installation and consistent inspection, as outlined in the PDF, are vital for preventing accidents.

Electrical Safety Considerations

The Bestway rectangular pool manual PDF strongly emphasizes electrical safety, warning against the use of any electrical appliances within close proximity to the pool water. It explicitly states that all electrical installations must comply with local and national regulations, and should be performed by a qualified electrician.

Crucially, the manual advises against extending power cords into the pool area and recommends using Ground Fault Circuit Interrupters (GFCIs) for any electrical equipment used nearby. It cautions against operating any electrical device with wet hands.

Furthermore, the PDF details the importance of proper grounding and bonding to minimize the risk of electric shock. Ignoring these electrical safety guidelines, as detailed in the manual, can lead to severe injury or even fatality.

Pool Maintenance and Care

Regular water chemistry checks, diligent cleaning, and proper filter system upkeep—detailed in the Bestway manual PDF—ensure a safe and enjoyable swimming experience.

Water Chemistry and Balancing

Maintaining proper water chemistry is paramount for a safe and enjoyable swimming experience with your Bestway rectangular pool. The Bestway manual PDF provides detailed guidance on testing and balancing pH, alkalinity, and sanitizer levels. Regularly test the water using a reliable test kit or strips, following the instructions within the manual. Ideal pH levels typically range between 7.2 and 7.8, while alkalinity should be between 80 and 120 ppm.

Sanitizer, such as chlorine, is essential for eliminating bacteria and algae. The manual outlines appropriate chlorine levels and usage instructions. Consistent monitoring and adjustment, as described in the PDF, prevent algae growth, cloudy water, and potential health hazards. Always adhere to the recommended chemical dosages to avoid irritation or damage to the pool liner and components.

Cleaning Procedures

Regular cleaning, detailed in the Bestway rectangular pool manual PDF, is vital for maintaining a pristine swimming environment. Skim the water surface daily to remove leaves, insects, and debris. Vacuum the pool floor at least once a week, or more frequently if needed, to eliminate settled dirt and sediment. The manual illustrates proper vacuuming techniques and filter system compatibility.

Periodically brush the pool walls and floor to prevent algae buildup. The Bestway guide emphasizes the importance of cleaning the filter system regularly, backwashing as needed, and replacing filter cartridges according to the recommended schedule. Proper cleaning extends the lifespan of your pool and ensures consistently clear, hygienic water.

Filter System Operation and Maintenance

The Bestway rectangular pool manual PDF provides comprehensive instructions for operating and maintaining your filter system. Proper operation involves understanding the filter’s components, priming the pump, and monitoring the pressure gauge. Regular backwashing, as detailed in the manual, removes trapped debris and maintains optimal flow rate.

Maintenance includes cleaning or replacing the filter cartridge according to the schedule outlined in the PDF. The manual stresses the importance of disconnecting the pump before performing any maintenance. Ignoring these steps can lead to reduced filtration efficiency and potential damage to the system. Always refer to the manual for specific model instructions.

Troubleshooting Common Issues

The Bestway rectangular pool manual PDF offers solutions for leaks, pump/filter problems, and frame instability, ensuring quick resolution and continued enjoyment.

Leak Detection and Repair

The Bestway rectangular pool manual PDF provides detailed guidance on identifying and addressing leaks, a common concern for pool owners. Begin by visually inspecting all seams, connections, and the pool liner for any obvious punctures or tears. A common method involves using a dye test – adding a special dye to the water to pinpoint the leak’s location.

The manual emphasizes the importance of immediately repairing any detected leaks to prevent water loss and potential damage. Small punctures can often be patched with a vinyl repair kit, readily available at most pool supply stores. Larger tears may require professional assistance. Always follow the manual’s specific instructions for applying patches and ensuring a watertight seal. Ignoring leaks can lead to structural issues and increased maintenance costs, so prompt action is vital.

Pump and Filter Problems

The Bestway rectangular pool manual PDF offers troubleshooting steps for common pump and filter issues. A frequently encountered problem is reduced water flow, often caused by a clogged filter cartridge. The manual details how to remove, clean, and reinstall the filter cartridge correctly, emphasizing regular cleaning intervals.

If the pump fails to start, the manual advises checking the power supply, circuit breaker, and pump impeller for obstructions. It also highlights the importance of priming the pump after initial setup or maintenance. Ignoring these issues can lead to overheating and pump failure. Always disconnect the power before performing any maintenance. Refer to the manual’s diagrams for proper component locations and procedures.

Frame Stability Issues

The Bestway rectangular pool manual PDF stresses the importance of a level installation site to prevent frame instability. Uneven ground can cause stress on the frame, leading to bending or collapse. The manual provides detailed instructions on proper site preparation, including removing rocks and debris, and using a leveling base.

If the frame appears unstable after setup, the manual advises checking all frame connectors to ensure they are securely locked. It also recommends inspecting the support legs for proper placement and adjustment. Regularly inspect the frame for any signs of bending or corrosion, and address issues promptly to prevent further damage. Following the manual’s guidelines ensures a safe and durable pool structure.

Finding the Bestway Rectangular Pool Manual PDF

Locate your Bestway rectangular pool manual PDF easily through the official Bestway website, reliable third-party databases, or a specific model number search.

Official Bestway Website Resources

Bestway’s official website, bestwaycorp.com, serves as the primary hub for accessing comprehensive pool manuals in PDF format. Navigate to the “Support” section, where a vast library of user manuals is categorized for easy browsing. You can search directly using your pool’s model number – crucial for pinpoint accuracy – ensuring you download the correct documentation.

The website offers manuals for various pool types, including rectangular frame pools, Steel Pro series, and Hydrium collections. Downloading directly from Bestway guarantees you receive the most up-to-date version, complete with safety guidelines, assembly instructions, maintenance schedules, and troubleshooting tips. Regularly check for updates, as manuals are occasionally revised to reflect product improvements or safety enhancements. This resource provides peace of mind, knowing you have official guidance at your fingertips.

Third-Party Manual Databases

While Bestway’s website is the preferred source, several third-party manual databases can assist in locating your rectangular pool’s PDF manual. Websites dedicated to collecting user manuals often archive documents for various products, including Bestway pools. However, exercise caution when using these resources, verifying the manual’s authenticity and ensuring it corresponds precisely to your pool’s model number and year of manufacture.

These databases can be helpful if you’ve misplaced the original manual or are seeking older versions. Always prioritize information from the official Bestway site, but these alternatives can provide a backup option. Remember to scan downloaded files for viruses before opening them, and cross-reference instructions with Bestway’s safety guidelines.

Specific Model Number Search

Locating the correct Bestway rectangular pool manual PDF hinges on knowing your pool’s specific model number. This number, typically found on the pool’s packaging, the product label, or in your original purchase documentation, is crucial for a precise search. Utilize Bestway’s website search function, entering the complete model number for targeted results.

Avoid generic searches like “Bestway rectangular pool manual,” as these yield numerous irrelevant results. A precise model number ensures you download the manual tailored to your pool’s features and assembly instructions. If you’re unsure of the model number, contact Bestway customer support for assistance in identifying it.

Winterizing Your Bestway Pool

Proper winterization, guided by your Bestway manual PDF, involves draining, cleaning, protecting the frame, and covering the pool to prevent damage.

Draining and Cleaning

Before storing your Bestway rectangular pool for the winter, thoroughly draining and cleaning it is paramount, as detailed in the official manual PDF. Begin by disconnecting all plumbing and accessories. Utilize a pump or siphon to remove the majority of the water, ensuring compliance with local regulations regarding water disposal.

Once drained, meticulously clean the pool liner with a mild detergent and soft brush, removing any algae, dirt, or debris. Pay close attention to corners and crevices. Rinse thoroughly to eliminate all traces of cleaning solution. Inspect the liner for any damage and address it promptly. Finally, allow the pool to air dry completely before proceeding to the next winterization steps, referencing the manual for specific drying recommendations.

Protecting the Pool Frame

To safeguard your Bestway rectangular pool’s frame during the off-season, consult the manual PDF for specific guidance. Disassemble the frame components carefully, following the illustrated instructions. Clean each metal part with a rust inhibitor to prevent corrosion over the winter months.

Store the frame pieces in a dry, sheltered location, away from direct sunlight and extreme temperatures. Consider covering them with a tarp or storing them indoors to further protect against the elements. Properly storing the frame ensures its longevity and simplifies reassembly in the spring, as detailed within the comprehensive Bestway documentation.

Covering the Pool for Winter

The Bestway rectangular pool manual PDF emphasizes the importance of a secure winter cover. After draining and cleaning, a properly fitted cover prevents debris accumulation and safeguards against freezing damage. Ensure the cover extends beyond the pool’s edges and is securely fastened using ropes or dedicated cover clips, as illustrated in the manual.

Consider a cover with a drainage system to prevent water pooling, which can add excessive weight and potentially damage the structure. Regularly check the cover throughout winter, removing any accumulated snow or debris. Following these steps, detailed in the Bestway guide, will ensure a smooth spring reopening.

Bestway Support and Contact Information

For assistance with your Bestway pool, consult the manual PDF for customer service channels, warranty details, and frequently asked questions readily available online.

Customer Service Channels

Bestway offers multiple avenues for customer support regarding your rectangular pool and its manual. The primary resource is their official website, bestwaycorp.com, within the support section, where you can often find downloadable manuals and FAQs. Direct contact can be made through their customer service channels, which may include email support and, in some regions, telephone assistance. Bestway-service.com is also a valuable resource for specific model inquiries.

When contacting support, having your pool’s model number readily available – often found on the original packaging or within the manual PDF itself – will expedite the process. Be prepared to describe your issue clearly and concisely. Online forums and communities dedicated to above-ground pools can also provide peer-to-peer assistance and troubleshooting tips, supplementing the official Bestway support options.

Warranty Information

Bestway provides a limited warranty on its rectangular pools, covering manufacturing defects in materials and workmanship. The specific terms and duration of the warranty vary depending on the pool model and region of purchase; therefore, consulting your pool’s manual PDF is essential. Typically, the warranty does not cover damage resulting from misuse, improper installation, accidents, or failure to follow the instructions outlined in the manual.

To make a warranty claim, retain your proof of purchase (receipt) and contact Bestway customer service. They will guide you through the claims process, which may involve submitting photos or returning defective parts. Carefully review the warranty details within the manual PDF to understand your rights and responsibilities.

Frequently Asked Questions (FAQ)

Q: Where can I find a digital copy of my Bestway rectangular pool manual? A: Visit the official Bestway website (bestwaycorp.com) and navigate to the support section. You can also find manuals on third-party databases by searching for your specific model number.

Q: What if my manual is missing parts information? A: Double-check the parts list in the manual PDF against the contents of your pool package. Contact Bestway customer service if discrepancies exist.

Q: Is the assembly truly tool-free? A: Yes, rectangular frame pool assembly is designed to be tool-free, but a rubber mallet can be helpful. Refer to the manual PDF for detailed instructions.

Instructions

haier dehumidifier instruction manual

Haier Dehumidifier Instruction Manual: A Comprehensive Guide

Welcome! This manual provides essential guidance for your Haier dehumidifier‚ covering setup‚ operation‚ maintenance‚ and troubleshooting for optimal performance and longevity.

Explore detailed instructions‚ safety precautions‚ and feature explanations to effectively manage humidity and enjoy a comfortable indoor environment.

Congratulations on selecting a Haier dehumidifier! This appliance is designed to efficiently reduce excess moisture‚ creating a healthier and more comfortable living space.

This manual serves as a comprehensive resource‚ guiding you through the features and functions of your specific model – from initial setup to ongoing maintenance.

Understanding its capabilities will ensure optimal performance and extend the lifespan of your dehumidifier.

Safety Precautions

Important: Prioritize safety during dehumidifier use. Always follow electrical safety guidelines to minimize fire or shock risks.

Never use extension cords. Disconnect the unit before cleaning or maintenance.

Avoid operating with a damaged cord or plug. Keep the unit away from flammable materials and ensure proper ventilation.

Serious injury or death could occur if precautions are ignored.

Important Warnings and Risks

Caution: This dehumidifier presents potential risks if safety guidelines aren’t followed. A risk of fire exists with improper use‚ potentially causing serious injury or even death.

Never operate the unit near flammable substances.

Ensure adequate ventilation and avoid obstructing the air inlet or outlet.

Always unplug before servicing.

Electrical Safety Guidelines

Important: To minimize electrical shock risk‚ do not use extension cords with this dehumidifier. Always plug directly into a grounded outlet.

Never operate with a damaged cord or plug.

Ensure the voltage matches the unit’s specifications.

Disconnect the power before cleaning or maintenance.

Dehumidifier Components & Features

Explore your Haier dehumidifier! Key components include the water tank‚ air inlet‚ air outlet‚ control panel‚ and filter.

Features like Smart Dry automatically optimize settings.

The portable design allows for flexible placement.

Understanding these parts ensures efficient operation and effective moisture removal.

Overview of Key Parts

Essential components include: the water tank for collected moisture‚ the air inlet drawing in humid air‚ and the air outlet expelling dry air.

The control panel manages settings‚ while the air filter removes dust.

These parts work together to efficiently reduce humidity levels within your space.

Control Panel Explanation

The control panel features: power button‚ mode selection (Auto‚ Continuous‚ Manual)‚ fan speed adjustment‚ and humidity level settings.

A digital display shows current humidity and set points.

Timer settings allow scheduled operation‚ while indicator lights signal tank full or operational status for convenient control.

Getting Started: Setup and Operation

Initial setup is simple: place the dehumidifier on a level surface‚ ensuring adequate ventilation around the unit.

Connect to a grounded electrical outlet – avoid extension cords.

Power on‚ select your desired mode‚ and adjust humidity levels. Allow several hours for optimal moisture removal.

Initial Setup Instructions

Before first use‚ carefully unpack your Haier dehumidifier and inspect for any shipping damage. Position the unit on a stable‚ level floor‚ allowing at least 6 inches of clearance on all sides for optimal airflow.

Ensure the water tank is correctly inserted.

Powering On and Basic Operation

To begin‚ plug the dehumidifier into a grounded outlet. Press the power button to initiate operation. Select your desired mode – Auto‚ Continuous‚ or Manual – using the control panel.

The unit will automatically begin removing moisture from the air‚ displaying the current humidity level.

Understanding Control Panel Functions

The control panel is your interface for managing dehumidification. It features mode selection for Auto‚ Continuous‚ and Manual operation. Adjust fan speed to balance noise and efficiency. Set your preferred humidity level for customized comfort‚ and utilize the Smart Dry function for intelligent moisture control.

Mode Selection (Auto‚ Continuous‚ Manual)

Auto mode maintains a set humidity level‚ cycling on and off as needed. Continuous mode operates constantly‚ maximizing moisture removal. Manual mode offers direct control‚ allowing you to run the dehumidifier without humidity feedback‚ ideal for specific drying tasks or situations.

Fan Speed Adjustment

Adjusting fan speed impacts both dehumidification rate and noise level. Higher speeds maximize moisture removal but generate more sound. Lower speeds offer quieter operation‚ suitable for bedrooms or nighttime use. Experiment to find the optimal balance between performance and comfort based on your needs.

Humidity Level Setting

Precisely control your desired room humidity! Use the control panel to select a target percentage‚ typically between 30% and 80%. Lower settings aggressively remove moisture‚ ideal for very damp spaces. Higher settings maintain a more comfortable‚ less drying environment. Monitor and adjust as needed.

Maintenance and Cleaning

Regular upkeep ensures peak performance and extends your dehumidifier’s life. Prioritize filter cleaning – a clogged filter reduces efficiency. Empty the water tank frequently to prevent overflows and maintain hygiene. Wipe down the exterior with a damp cloth. Consistent cleaning guarantees optimal operation!

Filter Cleaning Procedures

Locate the filter‚ usually behind a front grille. Gently remove it and vacuum away loose dust. For deeper cleaning‚ wash with mild soap and water‚ then rinse thoroughly. Ensure it’s completely dry before reinstalling. Clean the filter every two weeks for optimal airflow and dehumidifying efficiency.

Water Tank Emptying and Cleaning

Remove the full water tank carefully. Empty the collected water and rinse the tank with clean water. To prevent mold‚ periodically disinfect with a mild bleach solution‚ ensuring thorough rinsing afterward. Dry completely before reinserting. Regular cleaning maintains hygiene and optimal dehumidifier performance.

Exterior Cleaning Instructions

Disconnect the dehumidifier from power before cleaning. Wipe the exterior with a soft‚ damp cloth to remove dust and dirt. Avoid harsh chemicals or abrasive cleaners‚ as they can damage the finish; Ensure the unit is dry before resuming operation. Regular exterior cleaning keeps your dehumidifier looking its best.

Troubleshooting Common Issues

If the dehumidifier won’t turn on‚ check the power cord and outlet. For poor dehumidification‚ ensure proper airflow and tank isn’t full. Error codes indicate specific problems; consult the manual for definitions. Restarting the unit often resolves minor glitches. Contact support for persistent issues.

Dehumidifier Not Turning On

First‚ verify the power cord is securely plugged into a working outlet. Next‚ check the circuit breaker or fuse box for tripped breakers or blown fuses. Ensure the dehumidifier’s power button is firmly pressed. If issues persist‚ try a different outlet to rule out electrical problems.

Poor Dehumidification Performance

Check if the air filter is clean; a clogged filter restricts airflow. Ensure windows and doors are sealed to prevent humid air from entering. Verify the unit isn’t placed too close to walls or furniture‚ hindering circulation. Select a lower humidity setting or use continuous mode for maximum moisture removal.

Error Codes and Their Meanings


Consult the manual for specific error codes displayed on your Haier dehumidifier. Common codes may indicate a full water tank‚ a sensor malfunction‚ or a compressor issue. If an error persists after troubleshooting‚ disconnect the unit and contact Haier customer support for assistance and potential repair options.

Advanced Features & Settings

Explore the Smart Dry functionality‚ which automatically adjusts settings for optimal humidity control. Utilize the timer function to schedule operation‚ saving energy and ensuring comfort. Customize your experience with advanced settings‚ tailoring the dehumidifier to your specific needs and preferences for efficient performance.

Smart Dry Functionality

Leverage the intelligent Smart Dry feature‚ which automatically monitors room humidity and adjusts fan speed and operation mode. Enjoy consistently comfortable conditions without manual adjustments‚ as the dehumidifier optimizes performance based on ambient conditions. Benefit from energy efficiency and a hassle-free experience.

Timer Settings and Usage

Utilize the built-in timer to schedule dehumidifier operation‚ enhancing convenience and energy savings. Set a delayed start to activate the unit at a specific time‚ or program an auto-shutoff for worry-free operation. Customize your dehumidifying schedule to align with your lifestyle and preferences for optimal comfort.

Technical Specifications

Haier dehumidifiers boast diverse model numbers and capacities‚ ranging from 20 to 70-pint collection rates. Power consumption varies based on the model‚ typically between 200-500 watts. Review your specific model’s label for precise details regarding voltage‚ amperage‚ and refrigerant type for informed usage and maintenance.

Model Numbers and Capacities

Haier offers a wide array of dehumidifier models‚ including QDHR20LZ (20-pint) and DE65EJ-L (65-pint) options. Capacities range significantly‚ catering to various space sizes and humidity levels. Refer to your unit’s label or packaging to confirm its specific pint capacity for optimal performance expectations.

Power Consumption Details

Haier dehumidifiers are ENERGY STAR certified for efficient operation. Power consumption varies by model and settings; a 20-pint unit typically uses around 280 watts. Always avoid extension cords due to fire risk. Check the unit’s label for precise wattage and amperage information to manage energy usage effectively.

Warranty Information

Haier dehumidifiers come with a standard one-year limited warranty covering manufacturing defects. Coverage includes parts and labor for repairs or replacement. To file a claim‚ retain your proof of purchase and contact Haier Customer Service. Warranty is voided by misuse or unauthorized modifications. See full details in the warranty document.

Coverage Details

Haier’s limited warranty safeguards against defects in materials and workmanship for one year from purchase. It covers parts and labor for necessary repairs or component replacement. This warranty doesn’t extend to damage from misuse‚ accidents‚ or unauthorized repairs. Registration may be required to validate your claim; check your documentation.

Claim Procedures

To initiate a warranty claim‚ contact Haier Customer Service with your model and serial number‚ proof of purchase‚ and a detailed description of the issue. They will provide instructions for repair or replacement. Retain all documentation related to your claim‚ including shipping receipts; Haier reserves the right to inspect the unit.

Storage and Winterization

Before long-term storage‚ thoroughly clean and dry your Haier dehumidifier‚ including the water tank. Ensure it’s stored in a cool‚ dry place‚ protected from freezing temperatures and direct sunlight. Cover the unit to prevent dust accumulation. Disconnect the power cord and consider coiling it securely.

Preparing for Long-Term Storage

Prior to storing your Haier dehumidifier for an extended period‚ completely empty and clean the water tank to prevent mold growth. Thoroughly dry both the interior and exterior surfaces. Remove any filters and clean them separately‚ allowing them to fully dry before storage. Secure the power cord.

Proper Storage Conditions

Store the dehumidifier in a cool‚ dry‚ and well-ventilated area‚ protected from direct sunlight and extreme temperatures. Avoid locations prone to dust or moisture. Ensure the unit remains upright to prevent any potential damage to the compressor. Cover it loosely with a plastic sheet to shield from dust accumulation.

Frequently Asked Questions (FAQ)

Q: Why isn’t my dehumidifier removing moisture? A: Check the filter and tank. Q: What do error codes mean? A: Refer to the troubleshooting section for code definitions. Q: How often should I clean the filter? A: Every two weeks for optimal performance.

Common User Queries

Q: My unit won’t power on – what should I do? A: Ensure the power cord is secure and the outlet functions. Q: How do I reset the dehumidifier? A: Unplug it for ten minutes. Q: Can I use an extension cord? A: No‚ it poses a fire risk.

Addressing Specific Concerns

Q: My dehumidifier isn’t removing enough moisture. A: Check the filter and ensure proper airflow. Q: What do error codes mean? A: Consult the troubleshooting section for code definitions. Q: Can I leave it running continuously? A: Yes‚ using the continuous mode is acceptable.

Contact Information & Support

Haier Customer Service: For assistance‚ visit the Haier Appliances website or call their support line. Online Resources: Explore the Haier support pages for FAQs‚ manuals‚ and troubleshooting guides. Manual Library: Access downloadable manuals at the Internet Archive for various models.

Haier Customer Service Details

Reach out to Haier through their official website for direct support. Explore comprehensive online resources‚ including FAQs and troubleshooting guides. Find manuals and assistance via the Internet Archive’s extensive collection of Haier dehumidifier documentation. Contact details are readily available on their support pages.

Online Resources and Support

Access a wealth of information through Haier’s official website‚ featuring downloadable manuals and troubleshooting assistance. Explore the Internet Archive for user manuals like the DE45EJ-L model. Utilize ManualsLib and similar platforms for additional guides. Discover support forums and FAQs for quick answers to common queries.

Parts List & Diagrams

Identify replacement components easily with detailed parts lists specific to your Haier dehumidifier model. Refer to exploded view diagrams for a clear understanding of assembly and disassembly. Locate essential parts for maintenance and repairs‚ ensuring optimal functionality. Find resources online‚ aiding in self-service or professional assistance.

Identifying Replacement Parts

Locate specific part numbers using your Haier dehumidifier’s model number‚ found on the unit’s label. Consult the comprehensive parts list within this manual or on the Haier website. Ensure compatibility before ordering‚ verifying dimensions and specifications. Source parts from authorized Haier retailers for genuine replacements.

Exploded View Diagrams

Refer to detailed exploded view diagrams illustrating the Haier dehumidifier’s assembly. These diagrams showcase each component’s precise location and relationship to others. Utilize these visuals during repairs or part replacements‚ ensuring correct reassembly. Find diagrams within this manual or accessible online via Haier’s support resources.

Energy Saving Tips

Maximize efficiency by utilizing the Smart Dry function‚ automatically adjusting operation based on humidity levels. Regularly clean the air filter to maintain optimal airflow and reduce energy consumption. Consider using the timer function to operate the dehumidifier only when needed‚ avoiding unnecessary runtime.

Optimizing Dehumidifier Usage

Strategically position your Haier dehumidifier in a central location‚ ensuring adequate airflow around the unit. Minimize door and window openings in the dehumidified space to reduce moisture influx. Utilize the Auto mode for consistent humidity control‚ allowing the unit to cycle on and off as needed for peak efficiency.

Reducing Energy Consumption

Leverage the built-in timer to operate the dehumidifier only when necessary‚ avoiding unnecessary runtime. Regularly clean the air filter to maintain optimal airflow and prevent the unit from working harder. Consider using the manual humidity setting‚ adjusting it to the highest comfortable level to minimize energy use.

PreviousNext

You Want To Have Your Favorite Car?

We have a big list of modern & classic cars in both used and new categories.